您现在的位置是:首页 >学无止境 >Spring ‘23 New SF Features Overview网站首页学无止境
Spring ‘23 New SF Features Overview
Dev Part
1. Create Notifications with New Alert, Confirm, and Prompt Modules

Sample Code for LWC:
<!-- c/myApp.html -->
<template>
    <lightning-button onclick={handleAlertClick} label="Open Alert Modal"></lightning-button>
    <lightning-button onclick={handleConfirmClick} label="Open Confirm Modal"></lightning-button>
    <lightning-button onclick={handlePromptClick} label="Open Prompt Modal"></lightning-button>
</template>
// c/myApp.js
import { LightningElement } from 'lwc';
import LightningAlert from 'lightning/alert';
import LightningConfirm from 'lightning/confirm';
import LightningPrompt from 'lightning/prompt';

export default class MyApp extends LightningElement {
    async handleAlertClick() {
        await LightningAlert.open({
            message: 'this is the alert message',
            theme: 'error', // a red theme intended for error states
            label: 'Error!', // this is the header text
        });
        //Alert has been closed
    }

	async handleConfirmClick() {
        const result = await LightningConfirm.open({
            message: 'this is the prompt message',
            variant: 'headerless',
            label: 'this is the aria-label value',
            // setting theme would have no effect
        });
        //Confirm has been closed
        //result is true if OK was clicked
        //and false if cancel was clicked
    }

	handlePromptClick() {
        LightningPrompt.open({
            message: 'this is the prompt message',
            //theme defaults to "default"
            label: 'Please Respond', // this is the header text
            defaultValue: 'initial input value', //this is optional
        }).then((result) => {
            //Prompt has been closed
            //result is input text if OK clicked
            //and null if cancel was clicked
        });
    }
}
Sample Code for Aura: Reference
<!-- c:myApp.cmp -->
<aura:component>
    <aura:import library="lightning:alert" property="LightningAlert" />
    <aura:import library="lightning:confirm" property="LightningConfirm" />
    <aura:import library="lightning:prompt" property="LightningPrompt" />
    <lightning:button onclick="{! c.openAlert }" label="Open Alert"/>
    <lightning:button onclick="{! c.openConfirm }" label="Open Confim"/>
    <lightning:button onclick="{! c.openPrompt }" label="Open Alert"/>
</aura:component>
/* c:myAppController.js */
({
    openAlert: function(cmp, event) {
        this.LightningAlert.open({
            message: 'this is the alert message',
            theme: 'error',
            label: 'Error!',
        }).then(function() {
            console.log('alert is closed');
        });
    },
    openConfirm: function(cmp, event) {
        this.LightningConfirm.open({
            message: 'this is the confirm message',
            theme: 'warning',
            label: 'Please Confirm',
        }).then(function(result) {
            // result is true if clicked "OK"
            // result is false if clicked "Cancel"
            console.log('confirm result is', result);
        });
    },
    openPrompt: function(cmp, event) {
        this.LightningPrompt.open({
            message: 'this is the prompt message',
            variant: 'headerless',
            label: 'Please Respond',
            defaultValue: 'default input value',
        }).then(function(result) {
            // result is input value if clicked "OK"
            // result is null if clicked "Cancel"
            console.log('prompt result is', result);
        });
    }
});
2. Create Overlays with the New Modal Component

Sample Code:
<!-- c/myModal.html -->
<template>
    <lightning-modal-header label="My Modal Heading"></lightning-modal-header>
    <lightning-modal-body>This is the modal’s contents.</lightning-modal-body>
    <lightning-modal-footer>
        <lightning-button label="OK" onclick={handleOkay}></lightning-button>
    </lightning-modal-footer>
</template>
/* c/myModal.js */
import { api } from 'lwc';
import LightningModal from 'lightning/modal';
export default class MyModal extends LightningModal {
    handleOkay() {
        this.close('okay');
    }
}
3. Write Clear and Intentional Apex Assertions
Before: Apex provides three assert methods. System.assert(), System.assertEquals(), and System.assertNotEquals(). While adequate for many use cases, these methods can result in ambiguous or verbose error messages.
After: The new System.Assert class provides methods that handle all types of logical assertions and comparisons. Available methods: Assert.areEqual(), Assert.isNull, Assert.fail(), Assert.isInstanceOfType(), etc.
Example:
String sub = 'abcde'.substring(2);
Assert.areEqual('cde', sub);

String myString = null;
Assert.isNull(myString, 'String should be null');

try {
    methodUnderTest();
    Assert.fail('Exception failure is always an option');
} catch (Exception ex) {
    Assert.isInstanceOfType(ex, DmlException.class);
    // Additional assertions
}
Admin Part
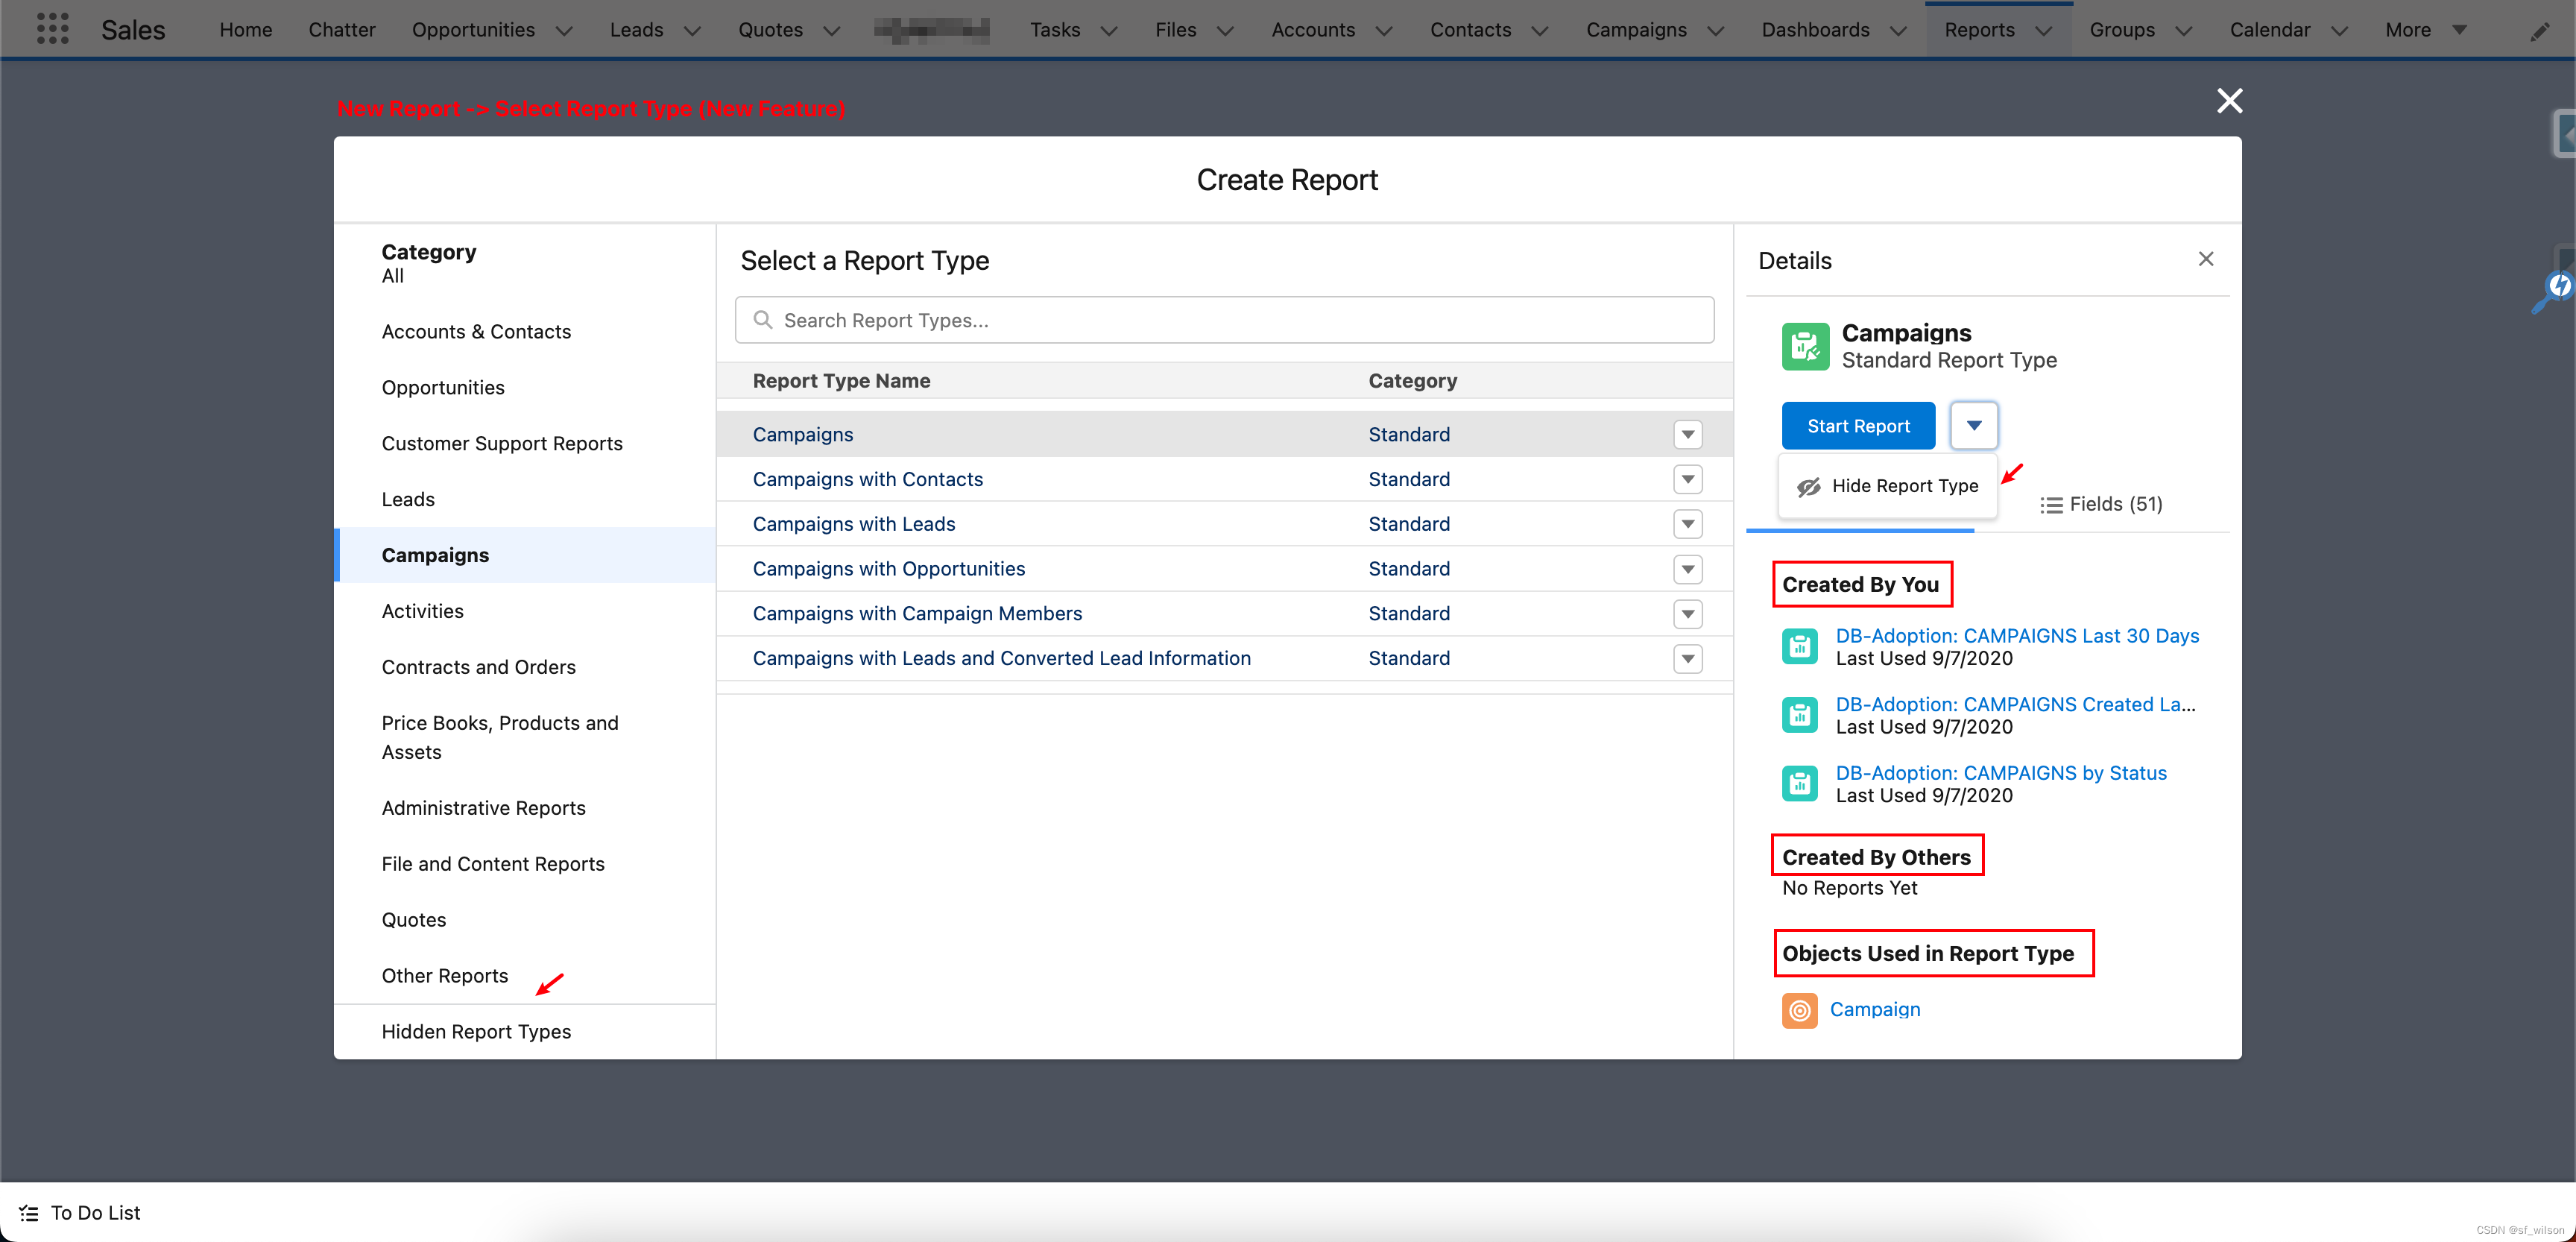
1. Report Type - Find the Best Report Type for New Records
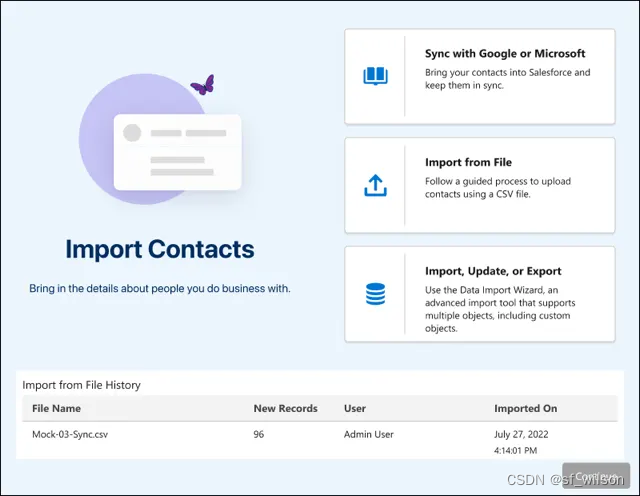
2. Import Contacts and Leads with a Guided Experience

a. Enable it

b. Use it in Data Import Wizard
3. Clean Up Inactive Picklist Values
Core Value: bulk delete unused values
Scope: available only for custom picklists with predefined values

(Standard Case Status picklist have no following mentioned button)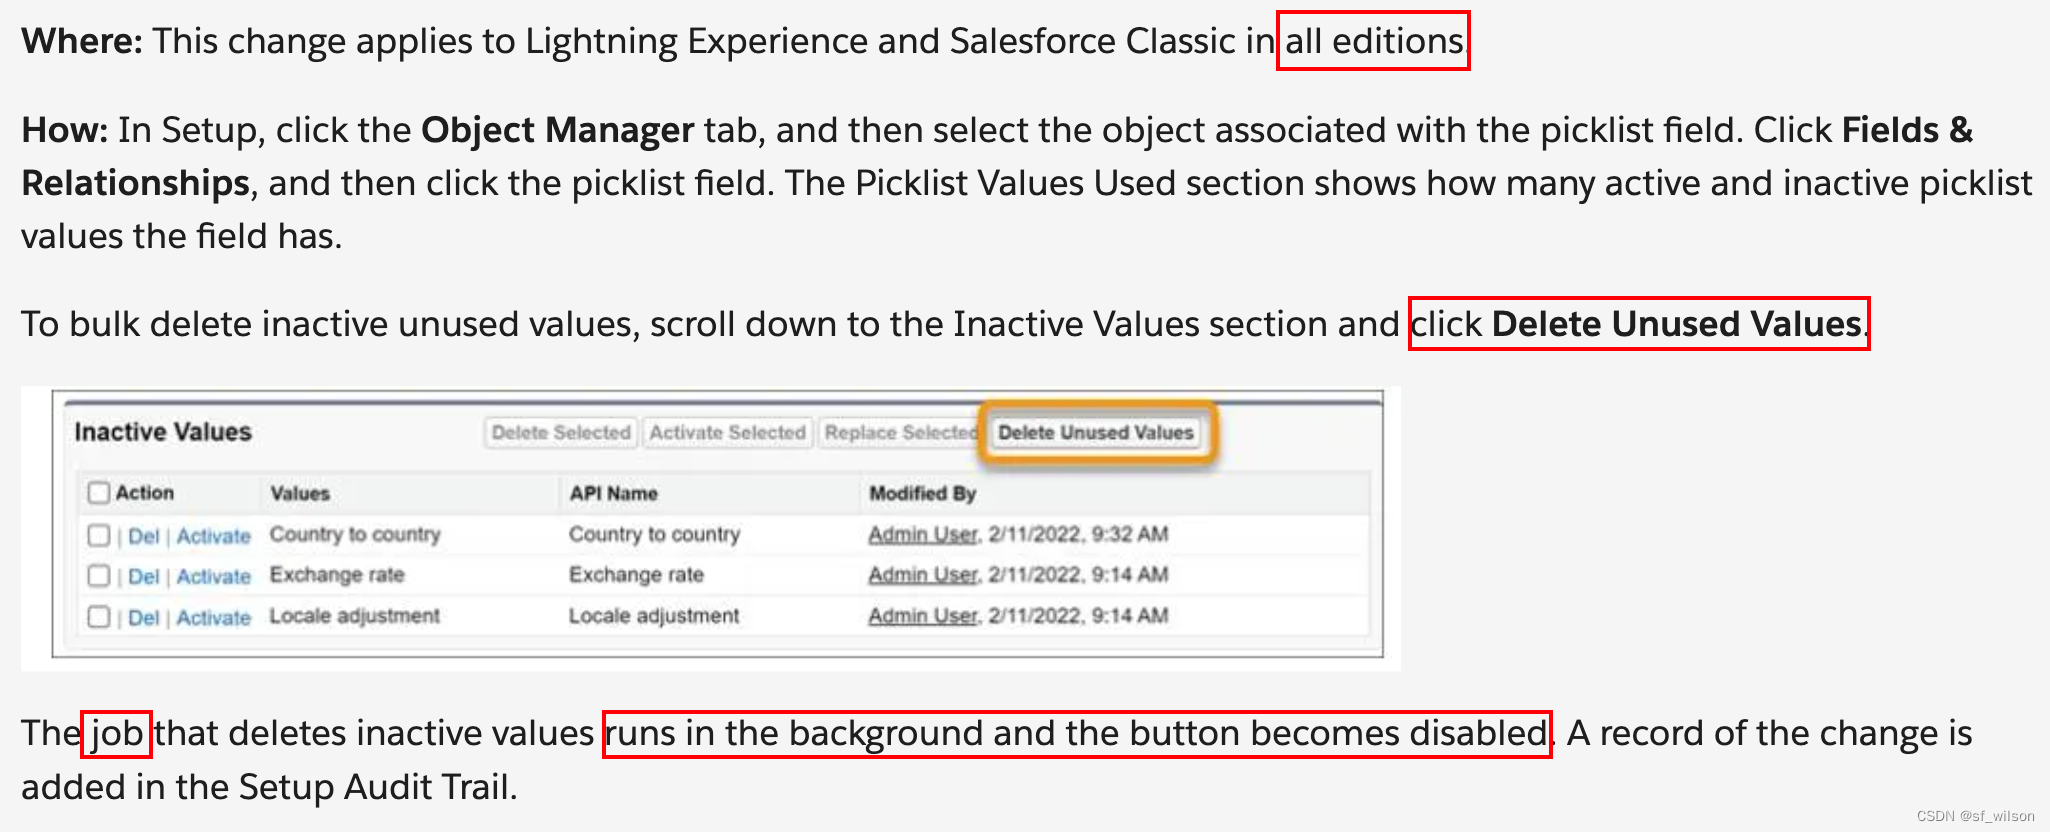
New Experience:

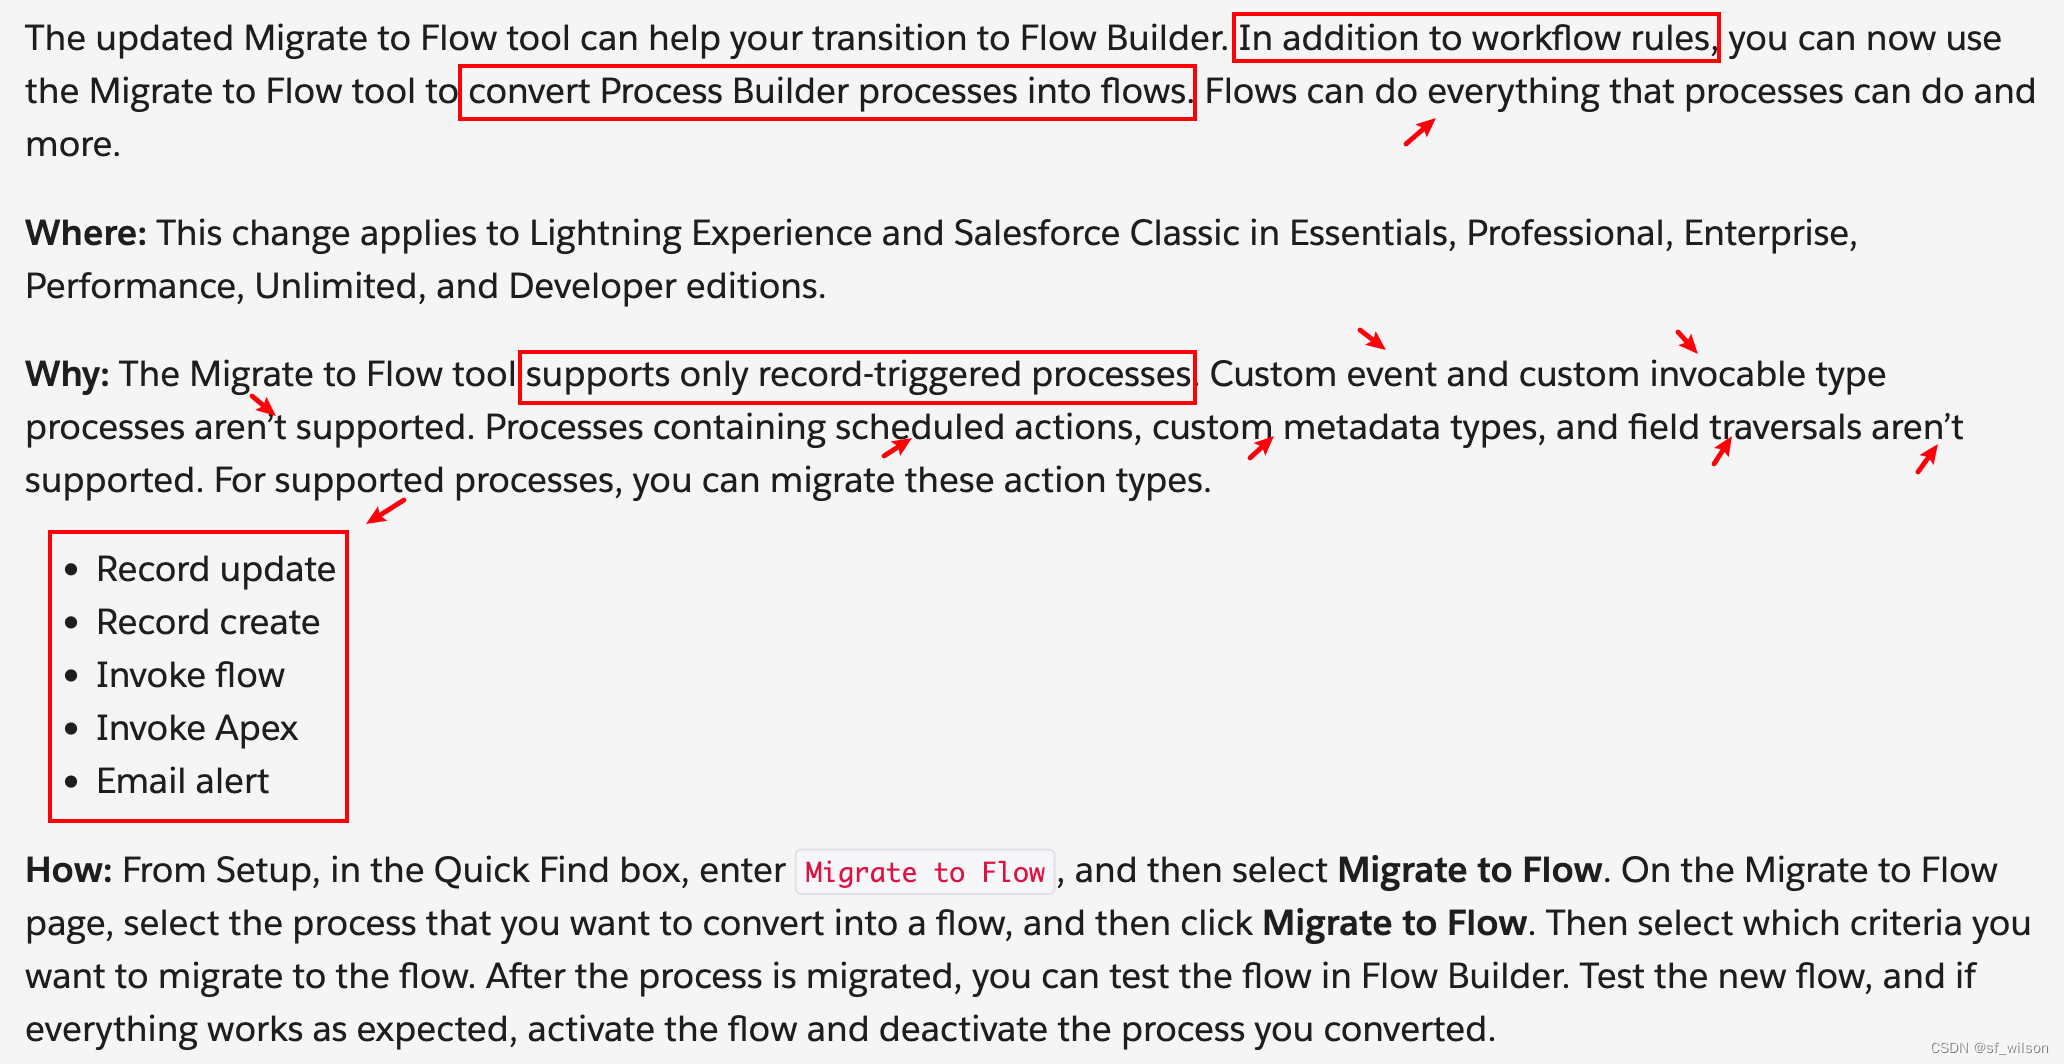
4. Convert Processes to Flows with the Migrate to Flow Tool
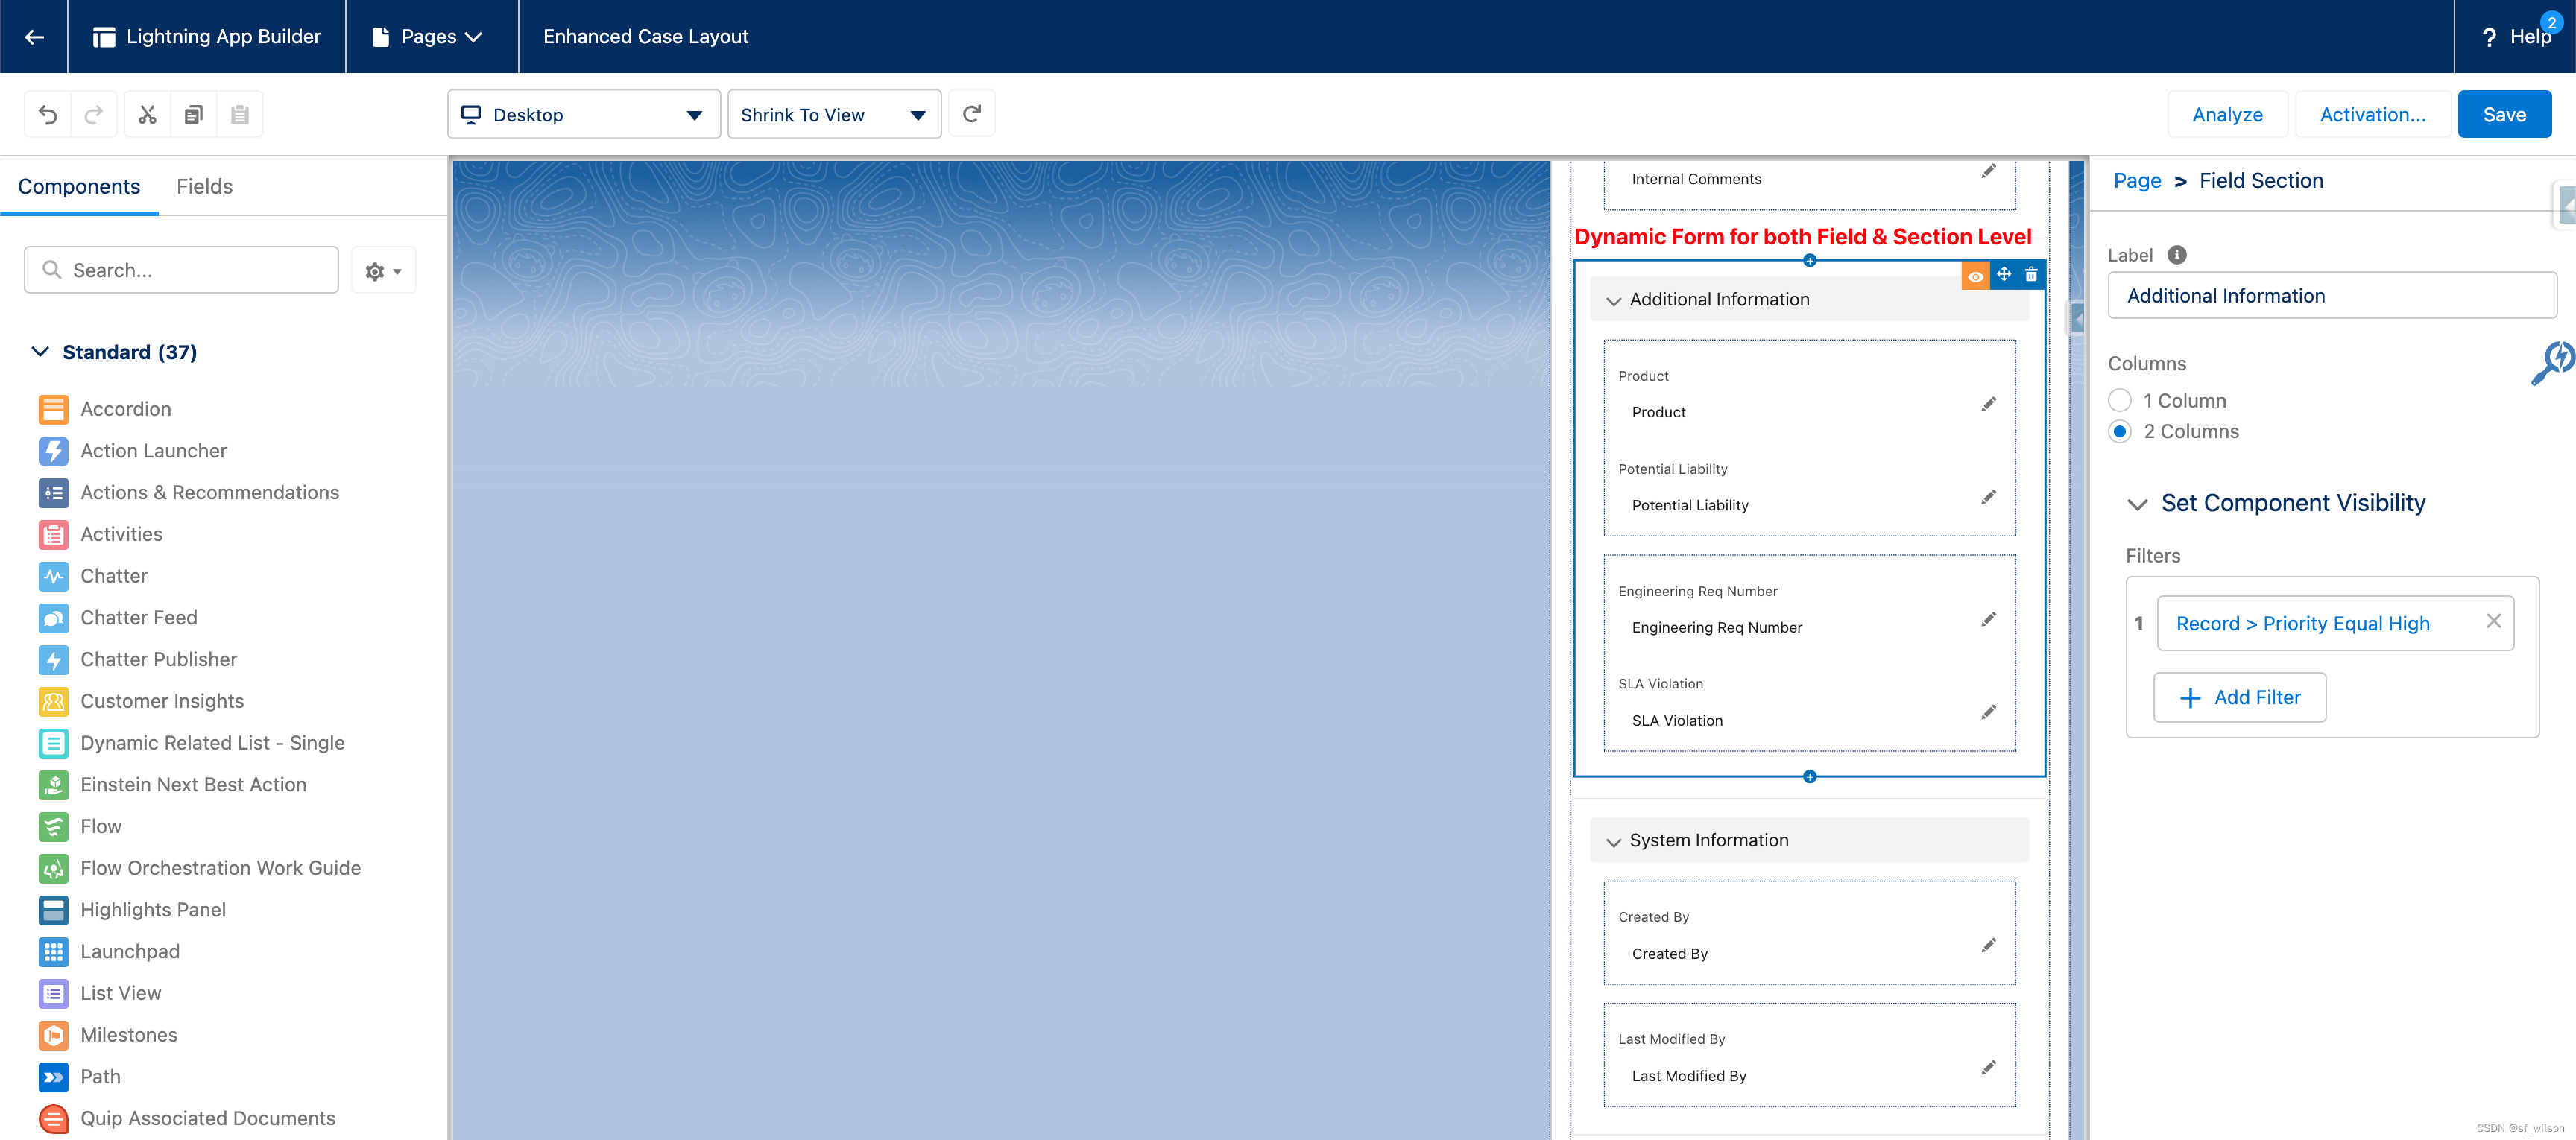
5. Enhance Record Pages With Dynamic Forms
You can make your account, including person account, contact, and opportunity record pages, more robust by configuring them with Dynamic Forms.
Make your case and lead record pages more robust by configuring them with Dynamic Forms.
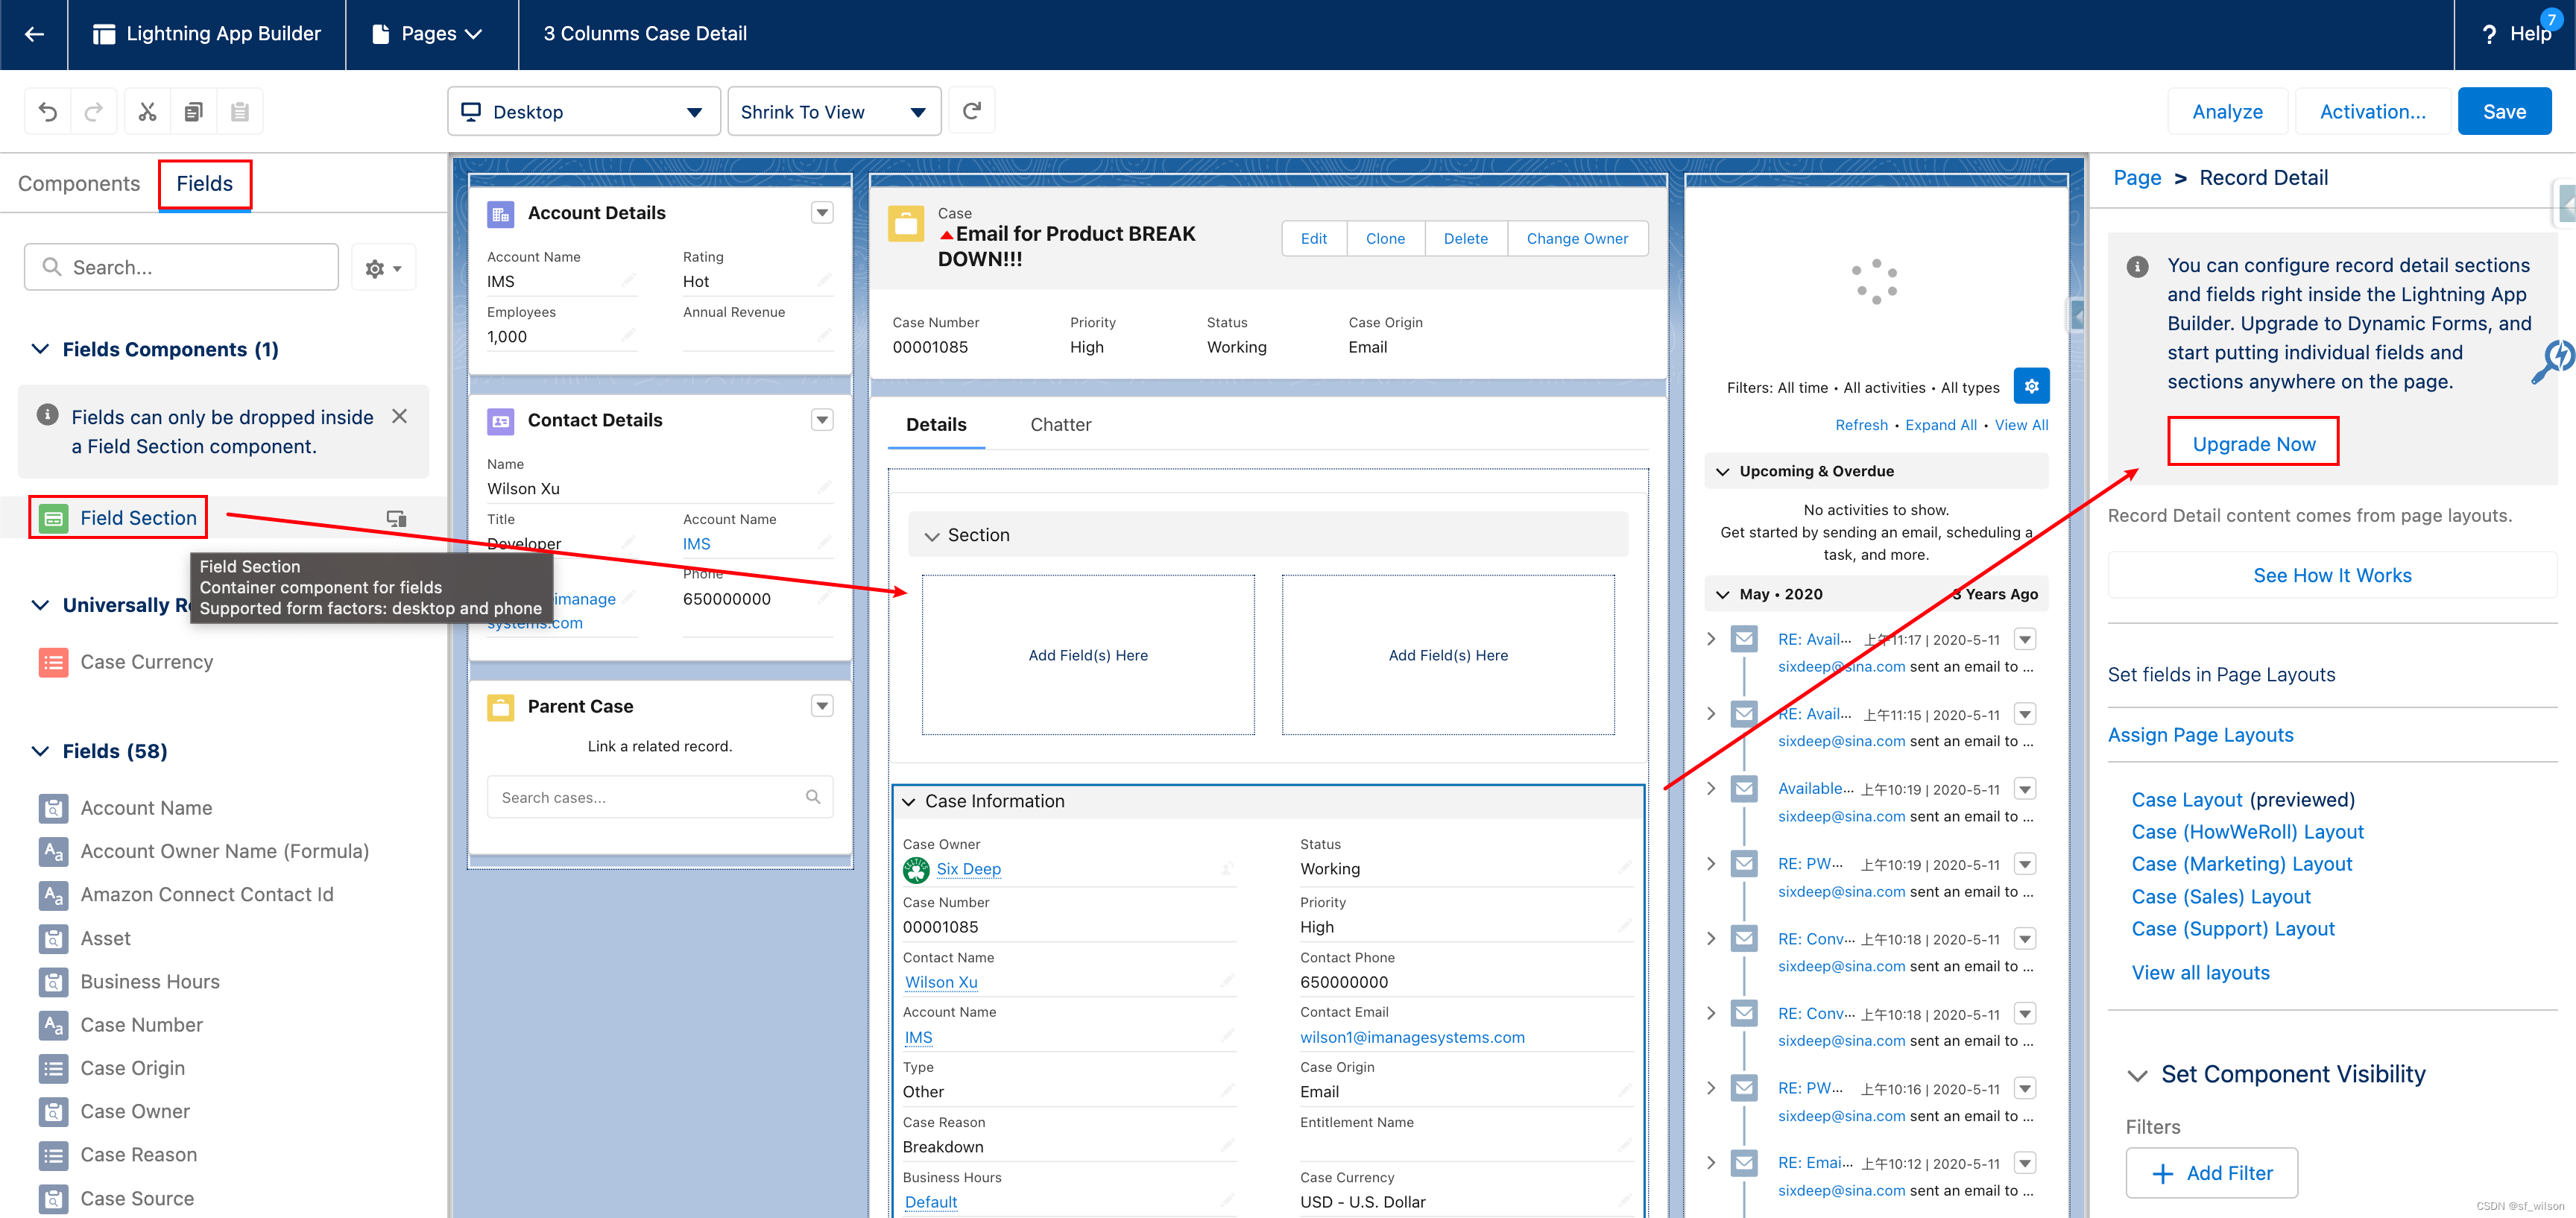
Hands-On Part:
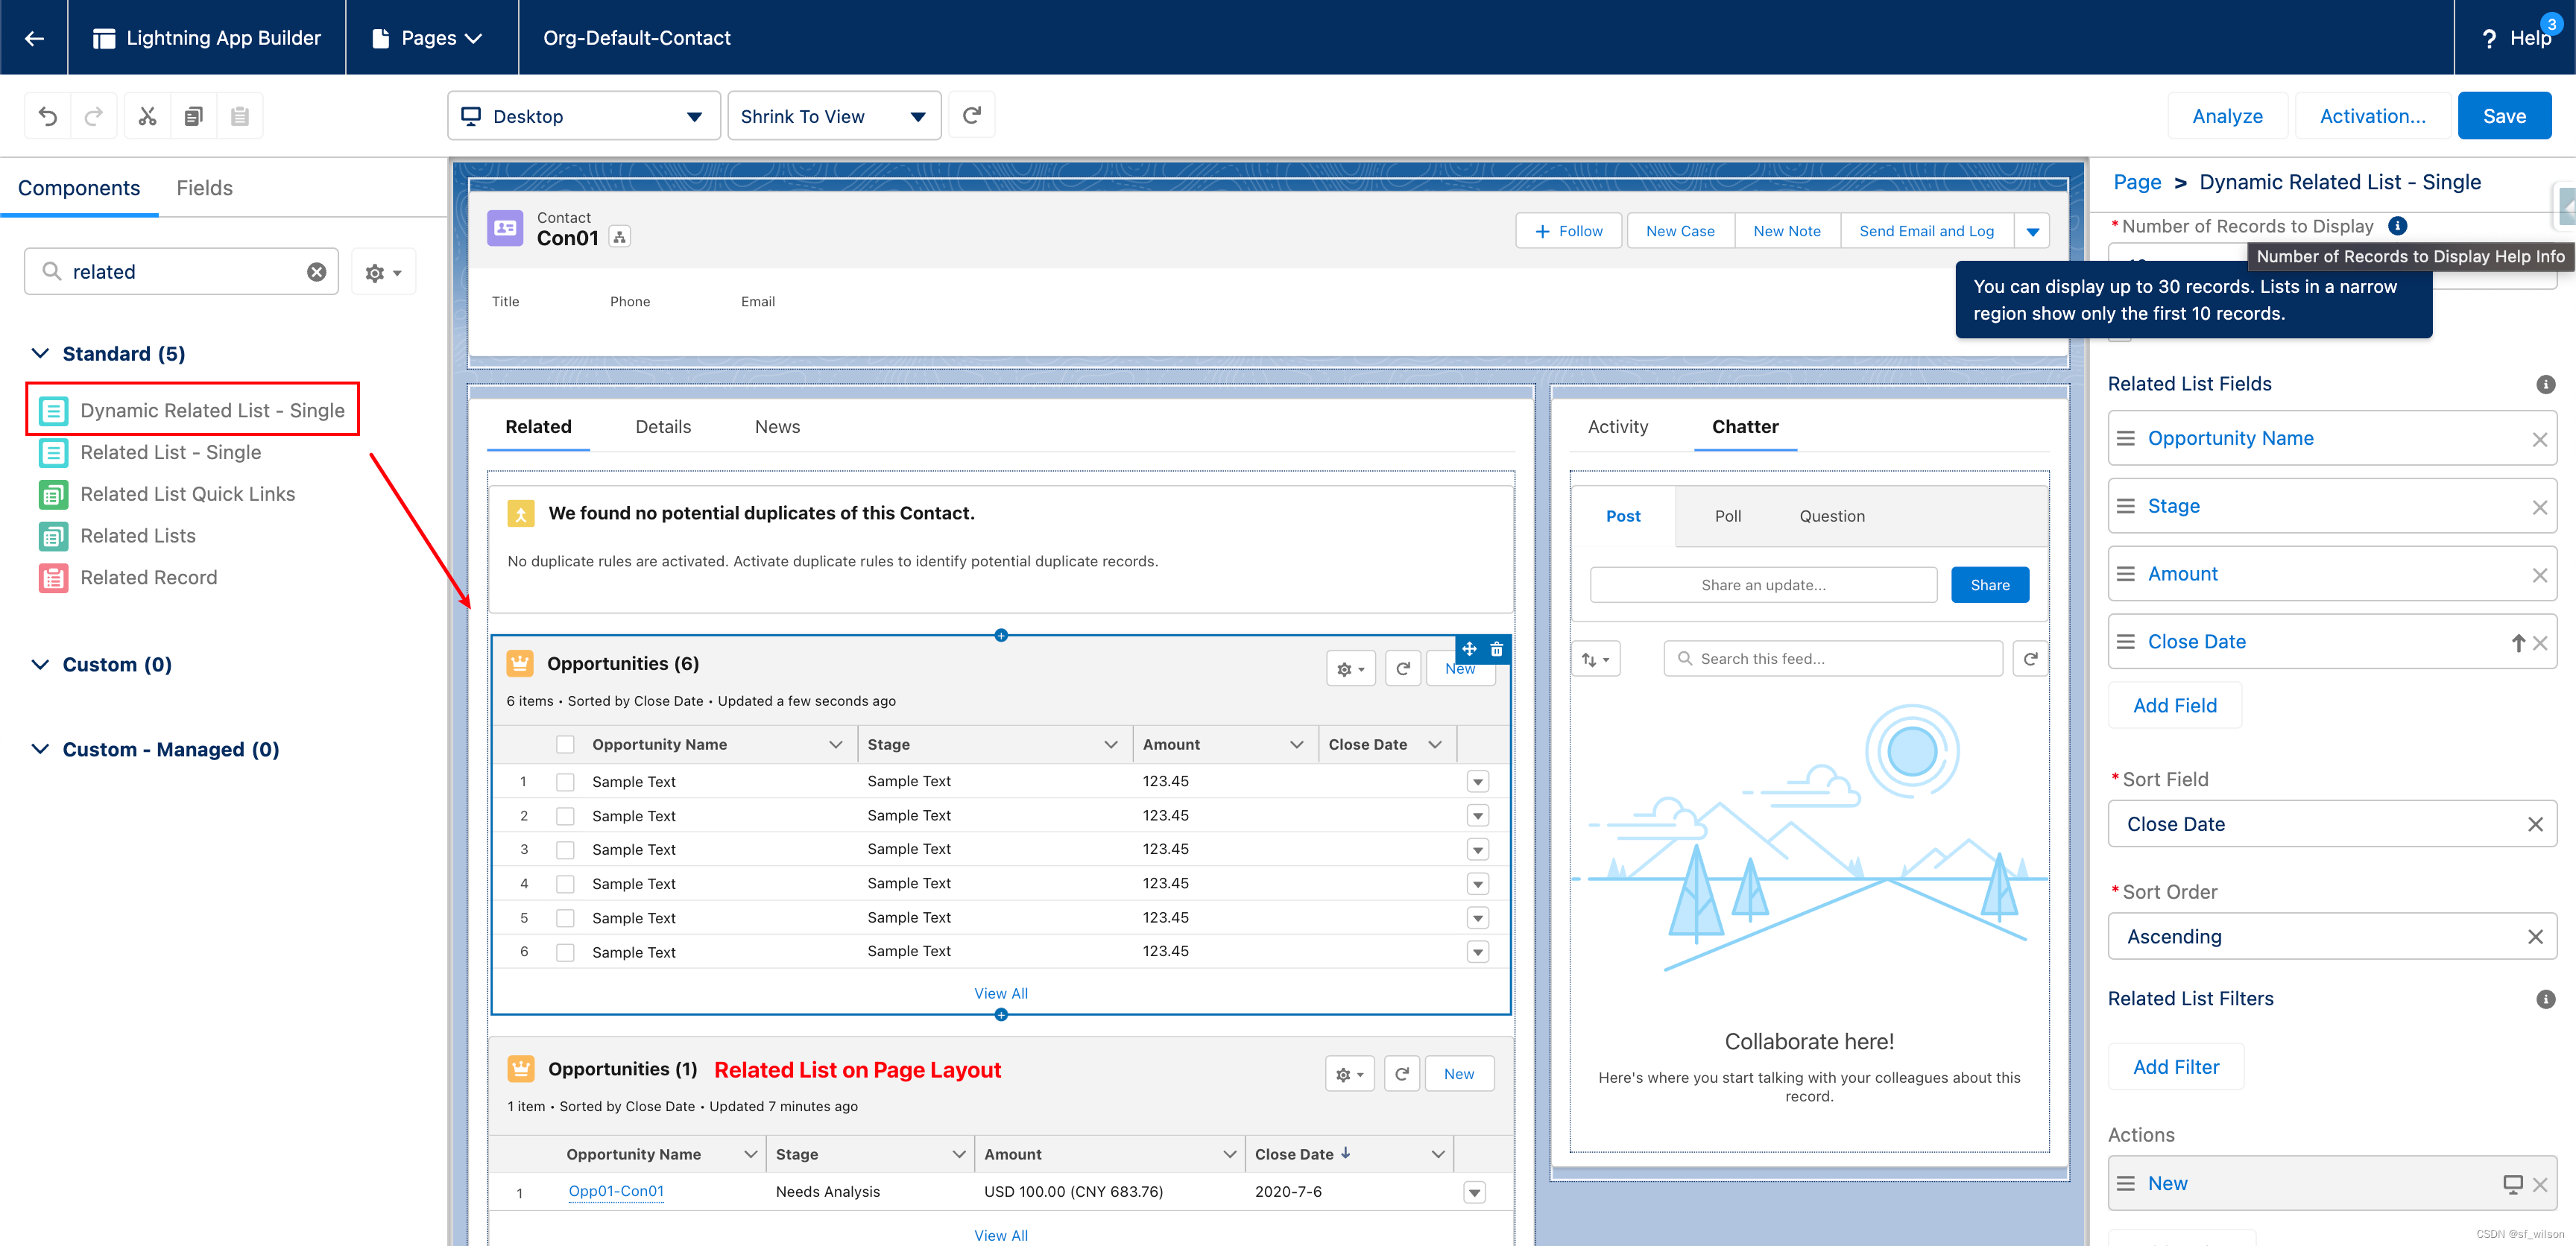
6. Dynamic Related List – Single component (Customize and Filter Related Lists in the Lightning App Builder)

7. Custom Address Fields
Intent: Improve address data accuracy
Example: Add a “warehouse address” field to a standard or custom object.
Options: Your users can enter a custom address, or they can use the Google lookup to search for an address.
Access: Access either as a structured compound data type or as individual address components.

Limits: Custom address fields aren’t supported for Lead Conversion, Approval Process, or the address component of Flows. And Salesforce hasn’t validated custom address fields in Community Profile or Data Export.
8. Allow Multiple Values in Restriction or Scoping Rule Record Criteria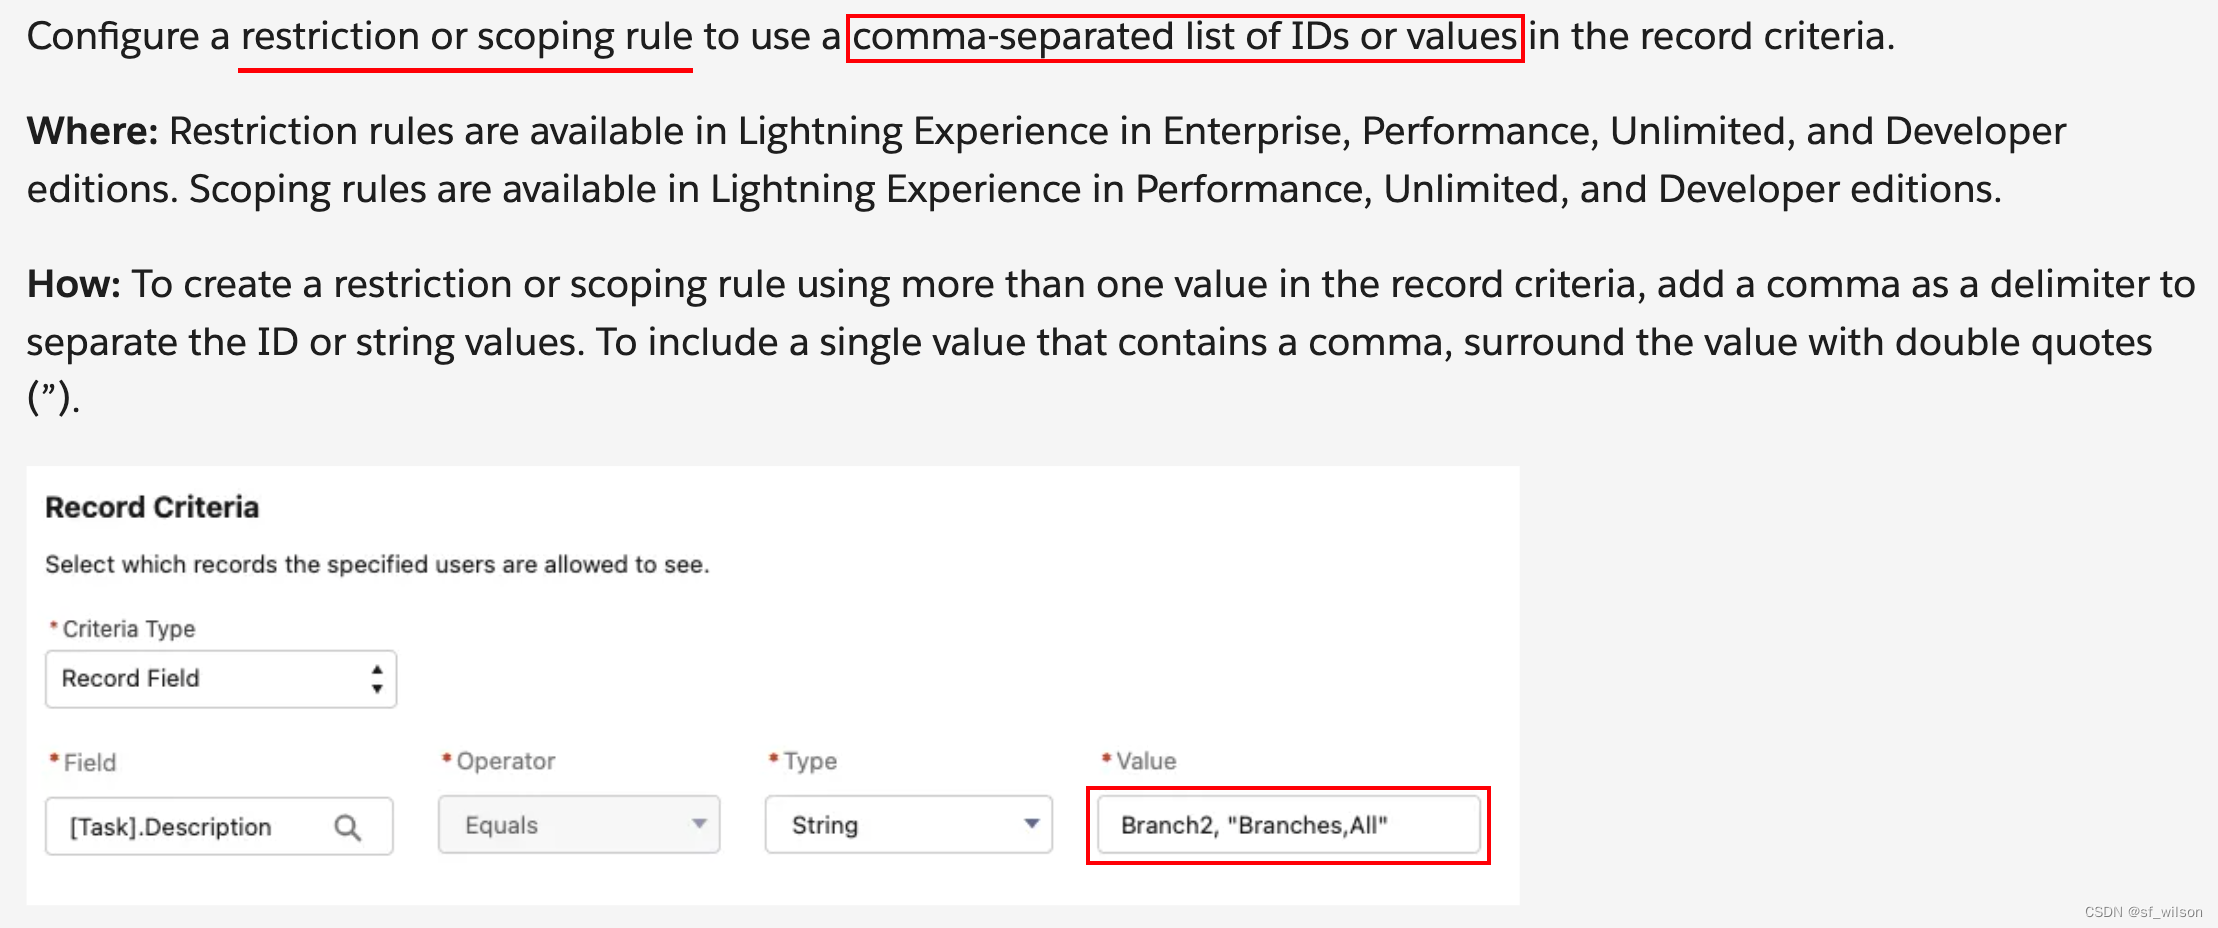
Note: If an existing rule uses commas in record criteria, add double quotes around the value that includes a comma to ensure that the rule works as intended.
9. Enable Permission Set or Permission Set Group Expirations
Now you can assign an expiration date to each permission set or permission set group, users can lose access to functionality after the expiration date.
New Lightning Experience interface and an improved workflow.
Users can be assigned to permission sets or permission set groups with or without an expiration date.
Get Started: To activate this feature, enable Permission Set & Permission Set Group Assignments with Expiration Dates in User Management Settings.


Hands-On Requirement:


 U8W/U8W-Mini使用与常见问题解决
 QT多线程的5种用法,通过使用线程解决UI主界面的耗时操作代码,防止界面卡死。...
 stm32使用HAL库配置串口中断收发数据(保姆级教程)
 分享几个国内免费的ChatGPT镜像网址(亲测有效)
 Allegro16.6差分等长设置及走线总结