您现在的位置是:首页 >学无止境 >Spring Cache网站首页学无止境
Spring Cache
2.1 Spring Cache
2.1.1 介绍
Spring Cache 是一个框架,实现了基于注解的缓存功能,只需要简单地加一个注解,就能实现缓存功能。
简单来说SpringCache并不是缓存的实现,而是Spring家族提供的一整套的缓存解决方案,也就是接口和代码规范,配置以及注解等,用于整合各种缓存方案。
Spring Cache 提供了一层抽象,底层可以切换不同的缓存实现,例如:
- EHCache
- Caffeine
- Redis(常用)
SpringCache依赖Spring的天然优势===AOP,我们只需要显式的在代码中调用第三方接口,在方法上加上注解,就可以实现把获取到的结果后把结果插入到缓存内,在下次查询的时候优先从缓存中读取数据。
[外链图片转存失败,源站可能有防盗链机制,建议将图片保存下来直接上传(img-A0h0HRmR-1682565429529)(assets/1680515388578.png)]
起步依赖:
<dependency>
	<groupId>org.springframework.boot</groupId>
	<artifactId>spring-boot-starter-cache</artifactId>  		            		       	 <version>2.7.3</version>
</dependency>
2.1.2 常用注解
在SpringCache中提供了很多缓存操作的注解,常见的是以下的几个:
| 注解 | 说明 |
|---|---|
| @EnableCaching | 开启缓存注解功能,通常加在启动类上 |
| @Cacheable | 在方法执行前先查询缓存中是否有数据,如果有数据,则直接返回缓存数据;如果没有缓存数据,调用方法并将方法返回值放到缓存中 |
| @CachePut | 将方法的返回值放到缓存中 |
| @CacheEvict | 将一条或多条数据从缓存中删除 |
在spring boot项目中,使用缓存技术只需在项目中导入相关缓存技术的依赖包,并在启动类上使用@EnableCaching开启缓存支持即可。
例如,使用Redis作为缓存技术,只需要导入Spring data Redis的maven坐标即可。
2.1.3 入门案例
1). 环境准备
**导入基础工程:**底层已使用Redis缓存实现
基础环境的代码,在我们今天的资料中已经准备好了, 大家只需要将这个工程导入进来就可以了。导入进来的工程结构如下:
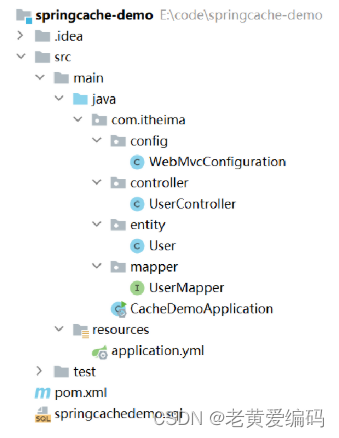
数据库准备:
创建名为spring_cache_demo数据库,将springcachedemo.sql脚本直接导入数据库中。

引导类上加@EnableCaching:
package com.itheima;

import lombok.extern.slf4j.Slf4j;
import org.springframework.boot.SpringApplication;
import org.springframework.boot.autoconfigure.SpringBootApplication;
import org.springframework.cache.annotation.EnableCaching;

@Slf4j
@SpringBootApplication
@EnableCaching//开启缓存注解功能
public class CacheDemoApplication {
    public static void main(String[] args) {
        SpringApplication.run(CacheDemoApplication.class,args);
        log.info("项目启动成功...");
    }
}
2). @CachePut注解
@CachePut 说明:
作用: 将方法返回值,放入缓存
value: 缓存的名称, 每个缓存名称下面可以有很多key
key: 缓存的key ----------> 支持Spring的表达式语言SPEL语法
在save方法上加注解@CachePut
当前UserController的save方法是用来保存用户信息的,我们希望在该用户信息保存到数据库的同时,也往缓存中缓存一份数据,我们可以在save方法上加上注解 @CachePut,用法如下:
	/**
	* CachePut:将方法返回值放入缓存
	* value:缓存的名称,每个缓存名称下面可以有多个key
	* key:缓存的key
	*/
	@PostMapping
    @CachePut(value = "userCache", key = "#user.id")//key的生成:userCache::1
    public User save(@RequestBody User user){
        userMapper.insert(user);
        return user;
    }
**说明:**key的写法如下
#user.id : #user指的是方法形参的名称, id指的是user的id属性 , 也就是使用user的id属性作为key ;
#result.id : #result代表方法返回值,该表达式 代表以返回对象的id属性作为key ;
#p0.id:#p0指的是方法中的第一个参数,id指的是第一个参数的id属性,也就是使用第一个参数的id属性作为key ;
#a0.id:#a0指的是方法中的第一个参数,id指的是第一个参数的id属性,也就是使用第一个参数的id属性作为key ;
#root.args[0].id:#root.args[0]指的是方法中的第一个参数,id指的是第一个参数的id属性,也就是使用第一个参数
的id属性作为key ;
启动服务,通过swagger接口文档测试,访问UserController的save()方法
因为id是自增,所以不需要设置id属性
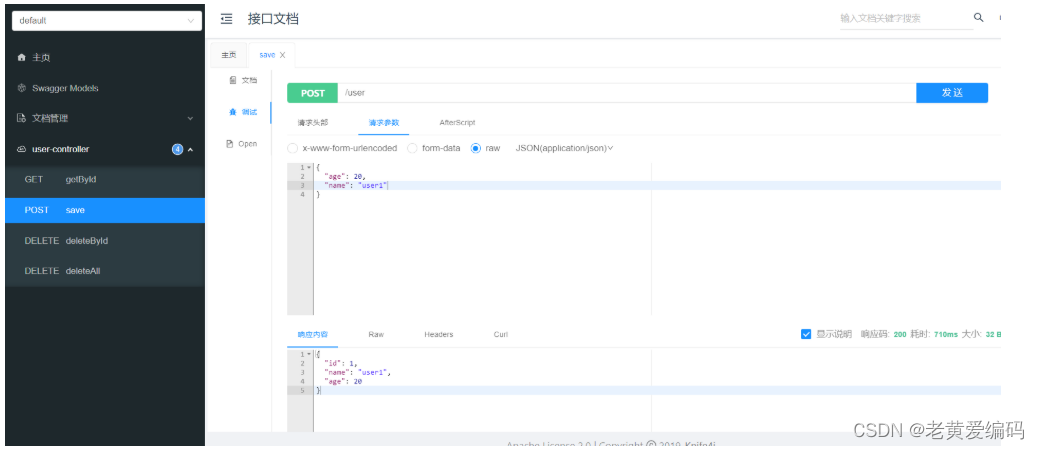
查看user表中的数据

查看Redis中的数据
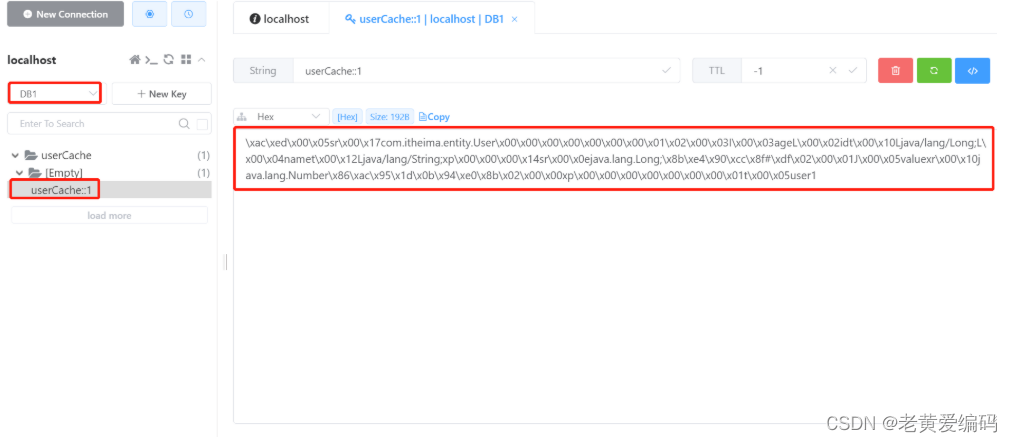
3). @Cacheable注解
@Cacheable 说明:
作用: 在方法执行前,spring先查看缓存中是否有数据,如果有数据,则直接返回缓存数据;若没有数据,调用方法并将方法返回值放到缓存中
value: 缓存的名称,每个缓存名称下面可以有多个key
key: 缓存的key ----------> 支持Spring的表达式语言SPEL语法
在getById上加注解@Cacheable
	/**
	* Cacheable:在方法执行前spring先查看缓存中是否有数据,如果有数据,则直接返回缓存数据;若没有数据,	  *调用方法并将方法返回值放到缓存中
	* value:缓存的名称,每个缓存名称下面可以有多个key
	* key:缓存的key
	*/
	@GetMapping
    @Cacheable(cacheNames = "userCache",key="#id")
    public User getById(Long id){
        User user = userMapper.getById(id);
        return user;
    }
重启服务,通过swagger接口文档测试,访问UserController的getById()方法
第一次访问,会请求我们controller的方法,查询数据库。后面再查询相同的id,就直接从Redis中查询数据,不用再查询数据库了,就说明缓存生效了。
提前在redis中手动删除掉id=1的用户数据
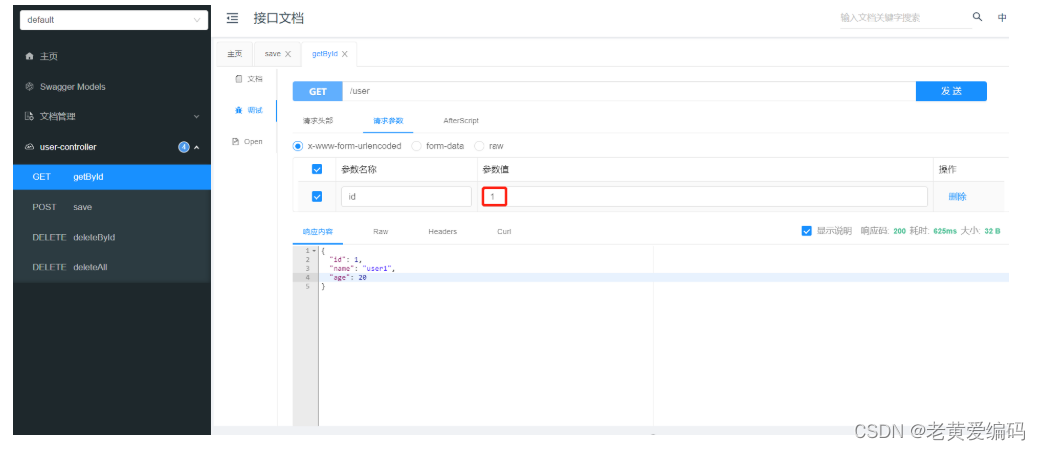
**查看控制台sql语句:**说明从数据库查询的用户数据

**查看Redis中的缓存数据:**说明已成功缓存
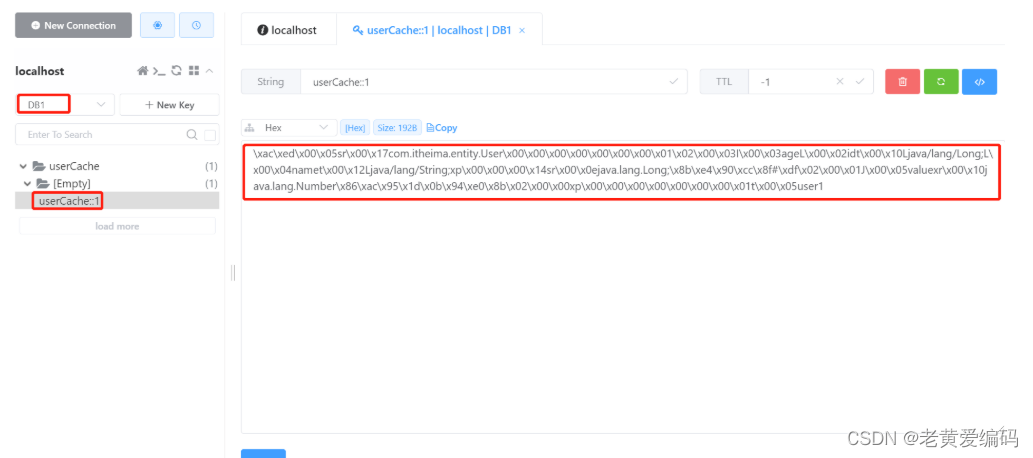
再次查询相同id的数据时,直接从redis中直接获取,不再查询数据库。
4). @CacheEvict注解
@CacheEvict 说明:
作用: 清理指定缓存
value: 缓存的名称,每个缓存名称下面可以有多个key
key: 缓存的key ----------> 支持Spring的表达式语言SPEL语法
在 delete 方法上加注解@CacheEvict
	@DeleteMapping
    @CacheEvict(cacheNames = "userCache",key = "#id")//删除某个key对应的缓存数据
    public void deleteById(Long id){
        userMapper.deleteById(id);
    }

	@DeleteMapping("/delAll")
    @CacheEvict(cacheNames = "userCache",allEntries = true)//删除userCache下所有的缓存数据
    public void deleteAll(){
        userMapper.deleteAll();
    }
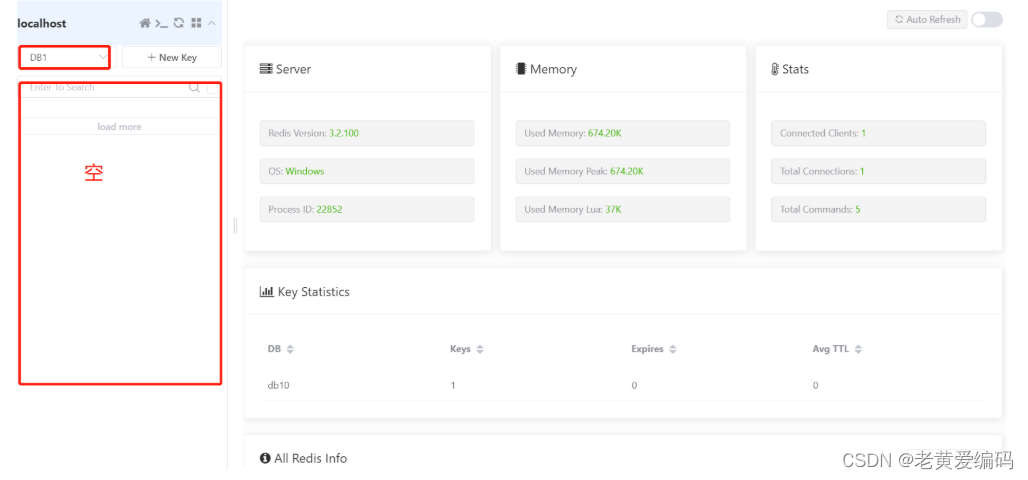
重启服务,通过swagger接口文档测试,访问UserController的deleteAll()方法

**查看user表:**数据清空

查询Redis缓存数据


 U8W/U8W-Mini使用与常见问题解决
 QT多线程的5种用法,通过使用线程解决UI主界面的耗时操作代码,防止界面卡死。...
 stm32使用HAL库配置串口中断收发数据(保姆级教程)
 分享几个国内免费的ChatGPT镜像网址(亲测有效)
 Allegro16.6差分等长设置及走线总结