您现在的位置是:首页 >其他 >electron+vue3全家桶+vite项目搭建【15】vue3+sass实现多主题一键切换,支持electron多窗口同步更新网站首页其他
electron+vue3全家桶+vite项目搭建【15】vue3+sass实现多主题一键切换,支持electron多窗口同步更新
引入
我们之前在这篇文章中集成了 sass,接下来我们结合sass的变量定义,在vue3+vite+electron的环境中实现一键切换主题色
- 该方式适用于web项目和electron项目
- 已适配electron多窗口同步更新主题风格
- 如果只是web项目,删除掉 ipcRedner部分的代码即可
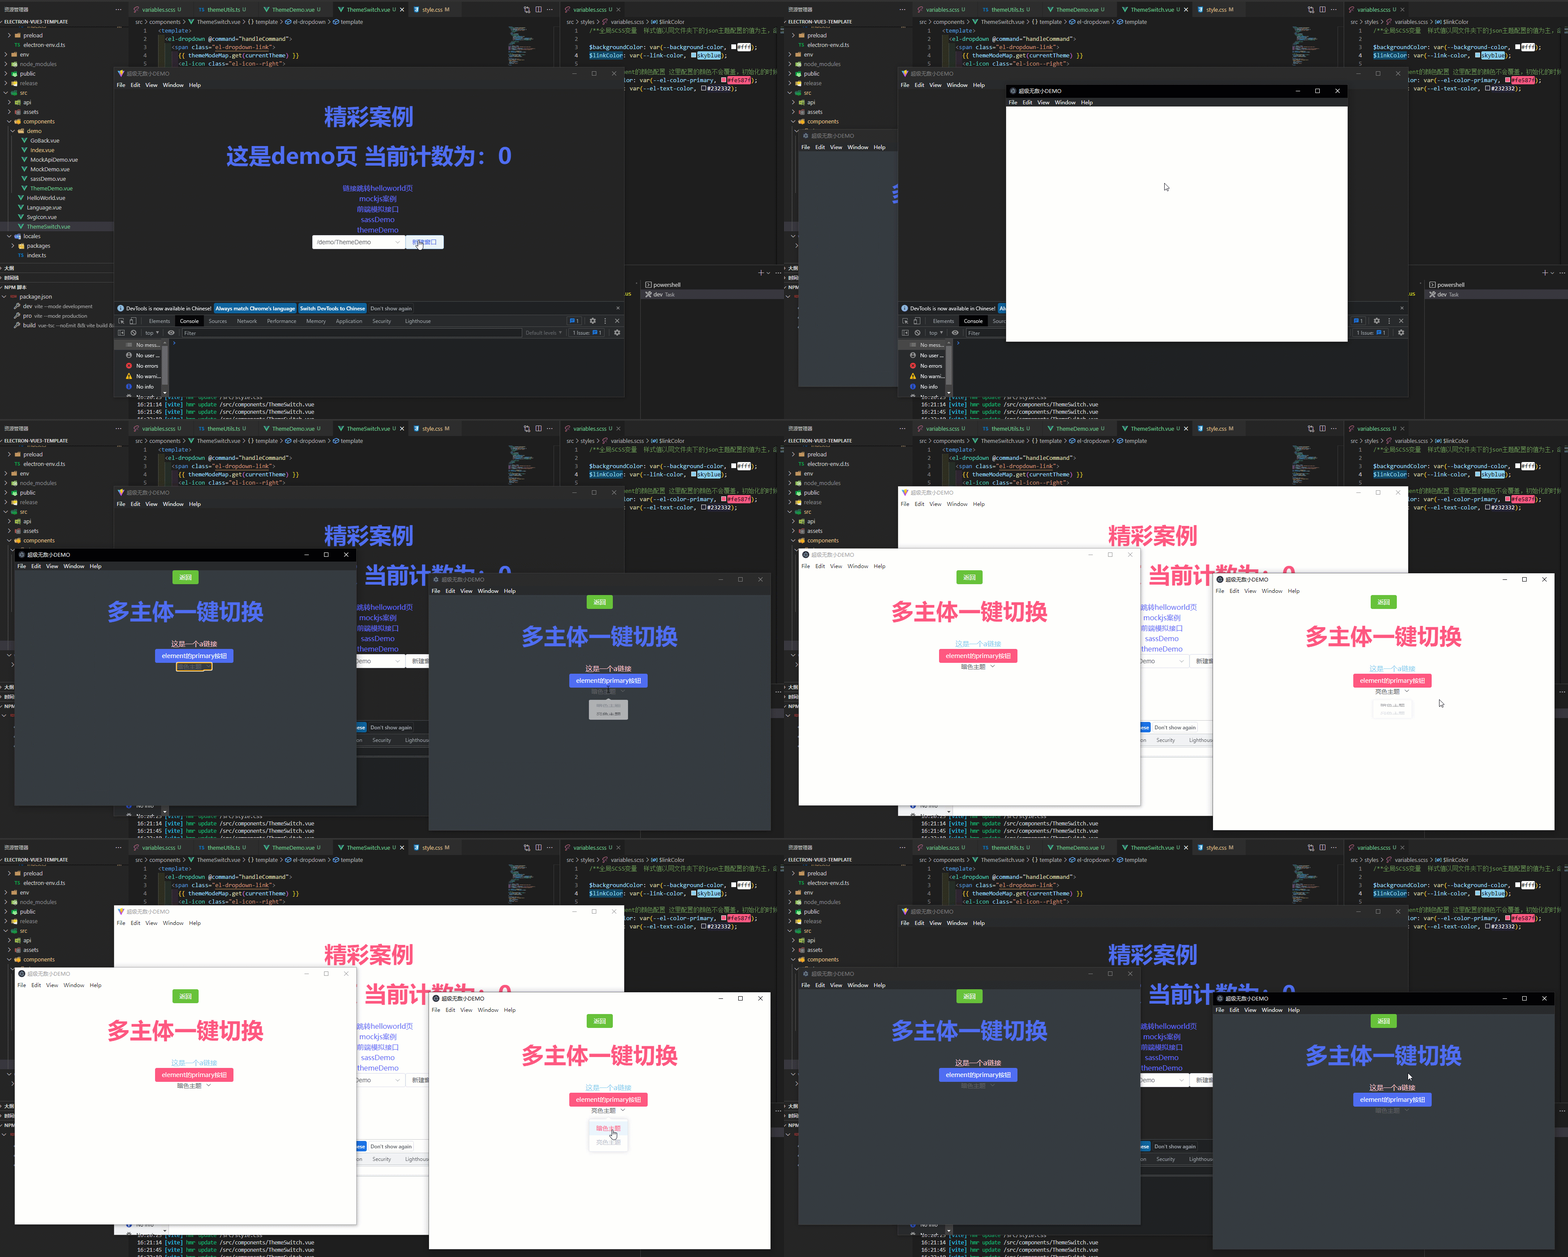
实现效果展示
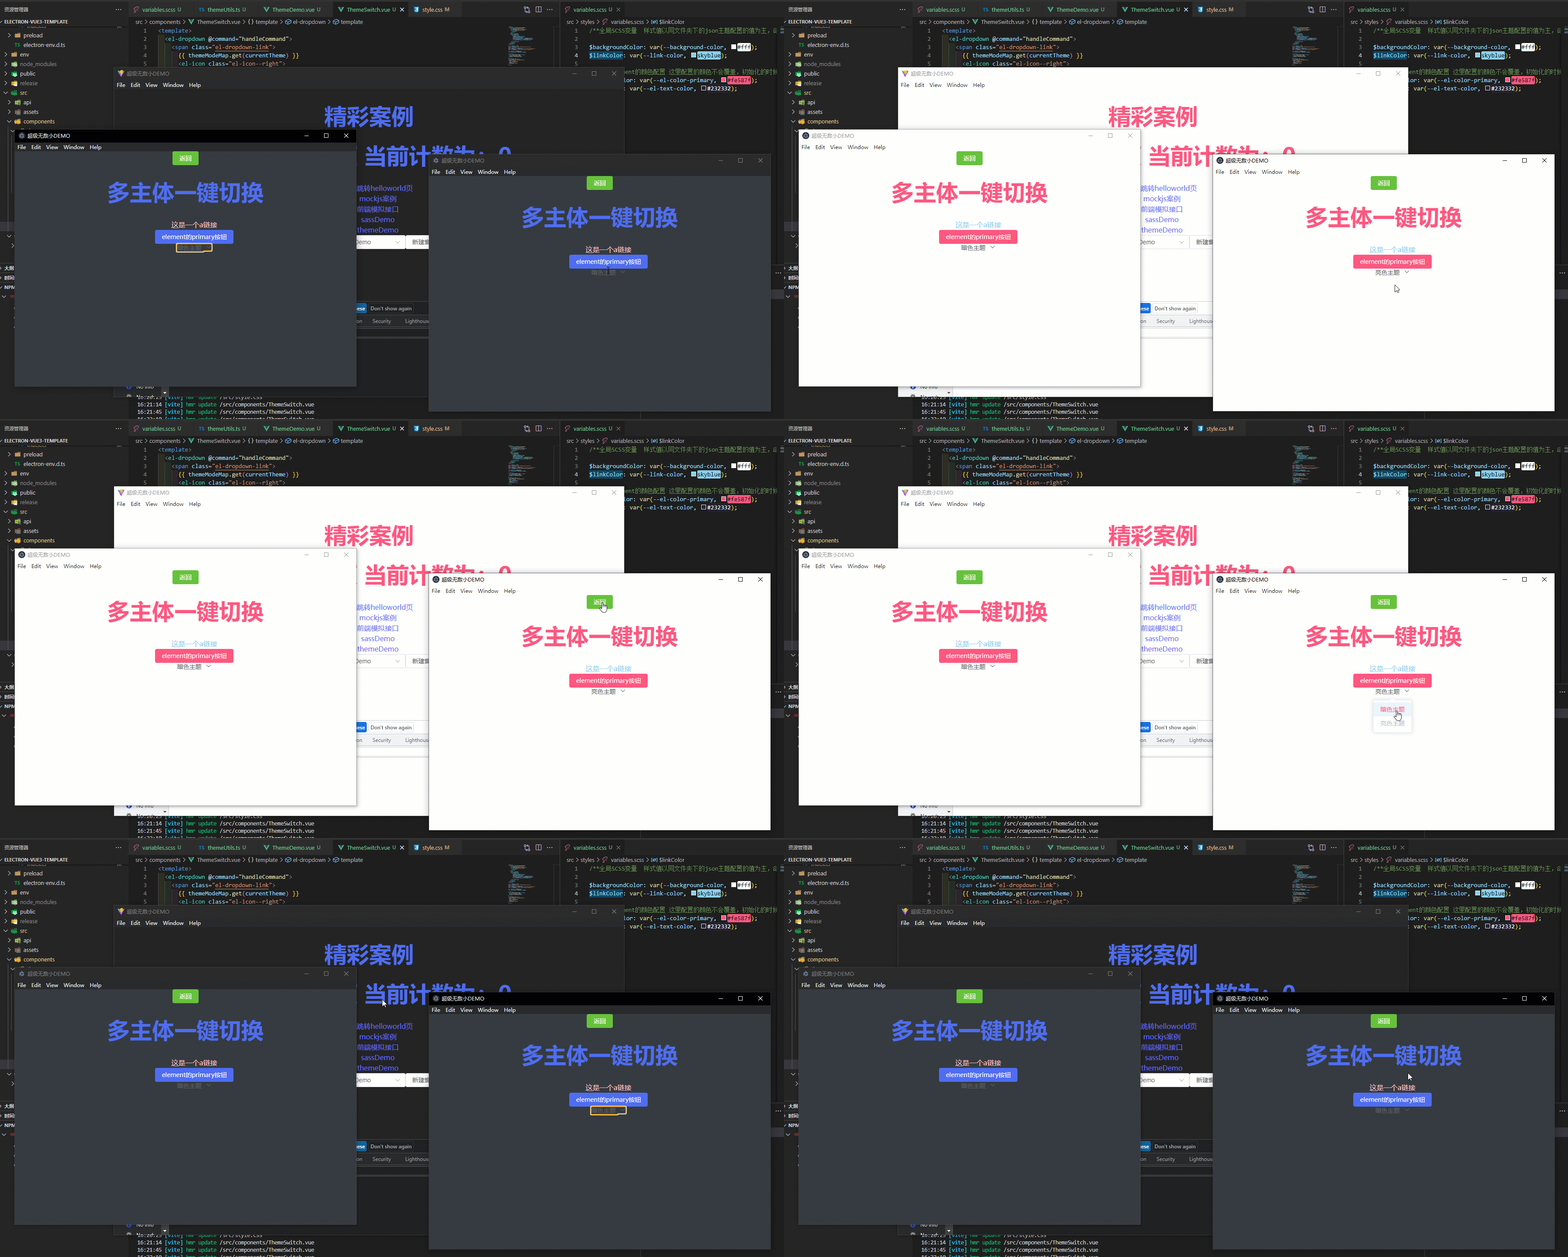
实现思路整理
1.将主题通用的全局变量定义在一个sass文件中,然后在vite中配置自动导入
2.创建多个主题json文件,key与全局变量一致,值就用对应的样式代码,例如颜色、字体样式,边框样式等等
3.项目初始化的时候从本地缓存中读取当前的主题,然后读取主题json文件,遍历覆盖相同的主题变量的值
4.主题初始化时渲染进程开启主题改变监听,主进程同样监听主题改变,主题切换组件在主题切换时通知主进程,然后主进程通知所有窗口同步切换主题
实现步骤
1.定义全局主题样式变量
1.首先我们在src目录下创建一个styles目录,里面创建一个variables.scss文件,里面定义一些通用的样式变量,如下:
- 该文件中的变量值咱们可以随便取,因为真实的值会在初始化时通过主题json文件进行覆盖,改文件仅仅是作为变量声明,方便我们在样式代码中调用
- 如果使用了element这类主题框架,咱们可以通过命名同样的名字来覆盖框架的默认颜色
srcstylesvariables.scss
/**全局SCSS变量  样式值以同文件夹下的json主题配置的值为主,命名推荐全拼小驼峰,这里定义的值可随意取*/

$backgroundColor: var(--background-color, #fff);
$linkColor: var(--link-color, skyblue);

// 覆盖element的颜色配置 这里配置的颜色不会覆盖,初始化的时候通过代码进行覆盖
$primaryColor: var(--el-color-primary, #fe587f);
$textColor: var(--el-text-color, #232332);
2.我们在vite.config.ts文件中设置默认导入sass,并设置element的样式导入方式:
- 配置默认导入的sass文件
- 如果需要修改element样式,那么之前咱们配的自动导入也得补充sass的引入
export default defineConfig(({ command }) => {
    // ......
    return {
        // ......
        plugins: [
            AutoImport({
                // ......
                resolvers: [
                    ElementPlusResolver({
                        importStyle: "sass", // 设置导入样式
                    }),
                ],
            }),
            Components({
                resolvers: [
                    ElementPlusResolver({
                        importStyle: "sass", //设置导入样式
                    }),
                ],
            }),

        ],
        // ......
        css: {
            preprocessorOptions: {
                scss: {
                    additionalData: `@use '@/styles/variables.scss' as *;`, // 引入全局变量文件
                },
            },
        },
    });
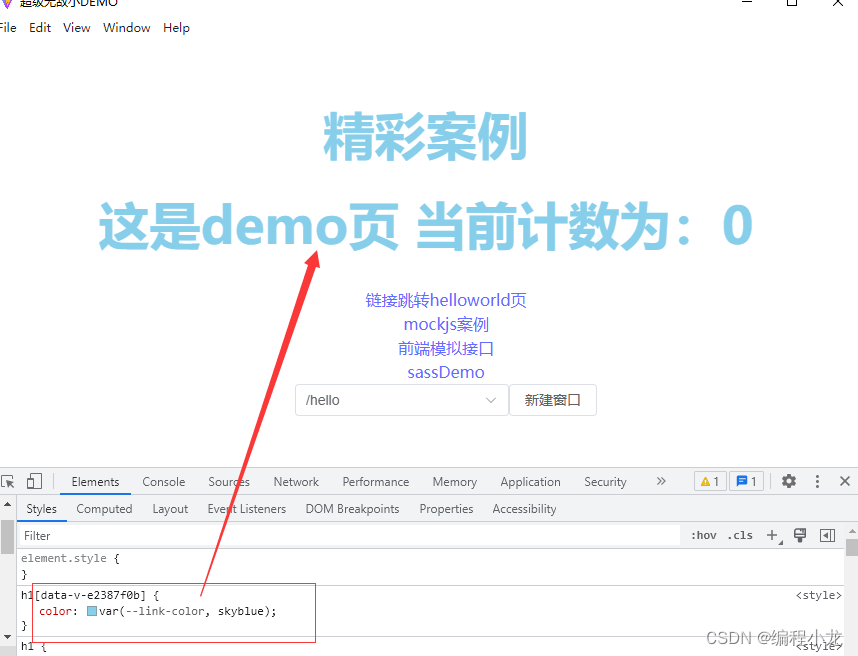
3.此时大家可以直接在代码中设置预定义的颜色,看看是否生效,如下:
- 这里给demo/index.vue中的h1设置了一个颜色,注意,我们在variables.scss中设置的element同名颜色,因为加载优先级更高,所以值会被后加载的element颜色覆盖掉,之后我们配置样式json走代码初始化覆盖即可
srccomponentsdemoIndex.vue
h1 {
  color: $linkColor;
}
2.定义主题模板
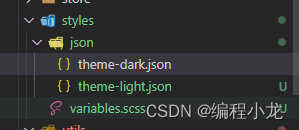
我们在styles目录下新建一个json目录,里面定义两个主题模板,分别命名theme-dark.json、theme-light.json:
- 这里使用json单纯觉得k-v的形式很方便,你也可以用yaml等格式
- key必须和variables中的var命名的全局名称一致,值就是当前主题设置的样式
theme-dark.json:
{
  "--background-color": "#363b40",
  "--link-color": "pink",
  "--el-color-primary": "#4e6ef2",
  "--el-text-color": "#b8bfc6"
}
theme-light.json:
{
  "--background-color": "#fff",
  "--link-color": "skyblue",
  "--el-color-primary": "#fe587f",
  "--el-text-color": "#232332"
}
目录结构如下所示:
3.封装颜色工具类
有了对应的主题文件,我们就需要在项目初始化的时候,使用对应的主题文件覆盖主题变量的值,这里我们把主题相关的操作封装到单独的工具类中,src/utils目录下创建themeUtils.ts,主要实现以下功能:
- 主题颜色初始化:从缓存中获取当前主题,没有取默认值,然后加载对应的json,用json中的值进行覆盖
- 主题颜色切换:颜色切换支持主题切换和自定义颜色切换,自定义颜色存在缓存中,切换主题颜色时,相同key优先走缓存中的值,实现不同主题可共用用户自定义的颜色
- 全局颜色修改:利用sass中定义的全局变量,直接配合document.getElementsByTagName(“body”)[0].style.setProperty(key, value);即可实现动态修改
srcutils hemeUtils.ts
import themeDarkConfig from "@/styles/json/theme-dark.json";
import themeLightConfig from "@/styles/json/theme-light.json";
import cacheUtils from "@/utils/cacheUtils";
import { ipcRenderer } from "electron";
import { useAppStore } from "@/store/modules/appStore";

/**主题前缀 */
export const keyThemePrefix = "theme_";

/**主题模式 枚举 */
export const enum themeModeEnum {
  dark = "dark",
  light = "light",
}

/**主题map,方便在主题切换组件中取值 */
export const themeModeMap = new Map<string, string>([
  [themeModeEnum.dark, "暗色主题"],
  [themeModeEnum.light, "亮色主题"],
]);

/**
 * 设置样式属性
 * @param key 样式名
 * @param value  样式值
 */
function setStyleProperty(key: string, value: string) {
  document.getElementsByTagName("body")[0].style.setProperty(key, value);
}
/**
 * 从缓存或默认json样式配置中全局设置样式变量
 */
export const initTheme = () => {
  // 从缓存中取出当前主题模式,默认为 light模式
  themeChange(
    cacheUtils.get(keyThemePrefix + "mode") || themeModeEnum.light,
    false
  );

  // 监听主进程通知样式修改时,同步窗口更新样式
  ipcRenderer.on("theme-style:changed", (event, mode: string) => {
    // 有mode说明是走主题切换
    if (mode) {
      /// 必须指定electron不同步,不然会循环调用
      themeChange(mode, false);
    } else {
      // 没有传mode,则是用户自定义样式修改,此时只修改本地存储的样式
      // 取到所有样式的key 和value
      const styleKeys = Object.keys(themeLightConfig);
      for (const styleKey of styleKeys) {
        const styleValue: string = cacheUtils.get(keyThemePrefix + styleKey);
        if (styleValue) {
          /// 设置样式
          setStyleProperty(styleKey, styleValue);
        }
      }
    }
  });
};

/**
 * 切换主题模式
 * @param mode 主题模式
 * @param electronChange 窗口是否需要同步修改 默认需要
 */
export function themeChange(mode: string, electronChange = true) {
  // app状态管理
  const appStore = useAppStore();
  // 设置主题状态
  appStore.theme = mode;
  // 设置缓存为对应主题
  cacheUtils.set(keyThemePrefix + "mode", mode);
  // 通知主进程告诉其他窗口同步修改主题样式
  if (electronChange) {
    ipcRenderer.invoke("theme-style:change", mode);
  }

  // 取到对应主题的json配置
  let themeConfig;
  switch (mode) {
    case themeModeEnum.dark:
      themeConfig = themeDarkConfig;
      break;
    // 补充任意个自定义主题色.......
    default:
      themeConfig = themeLightConfig;
      break;
  }

  // 取到所有样式的key 和 value
  const styleKeys = Object.keys(themeConfig);
  const styleValues = Object.values(themeConfig);

  // 遍历设置全局scss变量的样式
  for (let i = 0; i < styleKeys.length; i++) {
    const styleKey = styleKeys[i];
    /// 走缓存或json配置的默认值
    const styleValue: string =
      cacheUtils.get(keyThemePrefix + styleKey) || styleValues[i];
    /// 设置样式
    setStyleProperty(styleKey, styleValue);
  }
}

/**
 * 修改全局样式的值
 * @param param scss定义的样式名称,参考 {srcstylesvariables.scss}
 * @param value 样式值
 */
export function styleChange(param: string, value: string) {
  // 修改页面的变量
  setStyleProperty(param, value);

  // 修改缓存值
  cacheUtils.set(keyThemePrefix + param, value);
}

export default {
  themeChange,
  initTheme,
  styleChange,
  keyThemePrefix,
};
4.初始化主题色
与我之前讲的多窗口,多语言同步问题类似,我们应当讲主题色的初始化放在app挂载后执行,我们同样在 src/main.ts中补充逻辑:
srccomponentsdemoIndex.vue
import { initTheme } from "@/utils/themeUtils";
// .....

app.mount("#app").$nextTick(() => {
    // ......
    // 主题色初始化
  	initTheme();
});
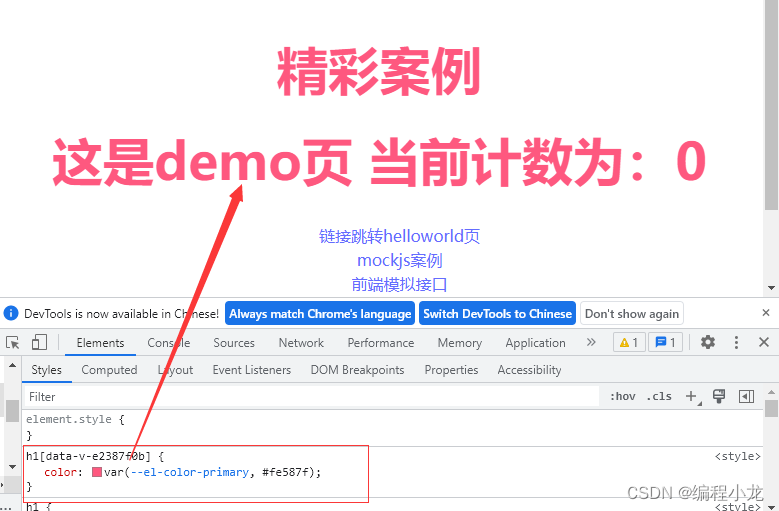
如果你之前有使用覆盖element主题色的变量,你就会发现,此时element的主题色已经被我们json中配置的值覆盖掉了,例如我调整 /demo/index.vue中的代码:
h1 {
  color: $primaryColor;
}
5.主进程监听颜色修改
我们在主进程中补充样式修改的监听处理逻辑:
- 如果主题模式是electron支持的模式,那么electron的窗口主题也同步修改主题样式
- 通知除通知主进程修改样式的窗口外的所有窗口同步修改样式
electronmainindex.ts
import { app, BrowserWindow, shell, ipcMain, nativeTheme } from "electron";

// 主题样式修改同步
ipcMain.handle(
  "theme-style:change",
  (event, mode?: "system" | "light" | "dark") => {
    if (mode && "system,light,dark".indexOf(mode) >= 0) {
      nativeTheme.themeSource = mode;
    }
    // 通知所有窗口同步更改样式
    // 遍历window执行
    for (const currentWin of BrowserWindow.getAllWindows()) {
      const webContentsId = currentWin.webContents.id;
      if (webContentsId !== event.sender.id) {
        currentWin.webContents.send("theme-style:changed", mode);
      }
    }
  }
);
6.补充主题状态管理
我们在appStore中补充主题相关的状态管理:
- 这里管理的全局主题状态主要是方便我们在任何页面快速获取的当前的主题
- 关于 多窗口的pinia全局状态管理同步问题关注我后续的文章 【加急创作中】
srcstoremodulesappStore.ts
import { defineStore } from "pinia";
import cacheUtils from "@/utils/cacheUtils";
import { themeMode, keyThemePrefix } from "@/utils/themeUtils";

/**应用相关状态管理 */
export const useAppStore = defineStore("appStore", {
  state() {
    return {
      lang: cacheUtils.get("lang") || "zhCn", // app的语言
      theme: cacheUtils.get(keyThemePrefix + "mode") || themeMode.light, // app的主题
    };
  },
});
7.主题一键切换组件
这里我们可以模仿多语言切换组件来写一个主题色切换组件:
srccomponentsThemeSwitch.vue
<template>
  <el-dropdown @command="handleCommand">
    <span class="el-dropdown-link">
      {{ themeModeMap.get(currentTheme) }}
      <el-icon class="el-icon--right">
        <arrow-down />
      </el-icon>
    </span>
    <template #dropdown>
      <el-dropdown-menu>
        <el-dropdown-item
          :command="themeModeEntry[0]"
          :key="themeModeEntry[0]"
          :disabled="currentTheme == themeModeEntry[0]"
          v-for="themeModeEntry in themeModeMap.entries()"
          >{{ themeModeEntry[1] }}</el-dropdown-item
        >
      </el-dropdown-menu>
    </template>
  </el-dropdown>
</template>

<script lang="ts" setup>
import { ArrowDown } from "@element-plus/icons-vue";
import { ref } from "vue";
import themeUtils, { themeModeMap } from "@/utils/themeUtils";
import { useAppStore } from "@/store/modules/appStore";

const appStore = useAppStore();
const currentTheme = ref(appStore.theme);

// 切换主题
function handleCommand(theme: string) {
  currentTheme.value = theme;
  themeUtils.themeChange(theme);
}
</script>
<style scoped lang="scss">
.example-showcase .el-dropdown-link {
  cursor: pointer;
  color: $primaryColor;
  display: flex;
  align-items: center;
}
</style>
8.测试案例
我们写一个主题一键切换案例,并且绑上路由:
srccomponentsdemoThemeDemo.vue
<template>
  <div class="box">
    <h1>多主体一键切换</h1>
    <a href="">这是一个a链接</a>
    <el-button type="primary">element的primary按钮</el-button>
    <ThemeSwitch></ThemeSwitch>
  </div>
</template>

<script setup lang="ts"></script>

<style scoped lang="scss">
.box {
  background-color: $backgroundColor;
  color: $textColor;
  h1 {
    color: $primaryColor;
  }
  a {
    color: $linkColor;
  }
}
</style>
演示效果如下:


 U8W/U8W-Mini使用与常见问题解决
 分享几个国内免费的ChatGPT镜像网址(亲测有效)
 stm32使用HAL库配置串口中断收发数据(保姆级教程)
 QT多线程的5种用法,通过使用线程解决UI主界面的耗时操作代码,防止界面卡死。...
 SpringSecurity实现前后端分离认证授权