您现在的位置是:首页 >技术教程 >Postman轻松签名,让SHA256withRSA保驾护航!网站首页技术教程
Postman轻松签名,让SHA256withRSA保驾护航!
简介Postman轻松签名,让SHA256withRSA保驾护航!
postman接口签名教程:https://www.bilibili.com/video/BV1r14y1A7MQ/?
目录:导读
使用Pre-request Script对请求进行加签(具体加签字段请看自己项目)
前言
在接口测试中,我们经常需要对请求进行签名,以保证数据的安全性。而SHA256withRSA是一种较为常见的签名算法,它可以使用私钥对数据进行签名,使用公钥进行验签。
但是,实现该算法签名可能会涉及到一些繁琐的操作,给我们的工作带来不小的困扰。
今天,我要向大家介绍一个神器——Postman,它可以轻松完成SHA256withRSA签名的实现,让您的API请求得到更加完善的保护。
接下来,我将简单介绍如何使用Postman实现SHA256withRSA签名,并且分享一些注意事项和技巧,希望能让大家轻松掌握这个技能。
获取pmlib
引入依赖bundle.js,有以下两种方式:
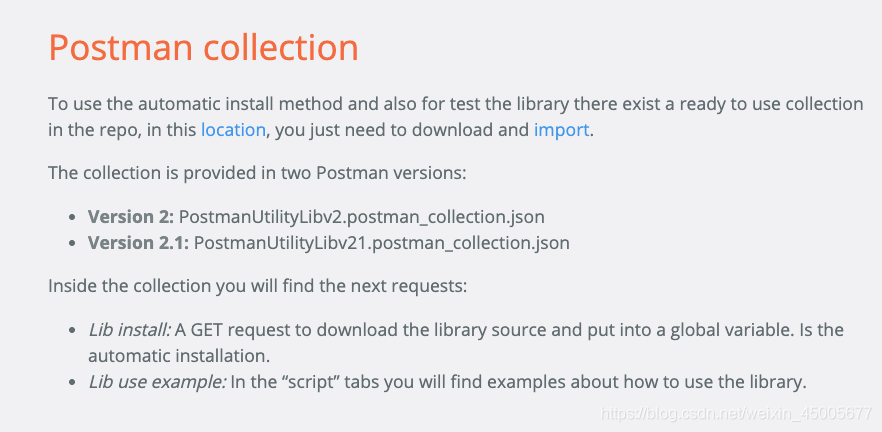
- 从github下载postman collection ,并导入进你的集合里。

- 将所需js所需js所需js全部复制保存成一个全局变量如:pmlib_code

- 把自己的私钥设置成环境变量如:pri_key

使用Pre-request Script对请求进行加签(具体加签字段请看自己项目)
// 使用eval执行js
eval(pm.globals.get('pmlib_code'))

// 生成rfctime
let date = new Date()
let y = date.getFullYear()
let m = date.getMonth()+1<10?'0'+(date.getMonth()+1):(date.getMonth()+1)
let d = date.getDate()<10?'0'+date.getDate():date.getDate()
let hh = date.getHours()<10?'0'+date.getHours():date.getHours();
let mm = date.getMinutes()<10?'0'+date.getMinutes():date.getMinutes()
let ss = date.getSeconds()<10?'0'+date.getSeconds():date.getSeconds()
this.rfc_time = y +'-' + m + '-' + d + ' ' + hh + ':' + mm + ':' + ss
this.rfc_time = this.rfc_time.replace(/s+/g, 'T')+'+08:00'
pm.variables.set('rfctime',this.rfc_time)
// console.log(pm.variables.get('rfctime'))

const privkey = pm.environment.get('pri_key').replace(/\n/g, "
")

// 随机字符串
const uuid = pm.variables.replaceIn('{{$randomUUID}}')
pm.variables.set('nonce_str', uuid)

const requestBodyRaw = pm.variables.replaceIn(pm.request.body == undefined ? '' : pm.request.body.raw)

const now = pm.variables.replaceIn('{{$timestamp}}')
pm.variables.set('req_time', now)
// 具体加密字段拼接请依据项目情况案例是:method+
+url+
+timestamp+
+nonce_str+
+body
var dataToSign = pm.request.method + "
" +
    pm.request.url.getPathWithQuery() + "
" +
    now + "
" +
    uuid + "
" +
    requestBodyRaw

console.log(dataToSign)

const sha256withrsa = new pmlib.rs.KJUR.crypto.Signature({"alg": "SHA256withRSA"});
sha256withrsa.init(privkey);

sha256withrsa.updateString(dataToSign);

const sign = pmlib.rs.hextob64(sha256withrsa.sign());

// console.log(sign);
pm.variables.set('sign', sign)
// 添加请求头
pm.request.headers.add({
    key:"Authorization",
    value:"SHA256-RSA nonce_str={{nonce_str}},timestamp={{req_time}},signature={{sign}}"
});
至此SHA256withRSA签名已完成
结语
这篇贴子到这里就结束了,最后,希望看这篇帖子的朋友能够有所收获。
postman接口签名教程(详细版)获取方式:留言【postman学习】即可
如果你觉得文章还不错,请大家 点赞、分享、留言 下,因为这将是我持续输出更多优质文章的最强动力!
风语者!平时喜欢研究各种技术,目前在从事后端开发工作,热爱生活、热爱工作。


 U8W/U8W-Mini使用与常见问题解决
 QT多线程的5种用法,通过使用线程解决UI主界面的耗时操作代码,防止界面卡死。...
 stm32使用HAL库配置串口中断收发数据(保姆级教程)
 分享几个国内免费的ChatGPT镜像网址(亲测有效)
 Allegro16.6差分等长设置及走线总结