您现在的位置是:首页 >技术教程 >【OAuth2.0 Client 总结】对接github第三方登录以及其他第三方登录总结网站首页技术教程
【OAuth2.0 Client 总结】对接github第三方登录以及其他第三方登录总结
之前搞 oauth 登录一直没有搞好,客户端、授权服务端、资源端一起搞对于我刚接触的小菜鸡来说,难度有点大。
然后就先搞了个 Client 端对接 Github 登录。 网上关于 Github 登录的资料有很多,而且框架对 Github 集成的也很好,配置起来并不麻烦。
对接Github登录
首先在 Github 上申请注册一个 oauth application,填写 callback url得到 client ID和 secret
默认的callback url 格式:{baseUrl}/login/oauth2/code/{registrationId}
在这里对接 GIthub 的默认重定向的地址就是http://xxxx/api/login/oauth2/code/github
如果对接其他的第三方就将 registrationId 改成 和我们配置文件中的一致即可
1、作为 Client 端只需要引入依赖
implementation 'org.springframework.boot:spring-boot-starter-oauth2-client'
2、然后在applicatiom.yml中进行相关配置
spring:
  security:
    oauth2:
      client:
        registration:
          github:
            clientId: 56ca77ae71xxxxxxx
            clientSecret: e1aa08298c5d0f5f9c35414355666b81xxxxxxx
            scope:
              - user:email
              - read:user
3、Create OAuth2User and OAuth2UserService Classes
主要用来定义 授权用户 的数据结构 和 加载 授权用户的相关数据
3.1、创建一个实体类去实现 OAuth2User 重写里面的方法
例如:
import java.util.Collection;
import java.util.Map;
import org.springframework.security.core.GrantedAuthority;
import org.springframework.security.oauth2.core.user.OAuth2User;

public class GitHubCustomOauth2User implements OAuth2User {

  private OAuth2User user;

  public GitHubCustomOauth2User(OAuth2User user) {
    this.user = user;
  }

  @Override
  public Map<String, Object> getAttributes() {
    return user.getAttributes();
  }

  @Override
  public Collection<? extends GrantedAuthority> getAuthorities() {
    return user.getAuthorities();
  }

  @Override
  public String getName() {
    return user.getAttribute("name");
  }

  public String getLogin() {
    return user.getAttribute("login");
  }

  public String getEmail() {
    return user.getAttribute("email");
  }
}
⚠️注意:对于对接不同的授权端是getName() 方法返回的值的名称发生变化
3.2 创建一个service 去继承 DefaultOAuth2UserService
里面实现加载授权用户数据的功能,根据不同授权端转变为不同的 OAuth2User
例如:
package com.openbayes.application.oauth;

import com.openbayes.domain.oauth.GitHubCustomOauth2User;
import com.openbayes.domain.oauth.SiomCustomOauth2User;
import java.util.Map;
import lombok.extern.slf4j.Slf4j;
import org.springframework.security.oauth2.client.registration.ClientRegistration;
import org.springframework.security.oauth2.client.userinfo.DefaultOAuth2UserService;
import org.springframework.security.oauth2.client.userinfo.OAuth2UserRequest;
import org.springframework.security.oauth2.core.OAuth2AccessToken;
import org.springframework.security.oauth2.core.OAuth2AuthenticationException;
import org.springframework.security.oauth2.core.user.OAuth2User;
import org.springframework.stereotype.Service;

@Service
@Slf4j
public class CustomOauth2UserService extends DefaultOAuth2UserService {

  @Override
  public OAuth2User loadUser(OAuth2UserRequest userRequest) throws OAuth2AuthenticationException {
    OAuth2AccessToken accessToken = userRequest.getAccessToken();
    String tokenValue = accessToken.getTokenValue();
    log.info("accessToken value: {}", tokenValue);

    ClientRegistration clientRegistration = userRequest.getClientRegistration();
    ClientRegistration.ProviderDetails providerDetails = clientRegistration.getProviderDetails();
    log.info("clientRegistration 为:{}", clientRegistration);
    log.info("clientRegistration providerDetails 为:{}", providerDetails);

    String attributeName =
        userRequest
            .getClientRegistration()
            .getProviderDetails()
            .getUserInfoEndpoint()
            .getUserNameAttributeName();
    log.info("attributeName 为:{}", attributeName);

    Map<String, Object> additionalParameters = userRequest.getAdditionalParameters();
    log.info("additionalParameters 为:{}", additionalParameters);

    OAuth2User oAuth2User = super.loadUser(userRequest);
    log.info("User information response: {}", oAuth2User.getAttributes());

    if (clientRegistration.getRegistrationId().equals("github")) {
      GitHubCustomOauth2User gitHubCustomOauth2User = new GitHubCustomOauth2User(oAuth2User);
      log.info("gitHubCustomOauth2User 的 Attributes 为:{}", gitHubCustomOauth2User.getAttributes());
      return gitHubCustomOauth2User;
    } else {
      xxxCustomOauth2User xxCustomOauth2User = new xxCustomOauth2User(oAuth2User);
      log.info("xxxCustomOauth2User 的 Attributes 为:{}", xxxxCustomOauth2User.getAttributes());
      return siomCustomOauth2User;
    }
  }
}
4、Configure Spring Security for OAuth2 Login
配置 OAuth Login 的配置
例如
   @Autowired private OAuth2AuthorizedClientService authorizedClientService;
    @Autowired private OAuth2AuthorizedClientRepository oAuth2AuthorizedClientRepository;
    @Autowired private CustomOauth2UserService customOauth2UserService;
    @Autowired private Oauth2LoginSuccessHandler oauth2LoginSuccessHandler;
    @Autowired private Oauth2LoginFailedHandler oauth2LoginFailedHandler;
    @Autowired private Oauth2LoginOutSuccessHandler oauth2LoginOutSuccessHandler;

   http.oauth2Login()
              .loginPage("/login")
              .authorizedClientService(authorizedClientService)
              .authorizedClientRepository(oAuth2AuthorizedClientRepository)
              .userInfoEndpoint().userService(customOauth2UserService)
              .and()
              .successHandler(oauth2LoginSuccessHandler)
              .failureHandler(oauth2LoginFailedHandler);
这里面的配置包含了 OAuth 集群下的一些配置(下面讲到),加载用户信息的服务为刚才我们定义的 Service ,以及用户登录成功 和登录失败的 handler
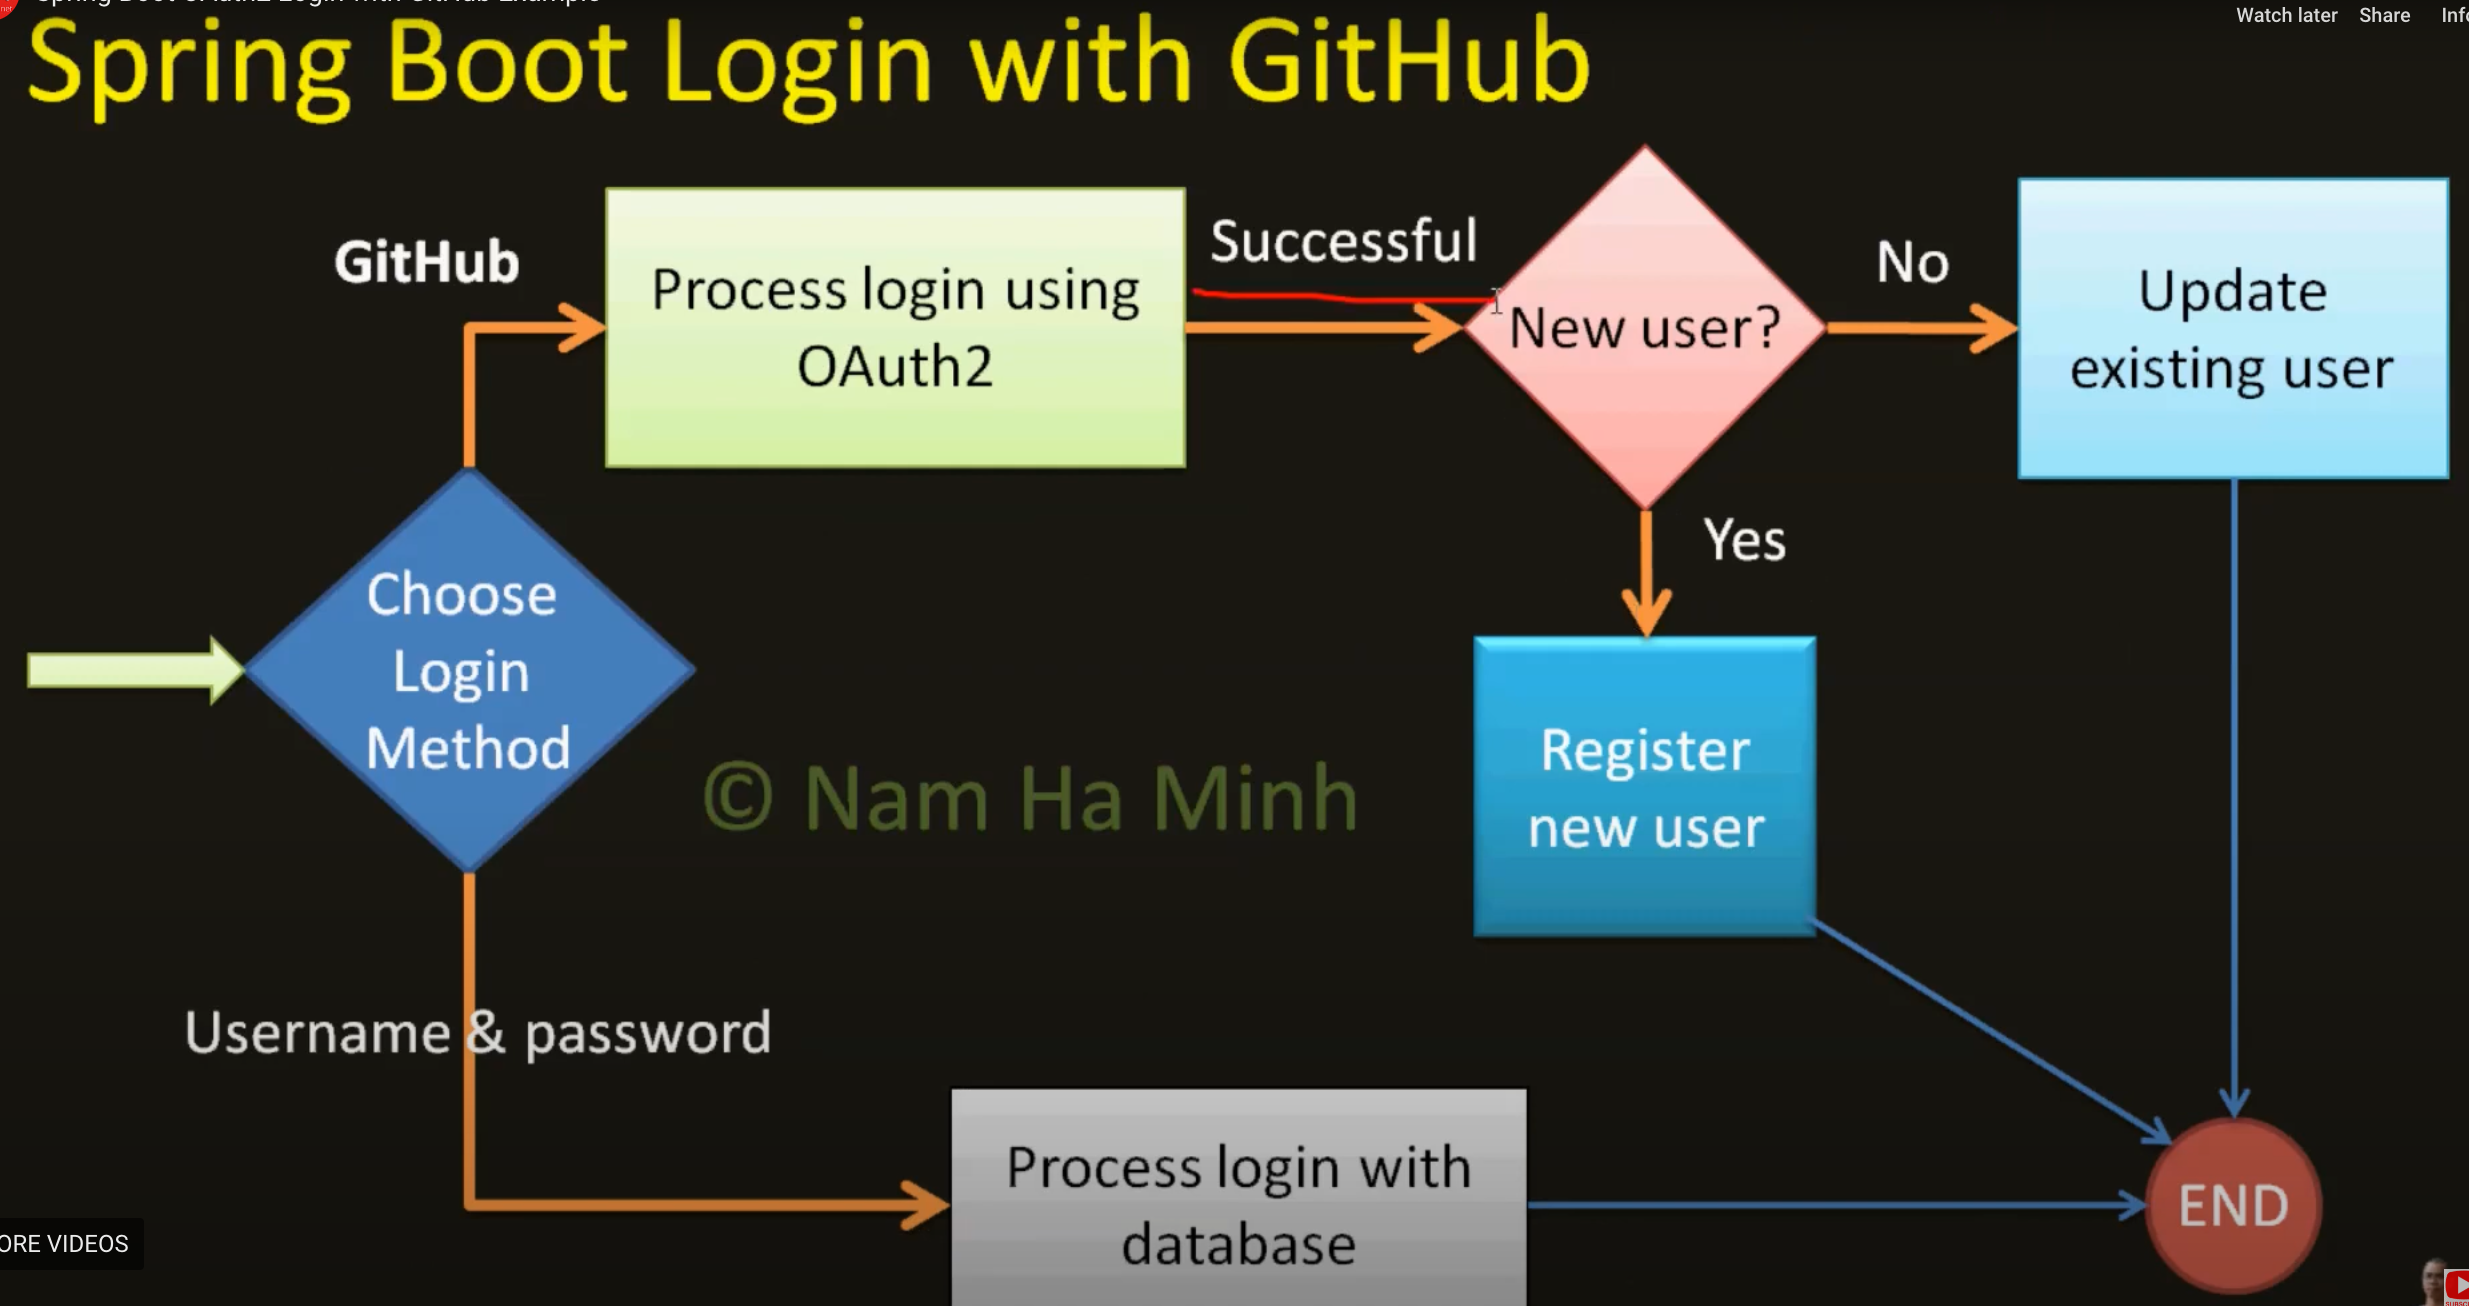
5、extends SimpleUrlAuthenticationSuccessHandler
这个里面主要用来处理授权成功之后的逻辑,是注册用户还是直接登录等业务逻辑
一张图来解释

例子
@Component
@Slf4j
public class Oauth2LoginSuccessHandler extends SimpleUrlAuthenticationSuccessHandler {

  @Autowired private CustomOauth2UserService customOauth2UserService;

  @Autowired private UserRepository userRepository;

  @Autowired private UserApplicationService userApplicationService;

  @Autowired private TokenService tokenService;

  @Override
  public void onAuthenticationSuccess(
      HttpServletRequest request, HttpServletResponse response, Authentication authentication)
      throws IOException, ServletException {

    if (authentication instanceof OAuth2AuthenticationToken) {
      OAuth2AuthenticationToken oauth2Token = (OAuth2AuthenticationToken) authentication;
      String authorizedProvider = oauth2Token.getAuthorizedClientRegistrationId();
      log.info("authorizedProvider为{}", authorizedProvider);
      String redirectUrl = null;

      if (authorizedProvider.equals("github")) {

        GitHubCustomOauth2User oauth2User = (GitHubCustomOauth2User) authentication.getPrincipal();

          是注册呢?还是直接返回 token呢? 根据相关业务逻辑来判断

      } else if (authorizedProvider.equals("siom")) {
        SiomCustomOauth2User siomCustomOauth2User =
            (SiomCustomOauth2User) authentication.getPrincipal();

            和上面同理

    }
  }
}
6、extends SimpleUrlAuthenticationFailureHandler
这里主要为了登录失败的情况,主要做一些打印日志,以及给前端返回错误信息。这样前端可以根据返回的结果判断授权登录是成功还是失败,做不一样的操作以及跳转到不同的页面
到这里, 在单节点上使用 Github 登录就已经结束了
OAuth Logout
其实还可以引入登出的逻辑,登出的 handler 里面就是清理 session 的工作
- 首先要进行 logout 的配置
例如
 http.logout()
              .logoutUrl("/auth/logout")
              .logoutSuccessHandler(oauth2LoginOutSuccessHandler)
              .invalidateHttpSession(true)
              .clearAuthentication(true)
              .deleteCookies("JSESSIONID");
上面的配置就是,等你调用接口 /auth/logout 登出的时候,会对seeion 以及 cookie进行处理,oauth2LoginOutSuccessHandler 也会做相应的操作(打印日志,返回信息给前端)
例如
@Component
@Slf4j
public class Oauth2LoginOutSuccessHandler extends SimpleUrlLogoutSuccessHandler {

  @Override
  public void onLogoutSuccess(
      HttpServletRequest request, HttpServletResponse response, Authentication authentication)
      throws IOException, ServletException {
    HttpSession session = request.getSession(false);
    if (session != null) {
      session.invalidate();
    }

    log.info("User logged out at {}", new Date());
    response.setStatus(HttpStatus.UNAUTHORIZED.value());
    response.setContentType(MediaType.APPLICATION_JSON_VALUE);
    response.getWriter().write("{"message": "Logout successful"}");
    response.getWriter().flush();
  }
}
对接其他作为Client登录
如果我们还想引入其他第三方的登录,和上面的流程一下的。 我们这次增加一个和框架没有集成的第三方(像github和谷歌等因为集成的很好,我们的配置就会很好,流程也会比较顺利)
1、首先就是client 的配置
security:
    oauth2:
      client:
        registration:
          github:
            clientId: 56ca77ae71cxxxxxx
            clientSecret: e1aa08298c5d0f5f9c35414355666b8xxxxxxxxx
            scope:
              - user:email
              - read:user
          aaaa:
            client-id: 6b91bc5axxxxxx
            client-secret: 97eabe644084f6442a58bxxxxxx
            authorization-grant-type: authorization_code
            redirect-uri: "http://xxxxxxx/api/login/oauth2/code/aaaa"
            client-name: SIOM
        provider:
          aaaa:
            authorization-uri: xxxxxxx
            token-uri: xxxxxx
            user-info-uri: xxxxxxx
            user-name-attribute: id
这里的配置就是看官方文档进行配置。学习网址:OAuth2
2、创建新的实体类去实现 OAuth2User
例如
import java.util.Collection;
import java.util.Map;
import org.springframework.security.core.GrantedAuthority;
import org.springframework.security.oauth2.core.user.OAuth2User;

public class xxxxCustomOauth2User implements OAuth2User {

  private OAuth2User user;

  public xxxxCustomOauth2User(OAuth2User user) {
    this.user = user;
  }

  @Override
  public Map<String, Object> getAttributes() {
    return user.getAttributes();
  }

  @Override
  public Collection<? extends GrantedAuthority> getAuthorities() {
    return user.getAuthorities();
  }

  @Override
  public String getName() {
    return user.getAttribute("id");
  }

  public String getAccountNo() {
    return (String)
        ((Map<String, Object>) user.getAttributes().get("attributes")).get("account_no");
  }

  public String getUserId() {
    return (String) ((Map<String, Object>) user.getAttributes().get("attributes")).get("user_uid");
  }

  public String getEmail() {
    return (String) ((Map<String, Object>) user.getAttributes().get("attributes")).get("email");
  }

  public String getMobilePhone() {
    return (String) ((Map<String, Object>) user.getAttributes().get("attributes")).get("mobile");
  }
}
⚠️注意:这里重写的 getName() 就是根据返回的授权用户的 id
3、在 extends DefaultOAuth2UserService 的Service 中增加判断,授权用户最终转变为那个授权实体类进行返回
上面的例子上已经有所展示
4、在 loginSuccessHandler 里面增加判断是那个 AuthorizedClientRegistrationId ,进行不同的登录或者创建用户操作
在这里单节点下两个不同的第三方的 OAuth Client 的整体流程就已经结束了,但是在集群环境下就会出现新的问题
1、 OAuth Client 集群环境下的会话丢失问题
解决方式
关于 JDBC Session的配置
1、引入 spring-session-jdbc 进行会话存储
application.yml
 spring:
  session:
    store-type: jdbc
    jdbc:
      initialize-schema: always
关于 OAuth Client 的配置
@Configuration
public class OAuth2AuthorizedClientConfig {

  @Bean
  public OAuth2AuthorizedClientRepository authorizedClientRepository() {
    return new HttpSessionOAuth2AuthorizedClientRepository();
  }

  @Bean
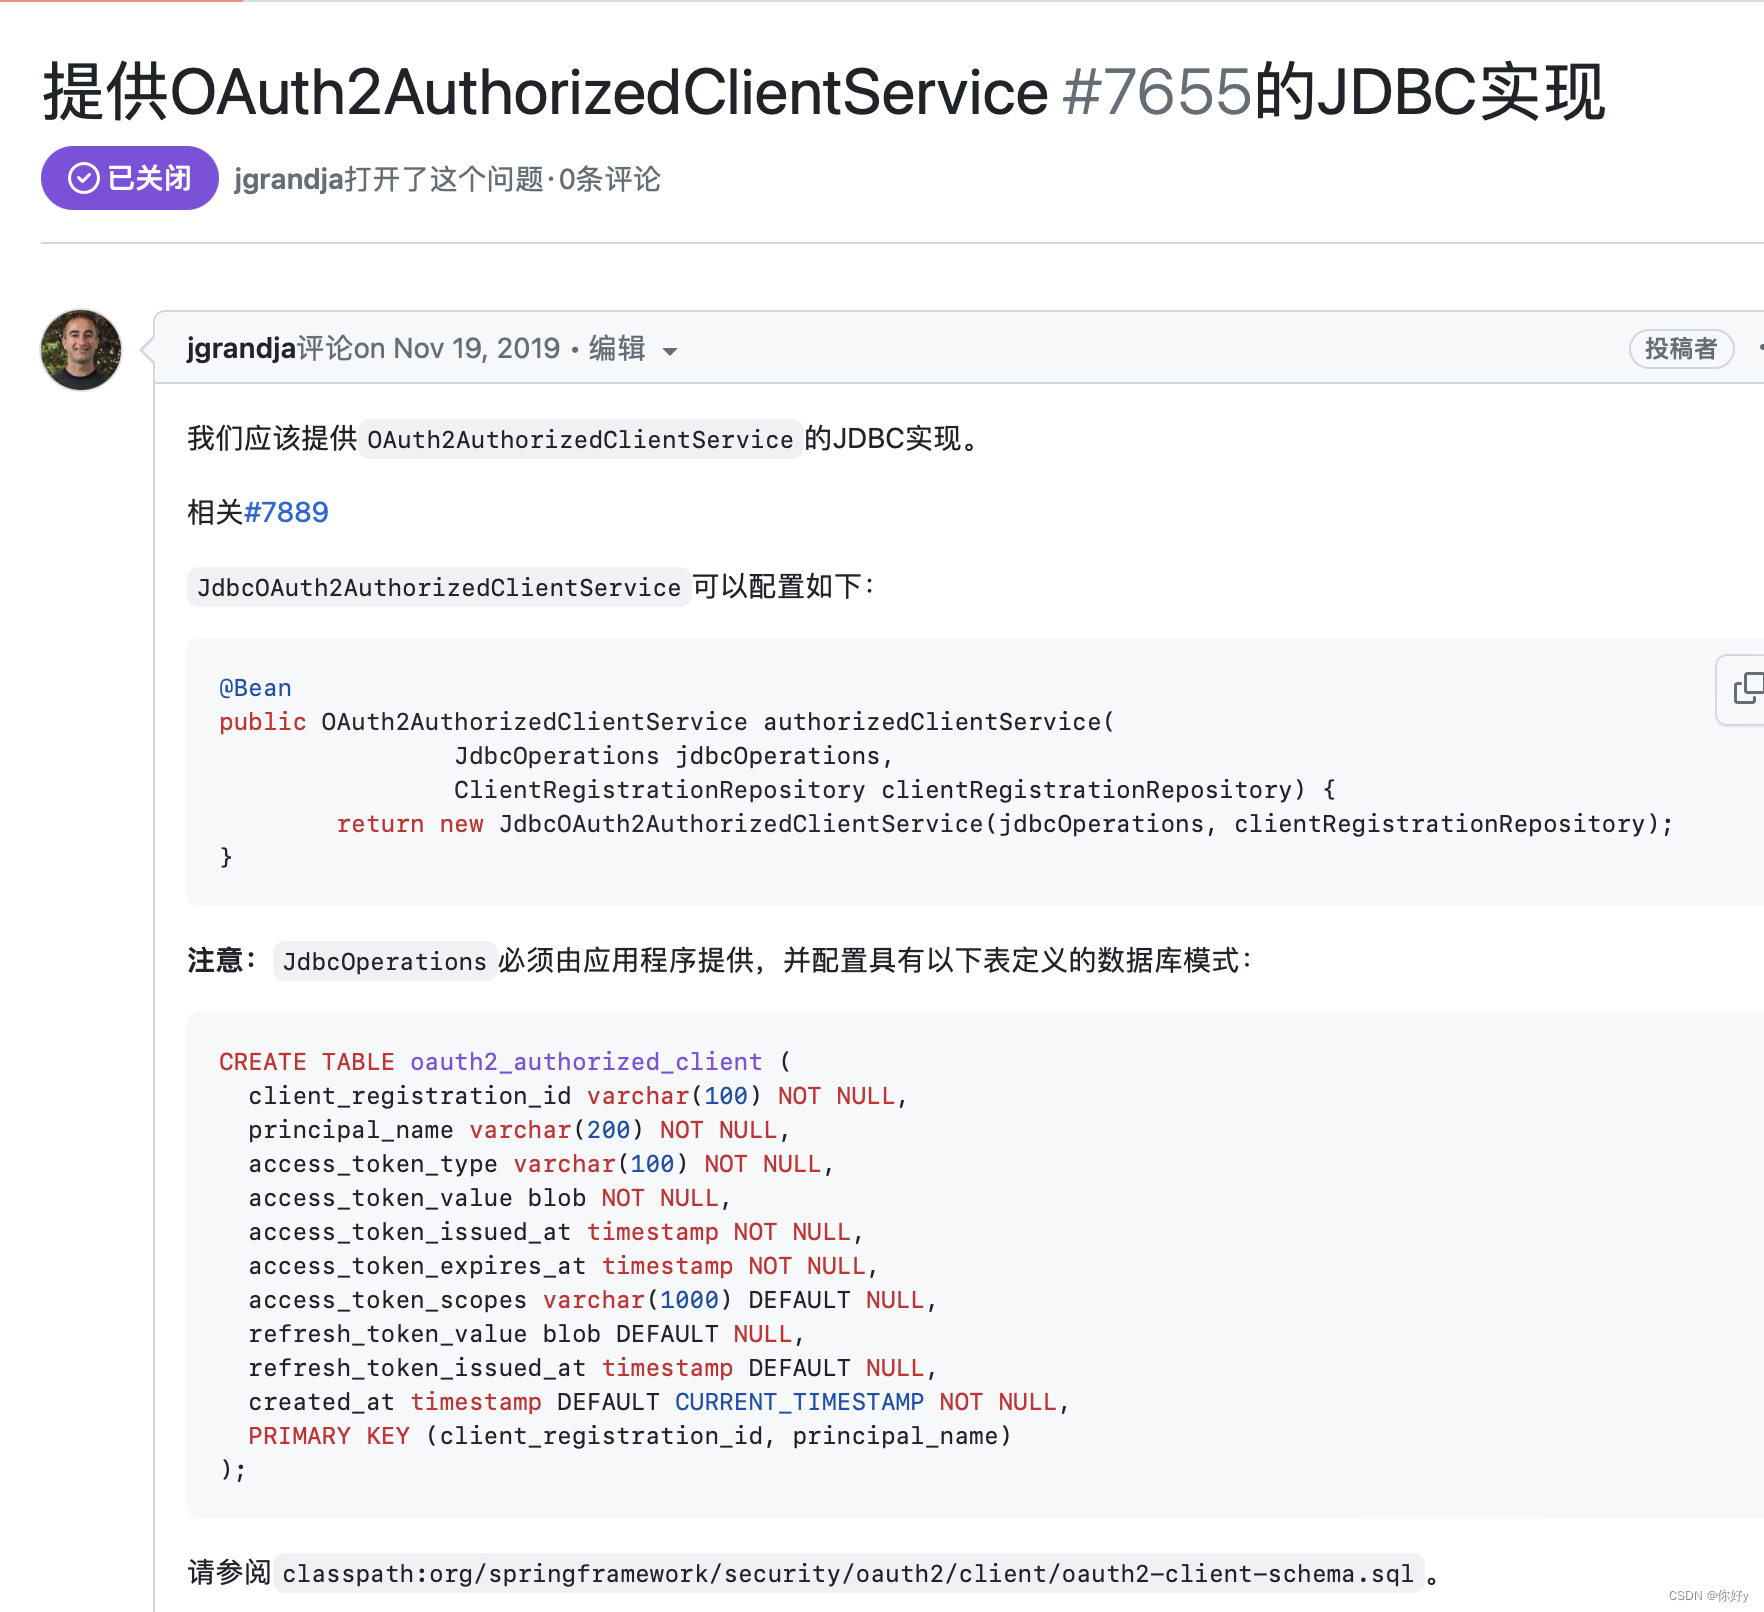
  public OAuth2AuthorizedClientService authorizedClientService(
      JdbcOperations jdbcOperations, ClientRegistrationRepository clientRegistrationRepository) {
    return new JdbcOAuth2AuthorizedClientService(jdbcOperations, clientRegistrationRepository);
  }
}
WebSecurity
   http.oauth2Login()
              .loginPage("/login")
              .authorizedClientService(authorizedClientService)
              .authorizedClientRepository(oAuth2AuthorizedClientRepository)
              .userInfoEndpoint().userService(customOauth2UserService)
              .and()
              .successHandler(oauth2LoginSuccessHandler)
              .failureHandler(oauth2LoginFailedHandler);
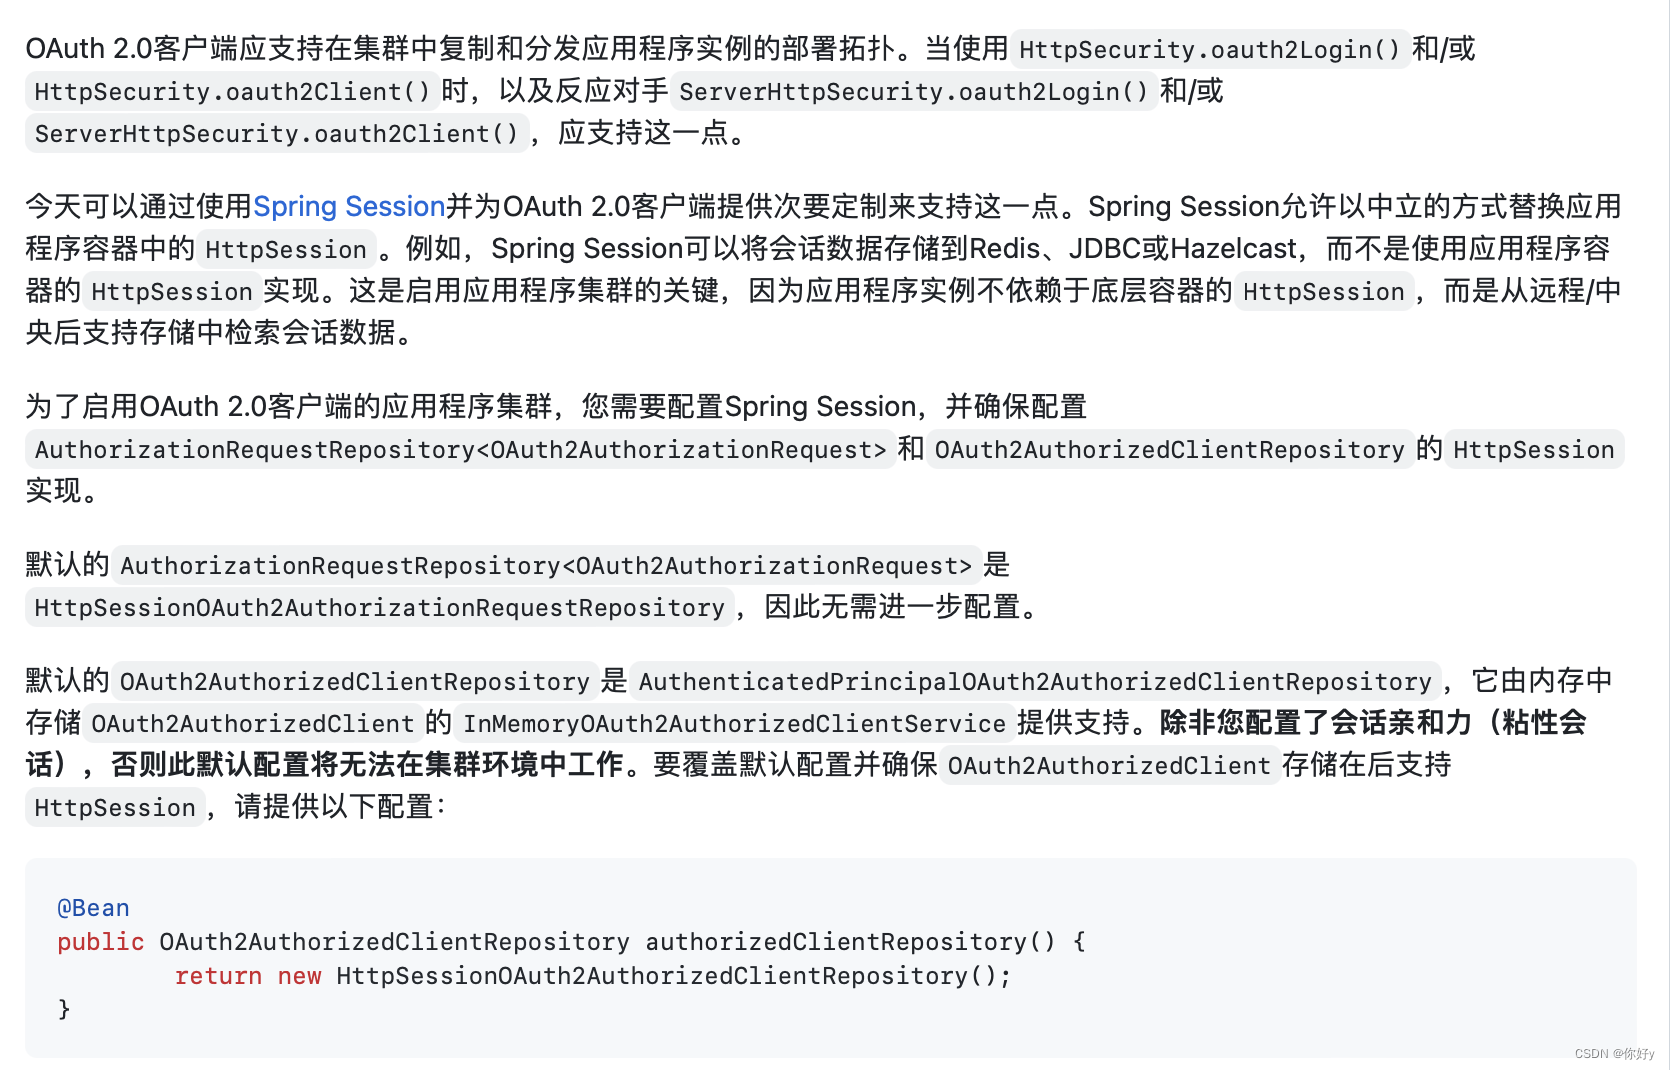
OAuth 2.0 Client supports application clustering
上面链接的摘录


2、authorization_request_not_fund
情况:在第一次成功登录后,客户端和授权端都登出,客户端再发起第三方登录的请求会出现这个问题。(不一定,需要看授权端的登出操作是否彻底请求用户的session及cookie)
无关集群环境,只是纯属工作中的坑。
解决:授权服务器在登出的时候要彻底清除用户的seesion 和 cookie信息


 U8W/U8W-Mini使用与常见问题解决
 QT多线程的5种用法,通过使用线程解决UI主界面的耗时操作代码,防止界面卡死。...
 stm32使用HAL库配置串口中断收发数据(保姆级教程)
 分享几个国内免费的ChatGPT镜像网址(亲测有效)
 Allegro16.6差分等长设置及走线总结