您现在的位置是:首页 >学无止境 >VSCode--Config网站首页学无止境
VSCode--Config
简介VSCode--Config
1. basic
1.1 调整字体

1.2 调整 remote login 输入框都在 TERMINAL 中实现

1.3 界面设置成中文
安装插件:

然后配置即可。
2.Linux
2.1 Install
2.1.1 offline Install vscode server
-
问题描述
内网开发,vscode 自身通过代理安装完 remote 插件后,还需要在服务器上安装 vscode server插件,但是因为没外网,会卡到这。 -
下载
https://github.com/microsoft/vscode/tags
根据 tag 找到对应的版本. -
安装
1.创建文件夹 并清空
mkdir -p ~/.vscode-server/bin
rm ~/.vscode-server/bin/* -rf  #把$HOME/.vscode-server/bin下的内容删干净,防止出错

2.移动下载的文件到1.创建的文件夹下并解压
mv vscode-server-linux-x64.tar.gz  ~/.vscode-server/bin	#这个好像写的不对...
cd ~/.vscode-server/bin
tar -zxf vscode-server-linux-x64.tar.gz
3.改名
mv vscode-server-linux-x64 ${commit_id} # 注意把:${commit_id}替换成对应的Commit ID

4. 在3.改名后的文件夹下创建一个文件 0
touch ~/.vscode-server/bin/${commit_id}/0
2.2 Debug config
有两种方法可配置 vscode 调试程序
方法一.每次在新项目时都自动生成相应的配置文件(推荐不熟悉配置参数的使用)
方法二.使用已有的配置文件(作为参考,自行修改)
需要先安装 插件:
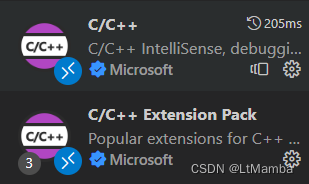
2.2.1 方法一
-
task.json
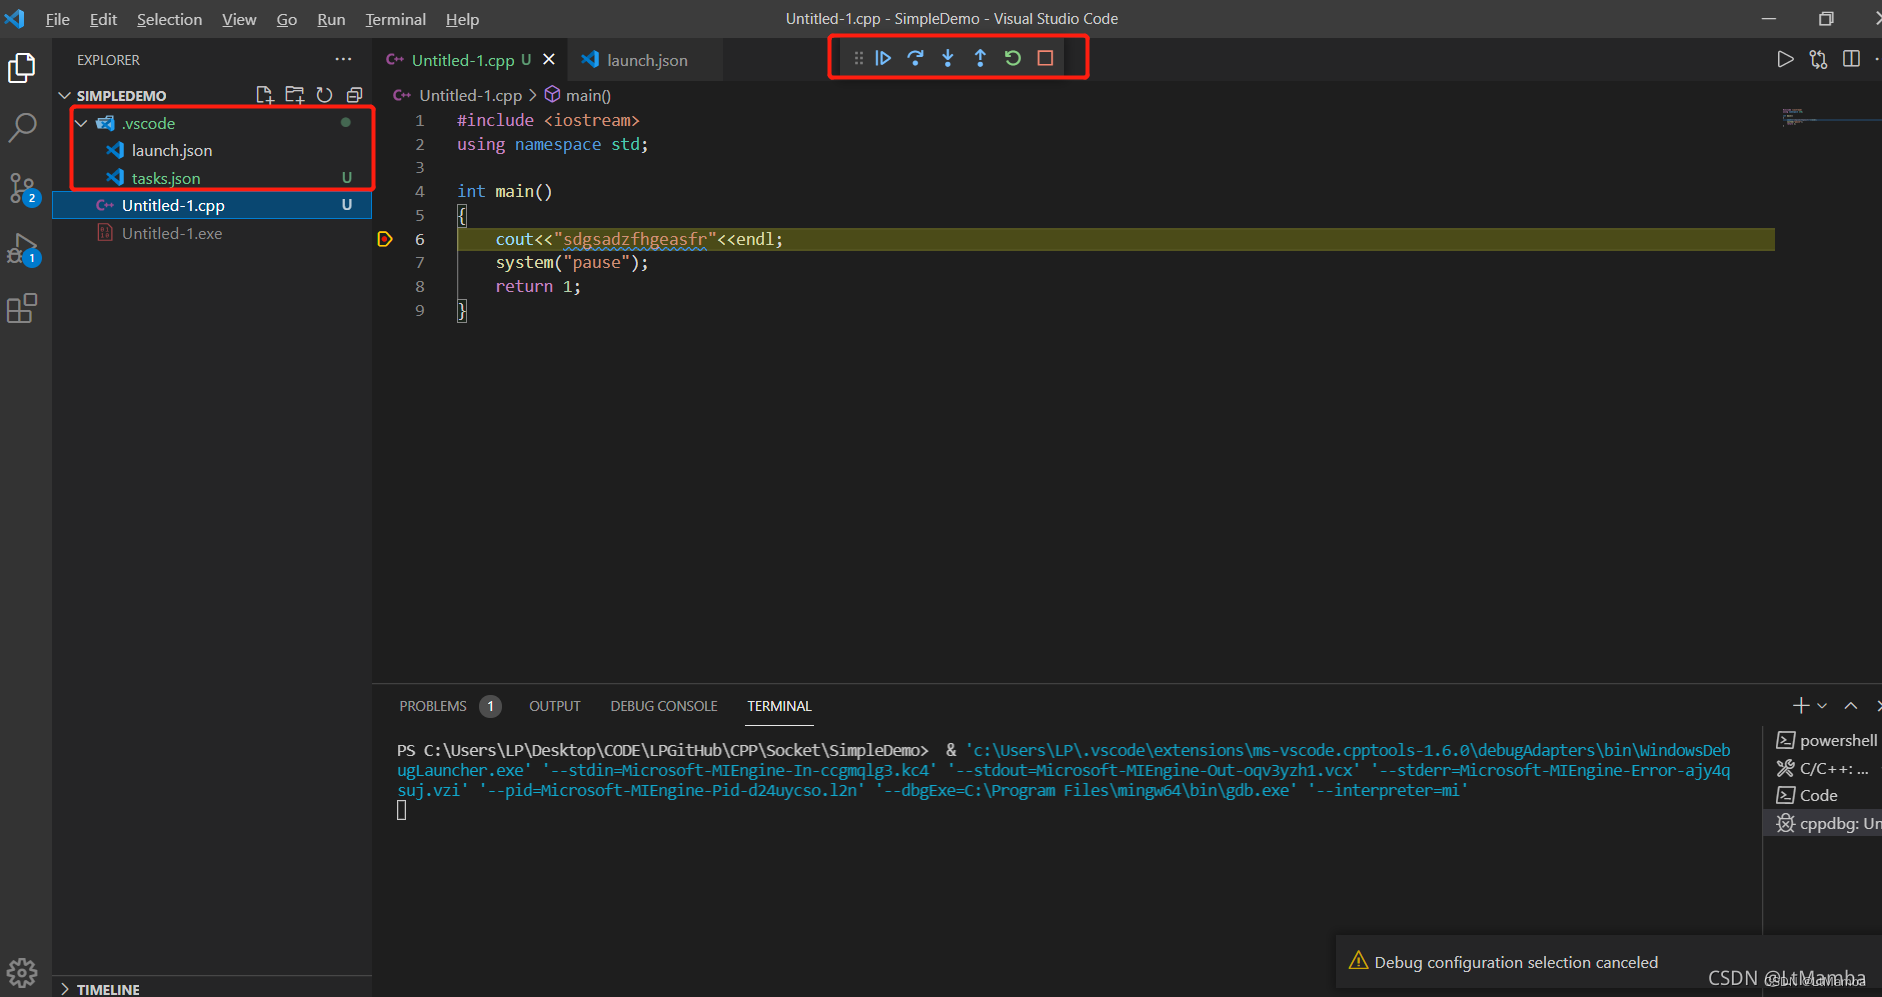
一般点 debug 时 会自动让选择生成(如下图步骤)。只有这个文件时可以直接单文件调试。
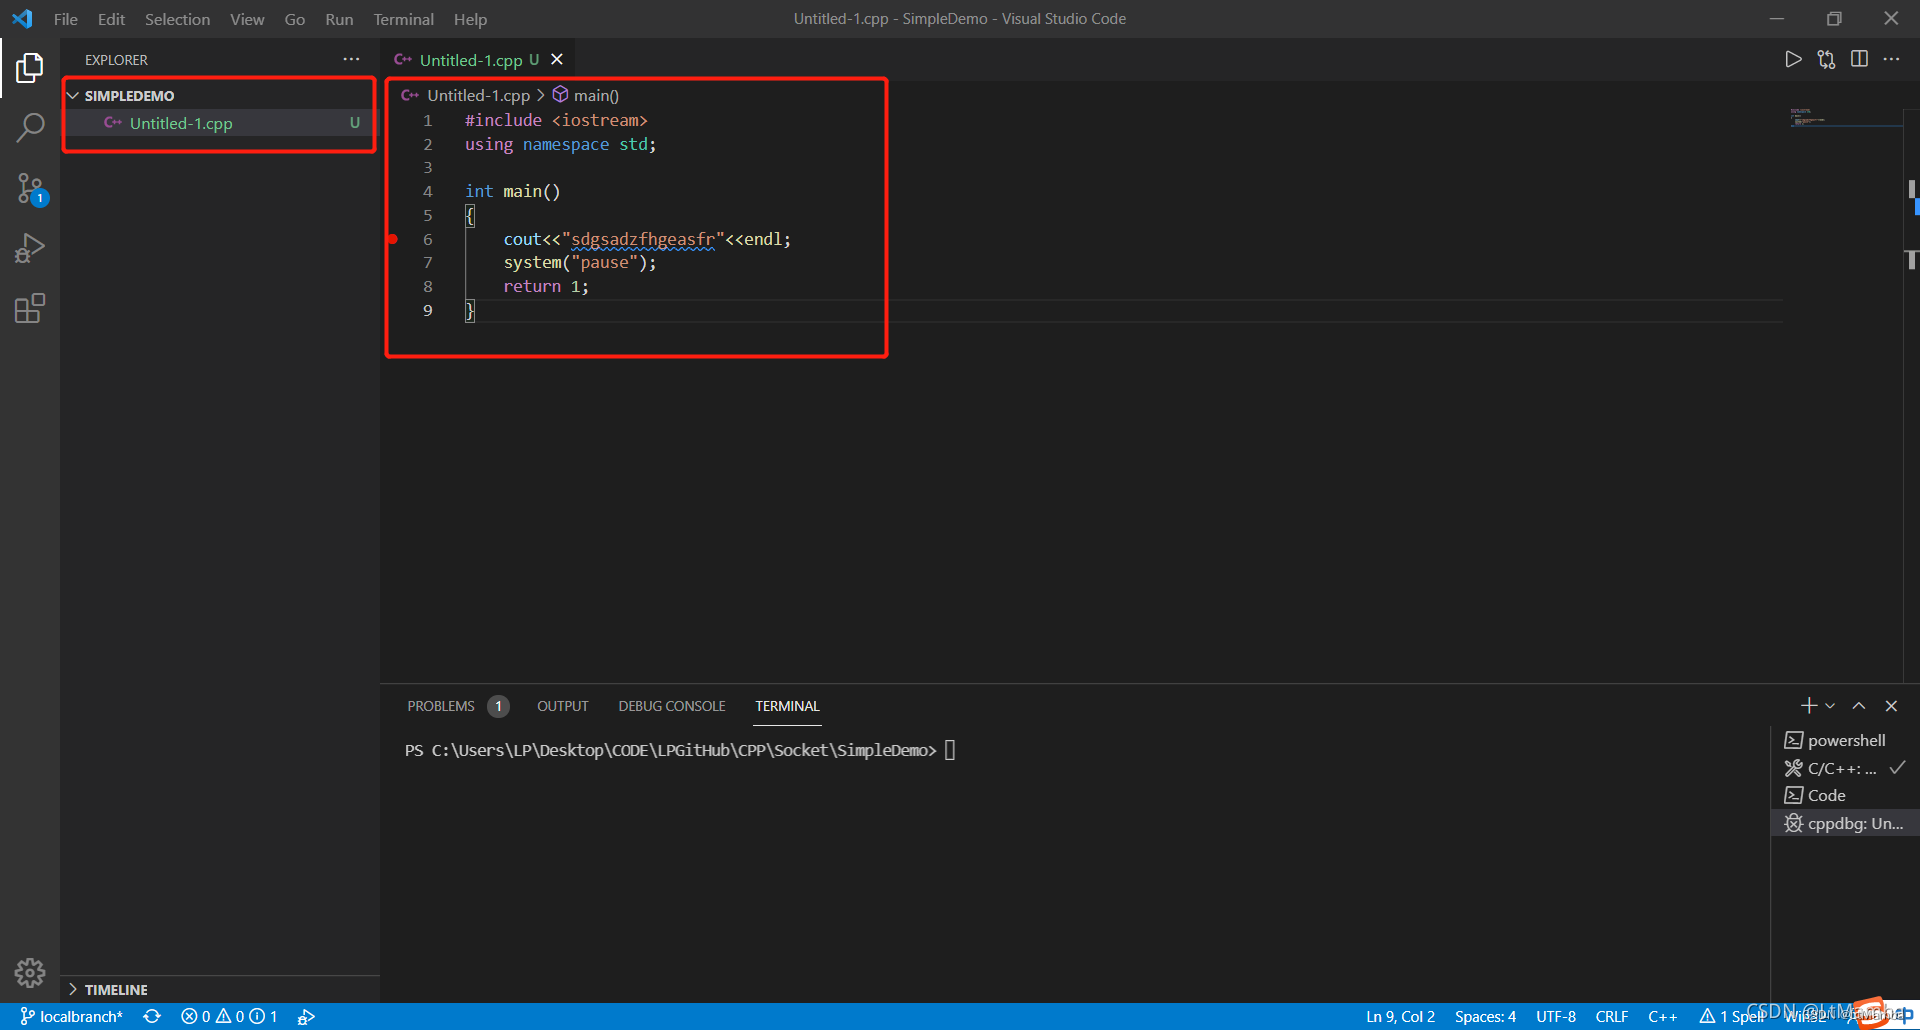
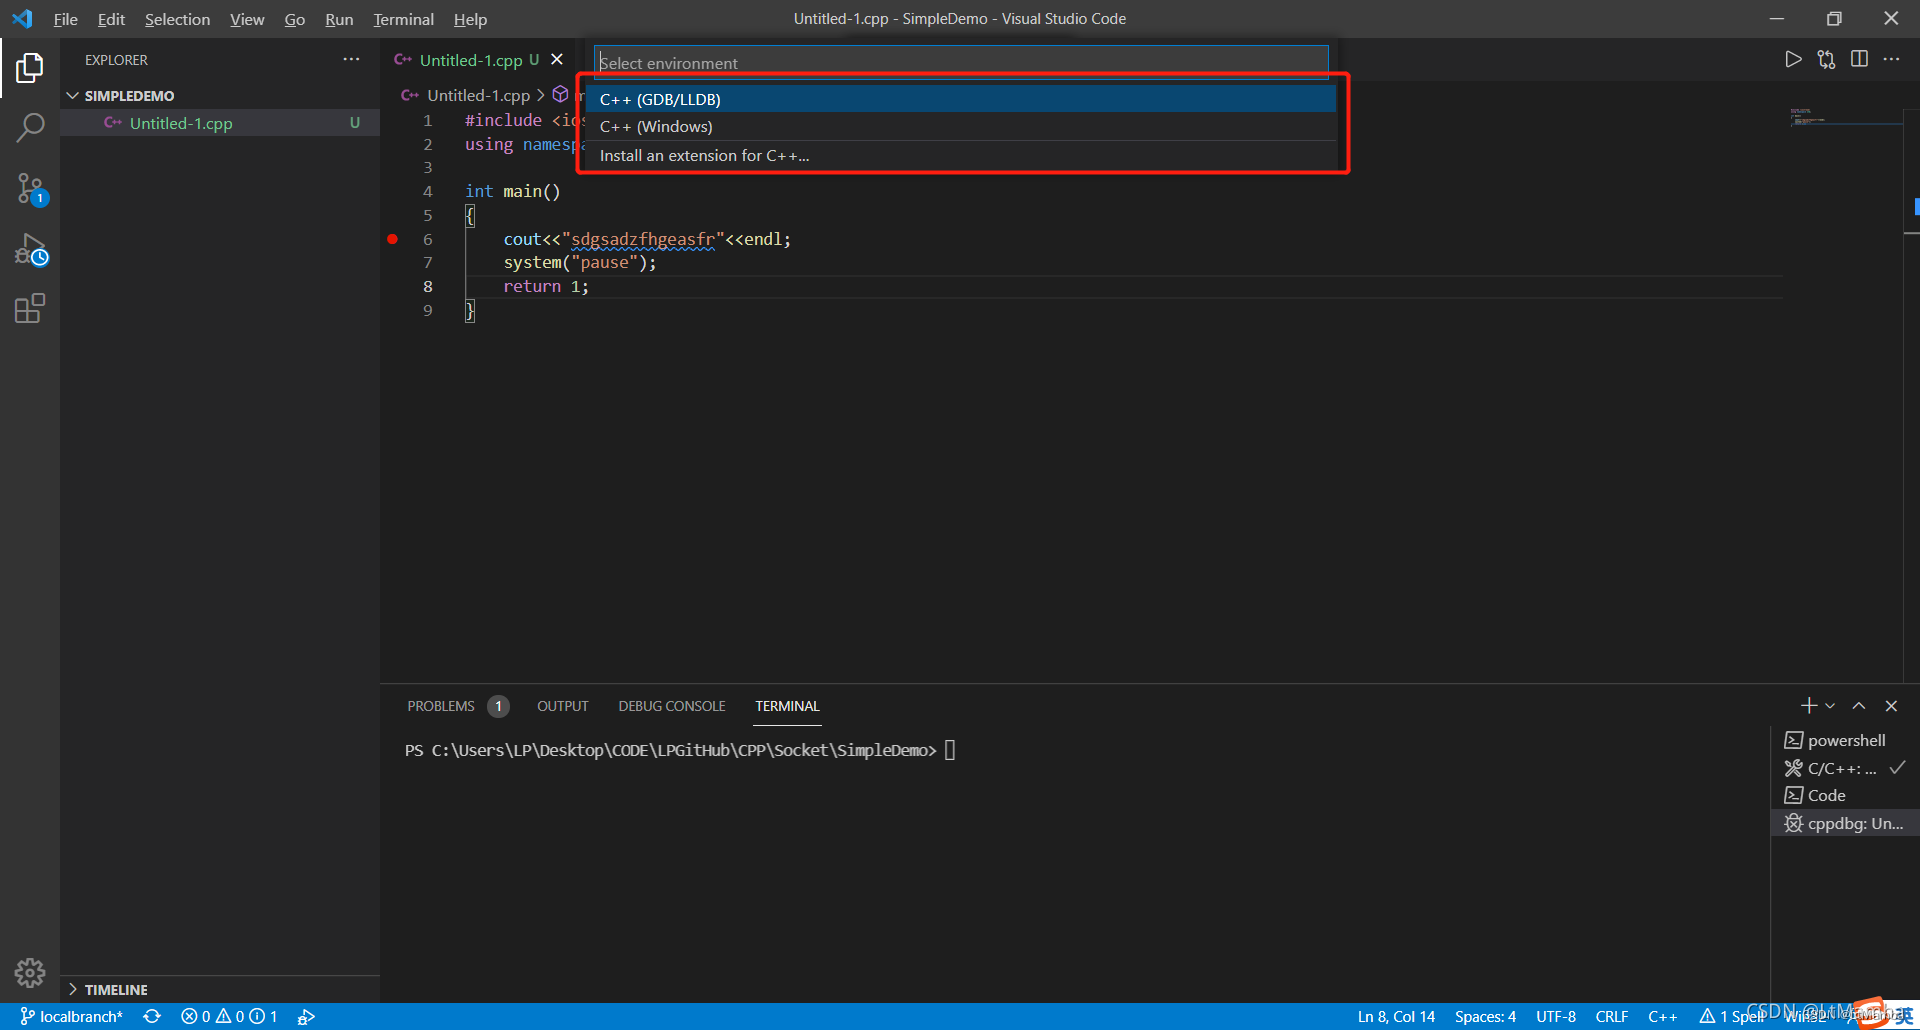
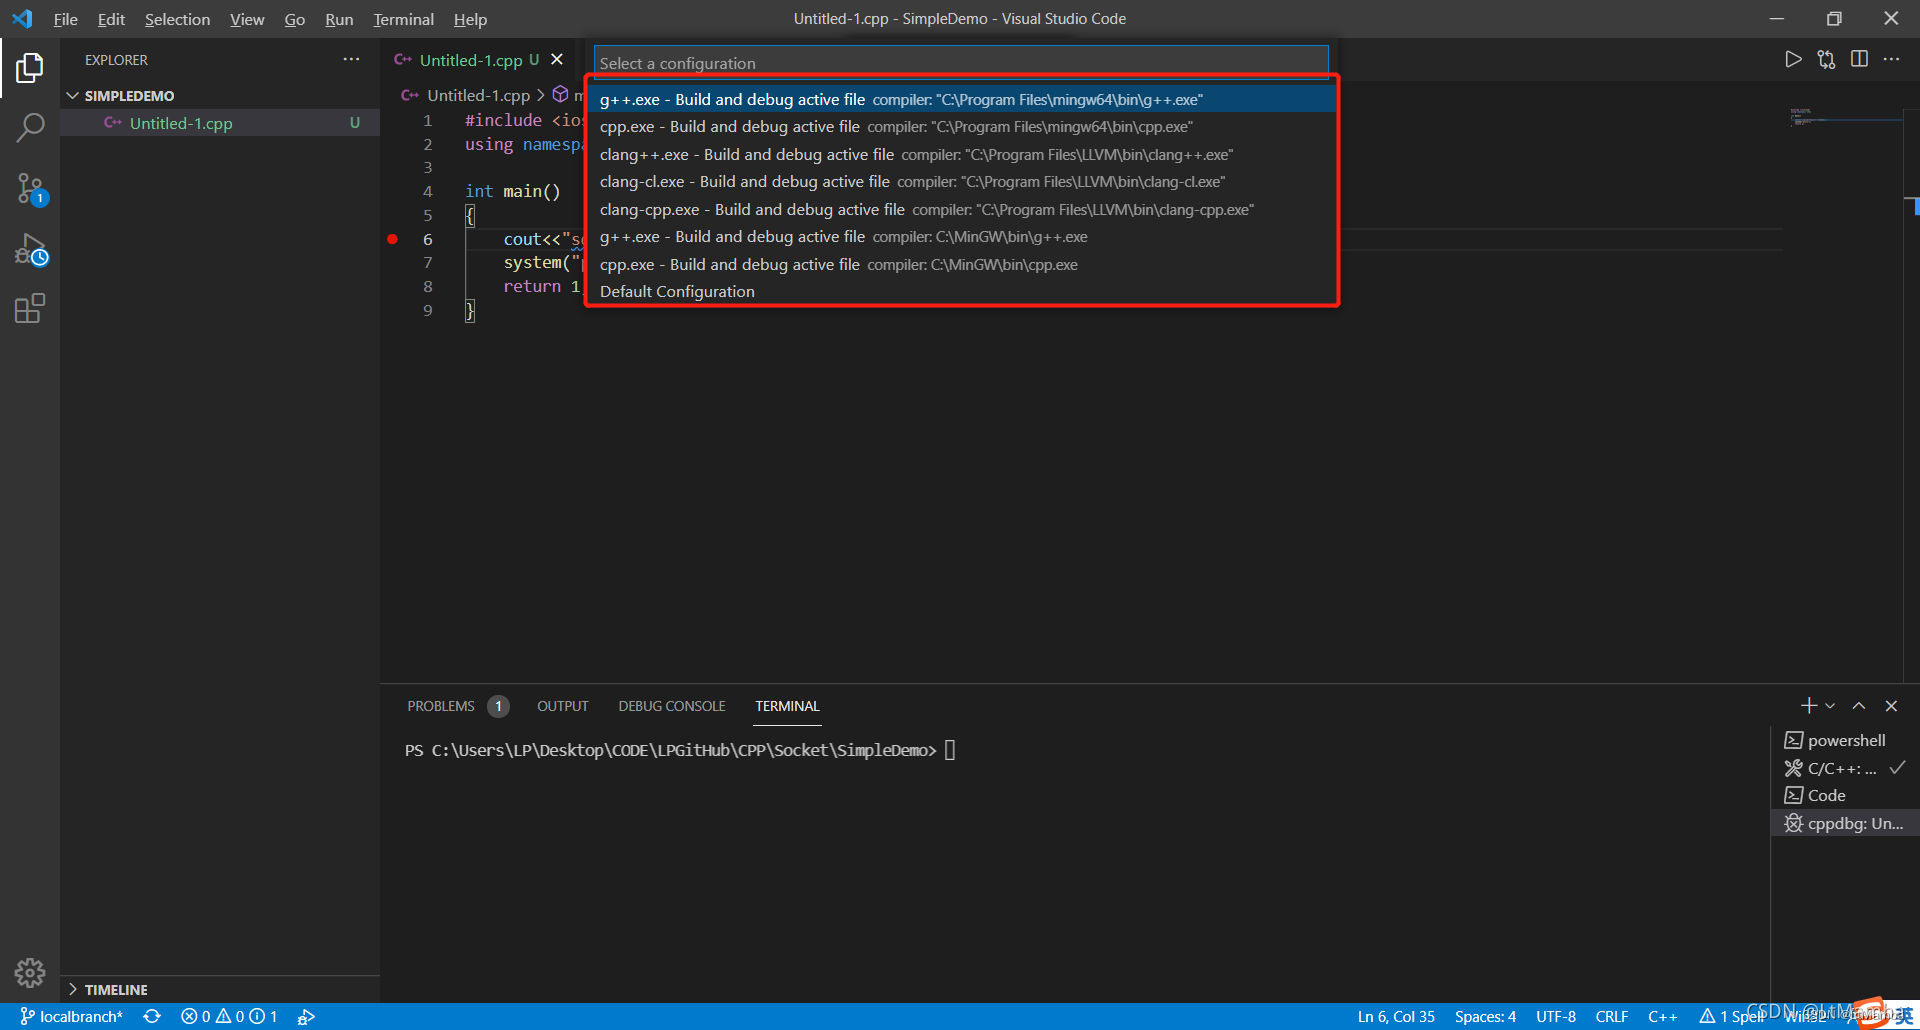
-
launch.json
一般不会直接生成,但可以先生成空的,再通过智能提示配置。
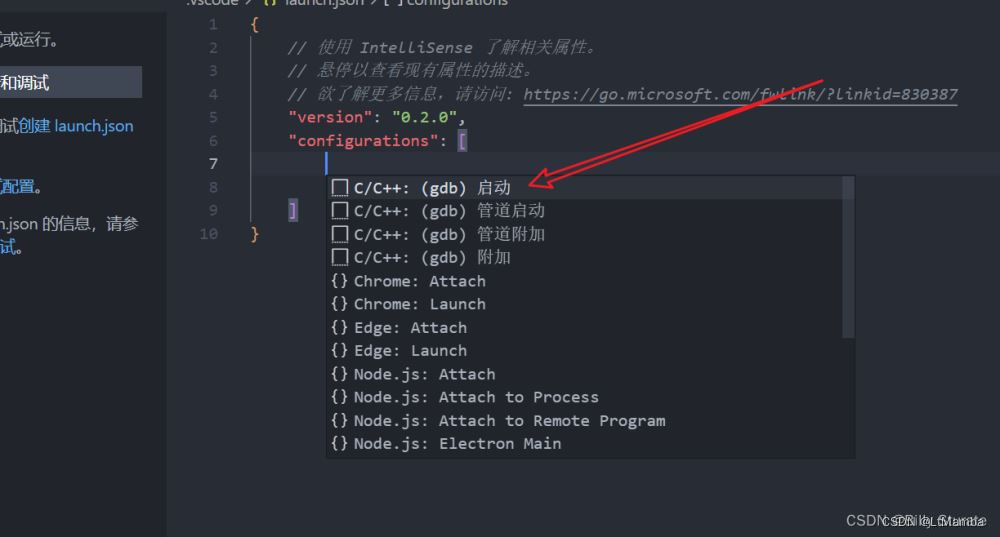
有这个launch.json 就必须 把这个和task.json联系上,
通过 key值: preLaunchTask 来配置(完整的可以看下面的方法二):"preLaunchTask": "prebuild", // 调试会话开始前执行的任务,一般为编译程序。与tasks.json的label相对应
2.2.1 方法二
- task.json
// 自动生成的json如下
{
    "tasks": [
        {
            "type": "cppbuild",
            "label": "prebuild",
            "command": "/usr/bin/g++",
            "args": [
                "-fdiagnostics-color=always",
                "-g",
                "${file}",
                "-o",
                "${fileDirname}/${fileBasenameNoExtension}",
                "-lpthread" //连接静态线程库
            ],
            "options": {
                "cwd": "${fileDirname}"
            },
            "problemMatcher": [
                "$gcc"
            ],
            "group": {
                "kind": "build",
                "isDefault": true
            },
            "detail": "Task generated by Debugger."
        }
    ],
    "version": "2.0.0"
}


//配置为自己想要的1
{
    "tasks": [
        {
            "type": "cppbuild",
            "label": "prebuild",// 任务名称,与launch.json的preLaunchTask相对应
            // "command": "/usr/bin/g++",
            "command": "make",	//我的小项目写的make编译,这个地方就能直接用。这个地方要重点理解。command + args 就相当于 g++ mainc.cpp -o main
            "args": [
                // "-fdiagnostics-color=always",
                // "-g",
                // "${file}",
                // "-o",
                // "${fileDirname}/${fileBasenameNoExtension}"
            ],
            "options": {
                "cwd": "${fileDirname}"
            },
            "problemMatcher": [
                "$gcc"
            ],
            "group": {
                "kind": "build",
                "isDefault": true
            },
            "detail": "Task generated by Debugger."
        }
    ],
    "version": "2.0.0"
}

//配置为自己想要的2
{
    "tasks": [
        {
            "type": "shell",  // 可以为shell或process,前者相当于先打开shell再输入命令,后者是直接运行命令
            "label": "build", // 任务名称,与launch.json的preLaunchTask相对应
            "command": "cd ${workspaceFolder}/build;cmake ..;make", // 要使用的编译器,这个地方要重点理解
            "args": [

            ],
            "options": {
                "cwd": "${workspaceFolder}"
            },
            "problemMatcher": [
                "$gcc"
            ],
            "group": {
                "kind": "build",
                "isDefault": true
            },
            "detail": "Task generated by Debugger."
        }
    ],
    "version": "2.0.0"
}
- launch.json
参数详解官方参考连接
//自动生成的一般为空的,如下
{
    // Use IntelliSense to learn about possible attributes.
    // Hover to view descriptions of existing attributes.
    // For more information, visit: https://go.microsoft.com/fwlink/?linkid=830387
    "version": "0.2.0",
    "configurations": []
}

//自动配置的
{
    // Use IntelliSense to learn about possible attributes.
    // Hover to view descriptions of existing attributes.
    // For more information, visit: https://go.microsoft.com/fwlink/?linkid=830387
    "version": "0.2.0",
    "configurations": [
        {
            "name": "(gdb) Launch",
            "type": "cppdbg",
            "request": "launch",
            "program": "${fileDirname}/${fileBasenameNoExtension}",
            "args": [
                "1asd"
            ],
            "stopAtEntry": false,
            "cwd": "${fileDirname}",
            "environment": [],
            "externalConsole": false,
            "MIMode": "gdb",
            "setupCommands": [
                {
                    "description": "Enable pretty-printing for gdb",
                    "text": "-enable-pretty-printing",
                    "ignoreFailures": true
                },
                {
                    "description": "Set Disassembly Flavor to Intel",
                    "text": "-gdb-set disassembly-flavor intel",
                    "ignoreFailures": true
                }
            ],
            "preLaunchTask": "prebuild", // 调试会话开始前执行的任务,一般为编译程序。与tasks.json的label相对应
        }
    ]
}


//自己根据官方文档Variables Reference 进行configurations配置示例1
{
    // Use IntelliSense to learn about possible attributes.
    // Hover to view descriptions of existing attributes.
    // For more information, visit: https://go.microsoft.com/fwlink/?linkid=830387
    "version": "0.2.0",
    "configurations": [
        {
            "name": "g++ - Build and debug active file", // 配置名称,将会在启动配置的下拉菜单中显示
            "type": "cppdbg",  // 配置类型,这里只能为cppdbg
            "request": "launch",  // 请求配置类型,可以为launch(启动)或attach(附加)
            "program": "${workspaceFolder}/server", // 将要进行调试的程序的路径,根据自己需求进行设置
            "args": ["9999"], // 程序调试时传递给程序的命令行参数
            "stopAtEntry": false,  // 设为true时程序将暂停在程序入口处
            "cwd": "${workspaceFolder}",  // 调试程序时的工作目录
            "environment": [], // (环境变量)
            "externalConsole": true, // 调试时是否显示外部控制台窗口(就是弹出一个cmd窗口)
            "MIMode": "gdb", // 指定连接的调试器,可以为gdb或lldb。
            "setupCommands": [
                {
                    "description": "Enable pretty-printing for gdb",
                    "text": "-enable-pretty-printing",
                    "ignoreFailures": true
                }
            ],
            "preLaunchTask": "prebuild", // 调试会话开始前执行的任务,一般为编译程序。与tasks.json的label相对应
            "miDebuggerPath": "/usr/bin/gdb"
        }
    ]
}
F.Common Error
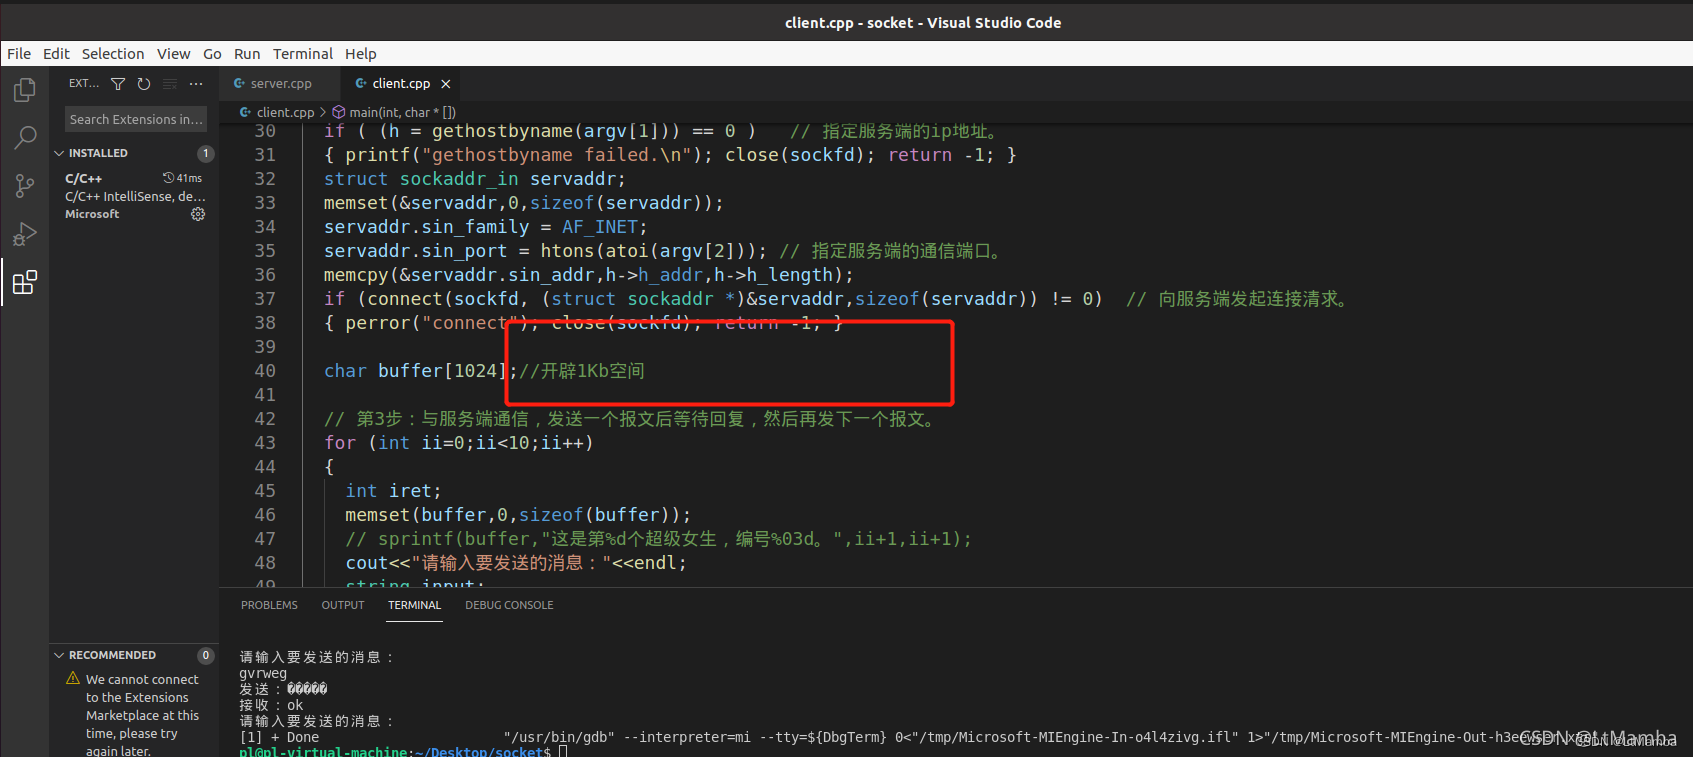
1.编辑界面中文乱码


2.输入中文输出乱码
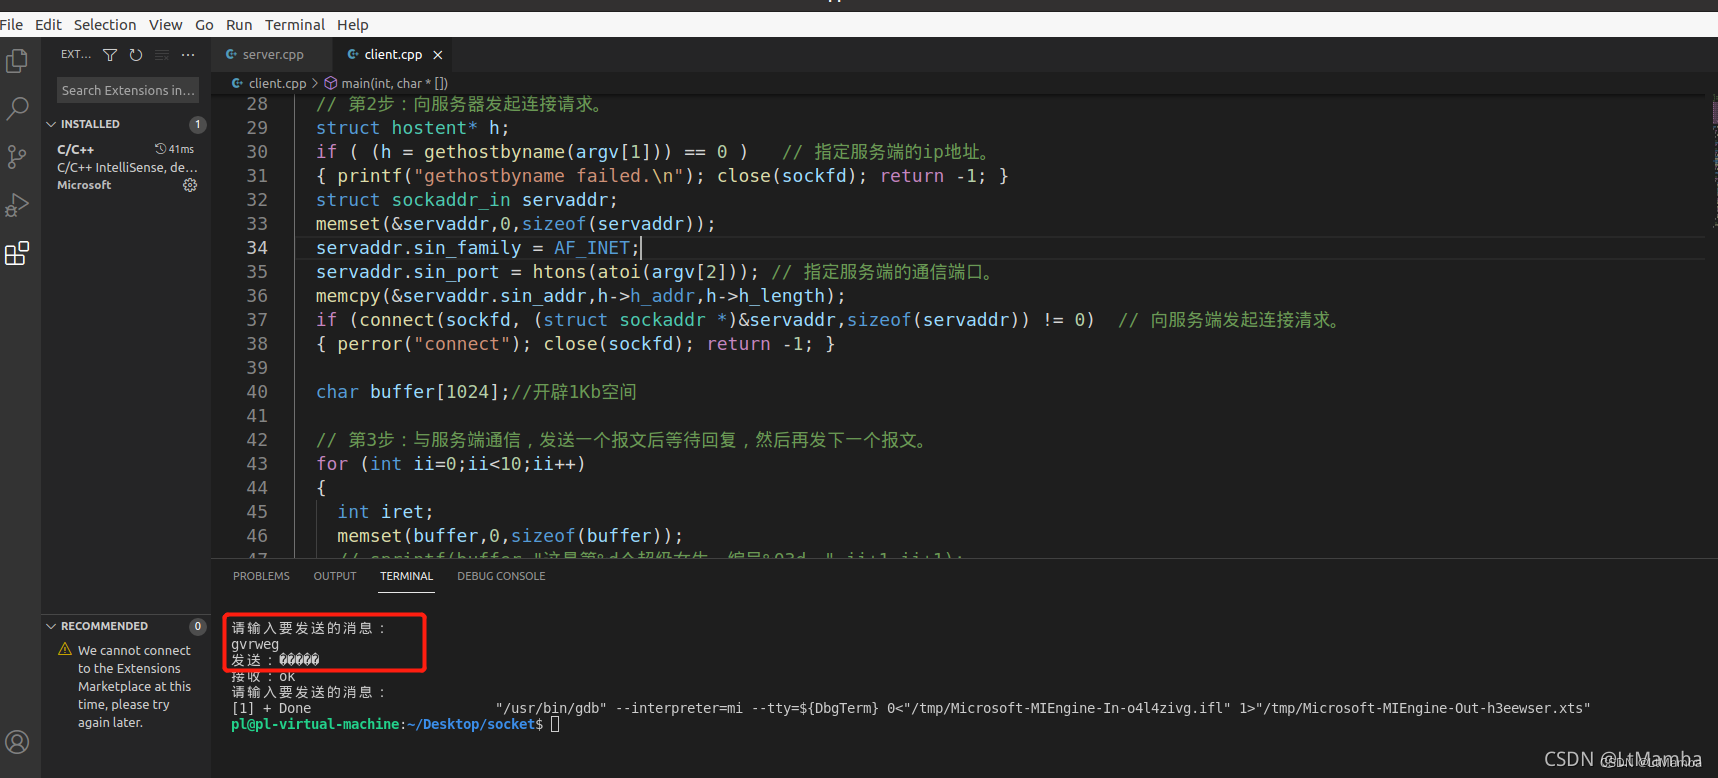
这是Printf输出乱码问题,和VsCode没关系!!!!!!
C++中Printf和scanf函数参数为char*,而把string类型传入时就会输出乱码,要转一下在输出就显示正常了。
C++ 中 char* 和string 区别
风语者!平时喜欢研究各种技术,目前在从事后端开发工作,热爱生活、热爱工作。


 U8W/U8W-Mini使用与常见问题解决
 分享几个国内免费的ChatGPT镜像网址(亲测有效)
 stm32使用HAL库配置串口中断收发数据(保姆级教程)
 QT多线程的5种用法,通过使用线程解决UI主界面的耗时操作代码,防止界面卡死。...
 SpringSecurity实现前后端分离认证授权