您现在的位置是:首页 >技术交流 >nacos注册中心替换成eureka网站首页技术交流
nacos注册中心替换成eureka
背景
项目使用的springcloud、nacos、redis等插件,但是nacos比较重,小项目使用不到,想用一个tomcat部署项目,所以准备用eureka替换nacos;
eureka
Eureak 是Netflix 开源微服务框架中一系列项目中的一个。Spring Cloud对其进行了二次封装,形成了Spring Cloud Netflix 子项目,但未对Netflix微服务实现原理进行更改,只是进行了Spring Boot化,使开发者更容易使用和整合。
在Eureka中,对于服务治理有如下3个概念:
-
服务治理服务器(Eureka服务器)
Eureka采用了CS的设计架构,Eureka Server 作为服务注册功能的服务器,也就是服务注册中心(这里的Eureka Server指的是我们自己专门写一个Java应用来引用Eureka Server的依赖,将这个应用作为注册中心)。而系统中的其他微服务,使用 Eureka的客户端连接到 Eureka Server并维持心跳连接。这样系统的维护人员就可以通过 Eureka Server 来监控系统中各个微服务是否正常运行。
-
服务注册代理(服务提供者)
如果一个微服务是一个服务提供者,那么可以通过服务注册代理将服务配置信息注册到治理服务器上。服务注册代理可以理解为一个Eureka客户端,负责将微服务所提供的服务向Eureka服务器执行注册、续约和注销等操作,以使服务消费者可以发现并进行消费。在服务注册时需要向服务治理服务器提供服务名称、宿主服务器IP地址、服务端口号、域名等主要数据。
Eureka的两个组件
- Eureka Server提供注册服务功能
各个微服务节点通过配置启动后,会在EurekaServer中进行注册,这样EurekaServer中的服务注册表中将会存储所有可用服务节点的信息,服务节点的信息可以在界面中直观看到。
<dependency>
    <groupId>org.springframework.cloud</groupId>
    <artifactId>spring-cloud-starter-netflix-eureka-server</artifactId>
</dependency>
- EurekaClient通过注册中心进行访问
EurekaClient可以分为提供者和消费者,他们都是一个Java客户端,客户端同时也具备一个内置的、使用轮询(round-robin)负载算法的负载均衡器。在应用启动后,将会向Eureka Server发送心跳(默认周期为30秒)。如果Eureka Server在多个心跳周期内没有接收到某个节点的心跳,EurekaServer将会从服务注册表中把这个服务节点移除(默认90秒)
<dependency>
    <groupId>org.springframework.cloud</groupId>
    <artifactId>spring-cloud-starter-netflix-eureka-client</artifactId>
</dependency>
实施
一、服务治理服务器
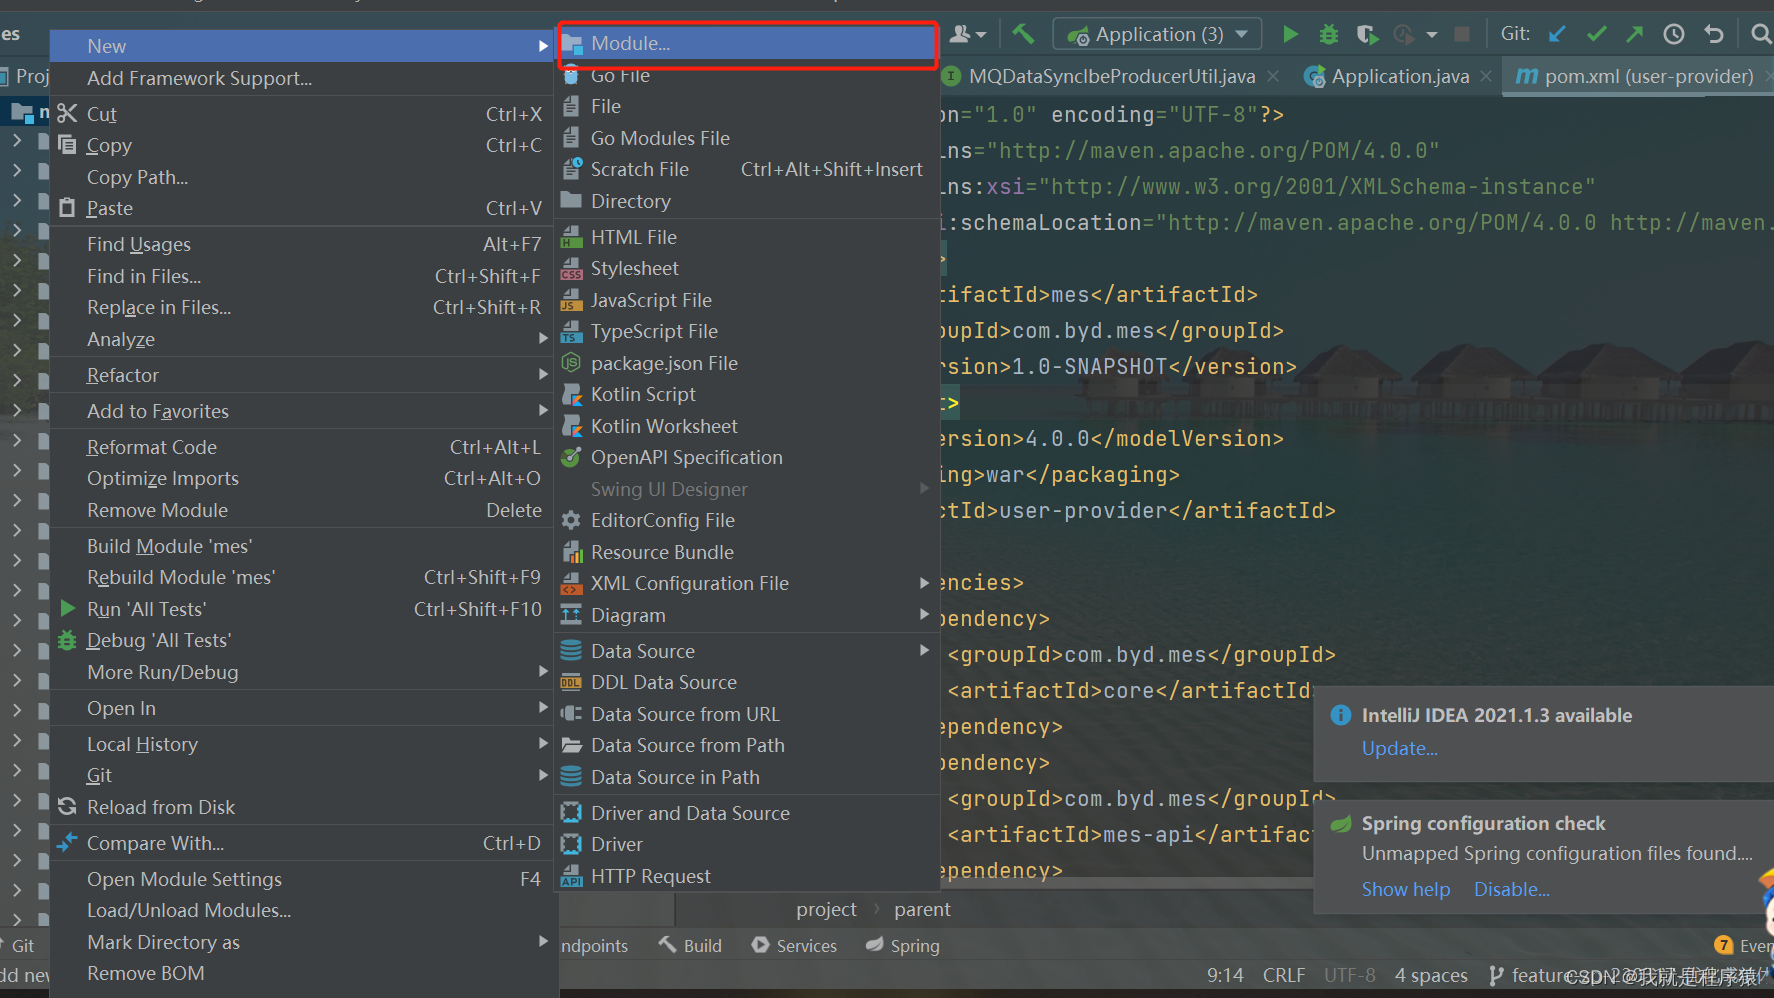
1、在你的项目上点击鼠标右键;

2、点击Spring Initializr输入项目名称,选择war包,点击下一步;
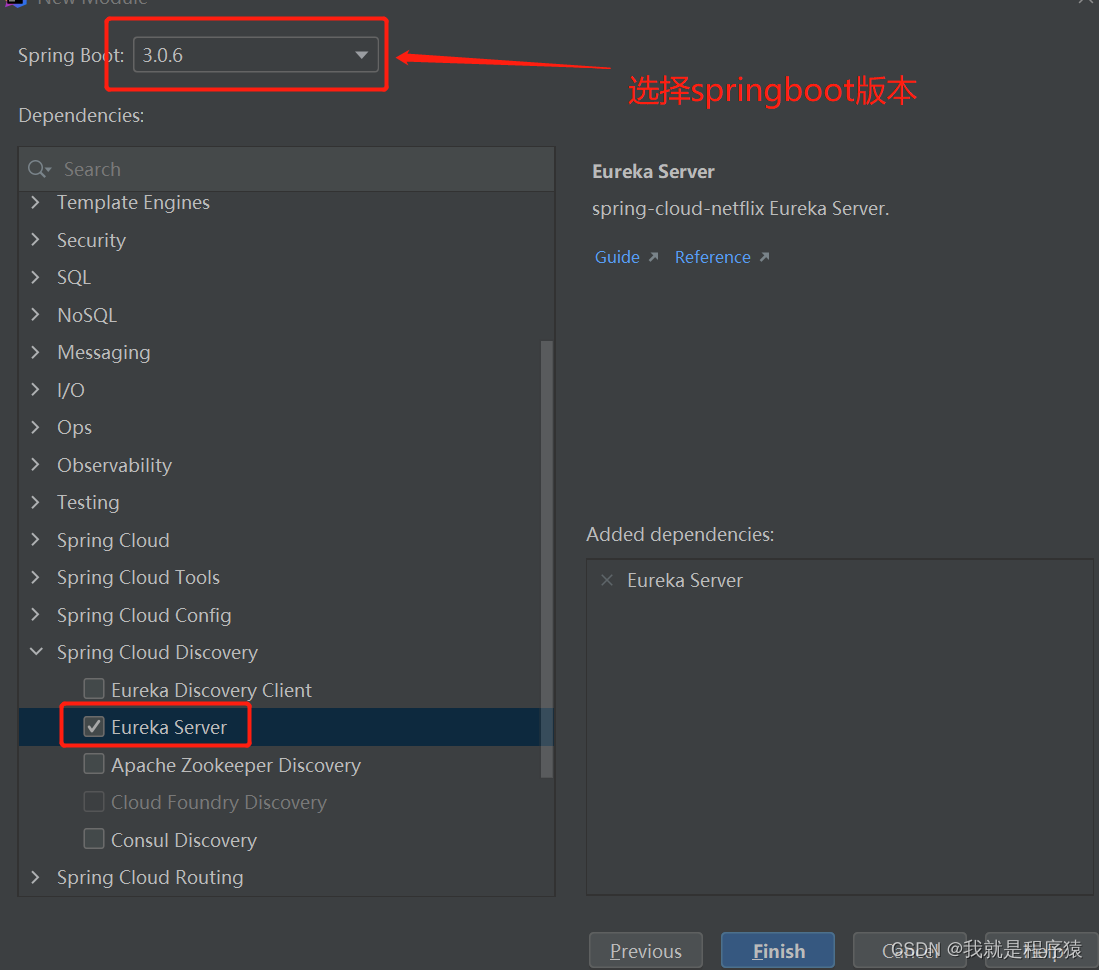
3、选择springboot版本,选择Eureka Server;

4、选择finish,创建eureka服务成功。
5、修改配置文件
server:
  port: 8761
spring:
  application:
    name: eureka-server #微服务名称
eureka:
  instance:
    hostname: 127.0.0.1
  client:
    register-with-eureka: false
    fetch-registry: false
    service-url:
      defaultZone: http://${eureka.instance.hostname}:${server.port}/eureka/
  server:
    eviction-interval-timer-in-ms: 5000   #设置清理的间隔时间,而后这个时间使用的是毫秒单位(默认是60秒)
    enable-self-preservation: true #设置为false表示关闭保护模式

logging:
  level:
    org:
      springframework:
        web:
          servlet:
            mvc:
              method:
                annotation:
                  RequestMappingHandlerMapping: trace
二、服务提供搭建
1、pom删除nacos的依赖
 <!-- <dependency>
                <groupId>com.alibaba.cloud</groupId>
                <artifactId>spring-cloud-starter-alibaba-nacos-discovery</artifactId>
                <version>${nacos.version}</version>
            </dependency>
            <dependency>
                <groupId>com.alibaba.cloud</groupId>
                <artifactId>spring-cloud-starter-alibaba-nacos-config</artifactId>
                <version>${nacos.version}</version>
            </dependency>-->
2、在你的子项目中添加如下pom文件;
<dependency>
            <groupId>org.springframework.cloud</groupId>
            <artifactId>spring-cloud-starter-netflix-eureka-client</artifactId>
            <!-- 排除Jersey,用SpringMVC Rest方式-->
            <exclusions>
                <exclusion>
                    <groupId>com.sun.jersey</groupId>
                    <artifactId>jersey-client</artifactId>
                </exclusion>
                <exclusion>
                    <groupId>com.sun.jersey</groupId>
                    <artifactId>jersey-core</artifactId>
                </exclusion>
                <exclusion>
                    <groupId>com.sun.jersey.contribs</groupId>
                    <artifactId>jersey-apache-client4</artifactId>
                </exclusion>
                <exclusion>
                    <groupId>org.apache.httpcomponents</groupId>
                    <artifactId>httpclient</artifactId>
                </exclusion>
            </exclusions>
        </dependency>
3、在启动类上添加注解;
删除@EnableDiscoveryClient的注解,添加@EnableEurekaClient
4、增加配置文件
eureka:
  client:
    serviceUrl:
      defaultZone: http://10.3.100.216:8761/eureka/
  instance:
    prefer-ip-address: true
spring:
  main:
    allow-bean-definition-overriding: true
  application:
    name: mes-dev-rt-provider
  cloud:
    gateway:
      discovery:
        locator:
          enabled: false
          #开启小写验证,默认feign根据服务名查找都是用的全大写
          lowerCaseServiceId: true
三、tomcat的配置
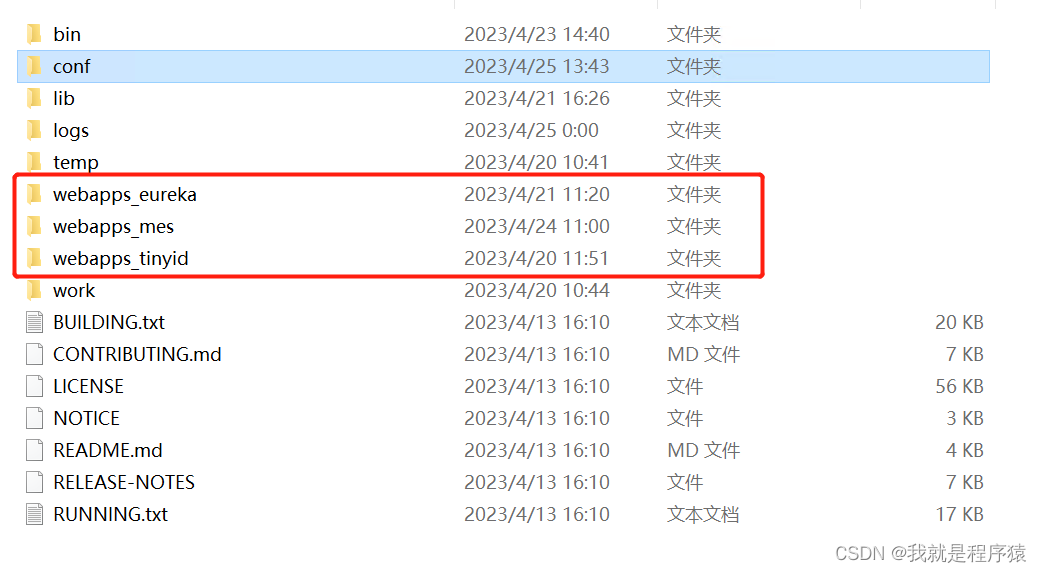
1、新建webapps

注意:文件夹名称可以自定义,然后在server.xml也配置成这个文件夹就行。
2、修改apache-tomcat-9.0.74confserver.xml
<?xml version="1.0" encoding="UTF-8"?>
<!--
Licensed to the Apache Software Foundation (ASF) under one or more
contributor license agreements. See the NOTICE file distributed with
this work for additional information regarding copyright ownership.
The ASF licenses this file to You under the Apache License, Version 2.0
(the "License"); you may not use this file except in compliance with
the License. You may obtain a copy of the License at
http://www.apache.org/licenses/LICENSE-2.0
Unless required by applicable law or agreed to in writing, software
distributed under the License is distributed on an "AS IS" BASIS,
WITHOUT WARRANTIES OR CONDITIONS OF ANY KIND, either express or implied.
See the License for the specific language governing permissions and
limitations under the License.
-->
<!-- Note: A "Server" is not itself a "Container", so you may not
define subcomponents such as "Valves" at this level.
Documentation at /docs/config/server.html
-->
<Server port="-1" shutdown="SHUTDOWN">
<Listener className="org.apache.catalina.startup.VersionLoggerListener" />
<!-- Security listener. Documentation at /docs/config/listeners.html
<Listener className="org.apache.catalina.security.SecurityListener" />
-->
<!-- APR library loader. Documentation at /docs/apr.html -->
<Listener className="org.apache.catalina.core.AprLifecycleListener" SSLEngine="on" />
<!-- Prevent memory leaks due to use of particular java/javax APIs-->
<Listener className="org.apache.catalina.core.JreMemoryLeakPreventionListener" />
<Listener className="org.apache.catalina.mbeans.GlobalResourcesLifecycleListener" />
<Listener className="org.apache.catalina.core.ThreadLocalLeakPreventionListener" />
<!-- Global JNDI resources
Documentation at /docs/jndi-resources-howto.html
-->
<GlobalNamingResources>
<!-- Editable user database that can also be used by
UserDatabaseRealm to authenticate users
-->
<Resource name="UserDatabase" auth="Container"
type="org.apache.catalina.UserDatabase"
description="User database that can be updated and saved"
factory="org.apache.catalina.users.MemoryUserDatabaseFactory"
pathname="conf/tomcat-users.xml" />
</GlobalNamingResources>
<!-- eureka -->
<Service name="Catalina">
<Connector port="8761" protocol="HTTP/1.1"
connectionTimeout="20000"
redirectPort="8443" />
<Connector port="8013" protocol="AJP/1.3" redirectPort="8443" secretRequired="false"/>
<Engine name="Catalina" defaultHost="localhost">
<Realm className="org.apache.catalina.realm.LockOutRealm">
<Realm className="org.apache.catalina.realm.UserDatabaseRealm"
resourceName="UserDatabase"/>
</Realm>
<Host name="localhost" appBase="webapps_eureka"
unpackWARs="true" autoDeploy="true">
<Valve className="org.apache.catalina.valves.AccessLogValve" directory="logs"
prefix="localhost_access_log" suffix=".txt"
pattern="%h %l %u %t "%r" %s %b" />
</Host>
</Engine>
</Service>
<!-- mes -->
<Service name="Catalina">
<Connector port="8084" protocol="HTTP/1.1"
connectionTimeout="20000"
redirectPort="8443" />
<Connector port="8009" protocol="AJP/1.3" redirectPort="8443" secretRequired="false"/>
<Engine name="Catalina" defaultHost="localhost">
<Realm className="org.apache.catalina.realm.LockOutRealm">
<Realm className="org.apache.catalina.realm.UserDatabaseRealm"
resourceName="UserDatabase"/>
</Realm>
<Host name="localhost" appBase="webapps_mes" unpackWARs="true" autoDeploy="true">
<Valve className="org.apache.catalina.valves.AccessLogValve" directory="logs"
prefix="localhost_access_log" suffix=".txt"
pattern="%h %l %u %t "%r" %s %b" />
</Host>
</Engine>
</Service>
<!-- tinyid -->
<Service name="Catalina">
<Connector port="8011" protocol="HTTP/1.1"
connectionTimeout="20000"
redirectPort="8443" />
<Connector port="8012" protocol="AJP/1.3" redirectPort="8443" secretRequired="false"/>
<Engine name="Catalina" defaultHost="localhost">
<Realm className="org.apache.catalina.realm.LockOutRealm">
<Realm className="org.apache.catalina.realm.UserDatabaseRealm"
resourceName="UserDatabase"/>
</Realm>
<Host name="localhost" appBase="webapps_tinyid"
unpackWARs="true" autoDeploy="true">
<Valve className="org.apache.catalina.valves.AccessLogValve" directory="logs"
prefix="localhost_access_log" suffix=".txt"
pattern="%h %l %u %t "%r" %s %b" />
</Host>
</Engine>
</Service>
</Server>
注意:
1.服务治理服务,这个配置在最上面,保证第一个能启动。
2.bootstrap.yml的server.port端口号最好和server.xml配置一致。
3.eureka服务中心,最好将项目名变成ROOT,不然就需要修改defaultZone: 为:http://10.3.100.216:8761/项目名称/eureka/这个地址。


 U8W/U8W-Mini使用与常见问题解决
 QT多线程的5种用法,通过使用线程解决UI主界面的耗时操作代码,防止界面卡死。...
 stm32使用HAL库配置串口中断收发数据(保姆级教程)
 分享几个国内免费的ChatGPT镜像网址(亲测有效)
 Allegro16.6差分等长设置及走线总结