您现在的位置是:首页 >技术教程 >分布式ID-Leaf网站首页技术教程
分布式ID-Leaf
目录
一,背景
在复杂的分布式系统中,往往需要对大量的数据和消息进行唯一标识,唯一的标识ID可以为业务处理提供便利。一个好的全局唯一ID系统应该能满足如下要求:
- 全局唯一性:不能出现重复的ID号,既然是唯一标识,这是最基本的要求。
- 趋势递增:在MySQL InnoDB引擎中使用的是聚簇索引,采用B+树的数据结构来存储索引数据,在主键的选择上面我们应该尽量使用有序的主键保证写入性能。
- 单调递增:保证下一个ID一定大于上一个ID,例如事务版本号、IM增量消息,排序等特殊需求。
- 信息安全:如果ID是连续的,恶意用户的扒取工作就非常容易做了,直接按照顺序下载指定URL即可;如果是订单号,交易号这些,可以通过ID知道一天的交易量,所以在一些应用场景下,会需要ID无规则,不规则。
上述最后两条是互斥的,无法使用同一个方案满足,Leaf Segment可以满足单调递增,在需要ID无规则,不规则时,可以使用Leaf Snowflake。
二,ID生成方案
1,UUID
UUID(Universally Unique Identifier)的标准型式包含32个16进制数字,以连字号分为五段,形式为8-4-4-4-12的36个字符,示例:550e8400-e29b-41d4-a716-446655440000,到目前为止业界一共有5种方式生成UUID。
优点:
-
性能非常高:本地生成,没有网络消耗。
缺点: -
不易于存储:UUID太长,16字节128位,通常以36长度的字符串表示,很多场景不适用。
-
信息不安全:基于MAC地址生成的UUID的算法可能会造成MAC地址泄露,这个漏洞曾被用于寻找梅丽莎病毒的制作者位置。
-
作为主键时在特定环境会存在一些问题,比如做DB主键的场景下,UUID就非常不适用:
- ① MySQL官方有明确的建议主键要尽量越短越好,36个字符长度的UUID不符合要求。
All indexes other than the clustered index are known as secondary indexes. In InnoDB, each record in a secondary index contains the primary key columns for the row, as well as the columns specified for the secondary index. InnoDB uses this primary key value to search for the row in the clustered index.*** If the primary key is long, the secondary indexes use more space, so it is advantageous to have a short primary key***.
翻译过来就是:聚集索引以外的所有索引都称为辅助索引。在InnoDB中,辅助索引中的每个记录都包含该行的主键列,以及为辅助索引指定的列。InnoDB使用这个主键值来搜索聚集索引中的行。如果主键长,则二级索引占用的空间更大,因此主键短是有利的。
- ② 对MySQL索引不利:如果作为数据库主键,在InnoDB引擎下,UUID的无序性可能会引起数据位置频繁变动,严重影响性能。
2,类snowflake方案
这种方案大致来说是一种以划分命名空间(UUID也算,由于比较常见,所以单独分析)来生成ID的一种算法,这种方案把64-bit分别划分成多段,分开来标示机器,时间等,比如在snowflake中的64-bit分别表示如下图(图片来自网络)所示:

41-bit的时间可以表示(1L<<41)/(1000L360024*365)=69年的时间,10-bit机器可以分别表示1024台机器。如果我们对IDC划分有需求,还可以将10-bit分5-bit给IDC,分5-bit给工作机器。这样就可以表示32个IDC,每个IDC下可以有32台机器,可以根据自身需求定义。12个自增序列号可以表示2^12个ID,理论上snowflake方案的QPS约为409.6w/s,这种分配方式可以保证在任何一个IDC的任何一台机器在任意毫秒内生成的ID都是不同的。
这种方式的优缺点是:
优点:
- 毫秒数在高位,自增序列在低位,整个ID都是趋势递增的。
- 不依赖数据库等第三方系统,以服务的方式部署,稳定性更高,生成ID的性能也是非常高的。
- 可以根据自身业务特性分别bit位,非常灵活。
缺点: - 强依赖机器时钟,如果机器上时钟回拨,会导致发号重复或者服务处于不可用状态。
3,号段模式
号段模式是当下分布式ID生成器主流实现方式之一,号段模式可以理解为从数据库批量的获取自增ID,每次从数据库取出一个号段范围,例如(1,1000]代表1000个ID,具体的业务服务将本号段,生成1~1000的自增ID并加载到内存。表结构如下:
CREATE TABLE id_generator (
  id int(10) NOT NULL,
  max_id bigint(20) NOT NULL COMMENT '当前最大id',
  step int(20) NOT NULL COMMENT '号段的布长',
  biz_type    int(20) NOT NULL COMMENT '业务类型',
  version int(20) NOT NULL COMMENT '版本号',
  PRIMARY KEY (`id`)
)
- id:主键
- max_id:当前最大的可用id
- step:代表号段的长度
- version:版本
等这批号段ID用完,再次向数据库申请新号段,对max_id字段做一次update操作,update max_id= max_id + step,update成功则说明新号段获取成功,新的号段范围是(max_id ,max_id +step]。
update id_generator set max_id = #{max_id+step}, version = version + 1 where version = # {version} and biz_type = XXX
由于多业务端可能同时操作,所以采用版本号version乐观锁方式更新,这种分布式ID生成方式不强依赖于数据库,不会频繁的访问数据库,对数据库的压力小很多。
4,基于Redis模式
Redis也同样可以实现,原理就是利用redis的 incr命令实现ID的原子性自增。
127.0.0.1:6379> set seq_id 1 // 初始化自增ID为1
OK
127.0.0.1:6379> incr seq_id // 增加1,并返回递增后的数值
(integer) 2
用redis实现需要注意一点,要考虑到redis持久化的问题。redis有两种持久化方式RDB和AOF
- RDB会定时打一个快照进行持久化,假如连续自增但redis没及时持久化,而这会Redis挂掉了,重启Redis后会出现ID重复的情况。
- AOF会对每条写命令进行持久化,即使Redis挂掉了也不会出现ID重复的情况,但由于incr命令的特殊性,会导致Redis重启恢复的数据时间过长。
5,数据库自增ID
基于数据库的auto_increment自增ID完全可以充当分布式ID,具体实现:需要一个单独的MySQL实例用来生成ID,建表结构如下:
CREATE DATABASE `DIS_ID`;
CREATE TABLE DIS_ID.SEQUENCE_ID (
    id bigint(20) unsigned NOT NULL auto_increment,
    value char(10) NOT NULL default '',
    PRIMARY KEY (id),
) ENGINE=MyISAM;
-- 插入一条数据,返回一个自增的ID
insert into SEQUENCE_ID(value)  VALUES ('values');
当我们需要一个ID的时候,向表中插入一条记录返回主键ID,但这种方式有一个比较致命的缺点,访问量激增时MySQL本身就是系统的瓶颈,用它来实现分布式服务风险比较大,不推荐!
优点:
- 实现简单,ID单调自增,数值类型查询速度快
缺点: - DB单点存在宕机风险,无法扛住高并发场景
三,Leaf Segment
Leaf Segment是美团开源的关于号段模式ID生成的方法之一,除了满足号段模式的基本功能外,还通过双Buffer缓存的方式进行了优化,一个缓存用来提供生成id服务,另一个buffer通过新开一个线程从数据库中更新号段,项目源码已上传到Github。
Leaf Github
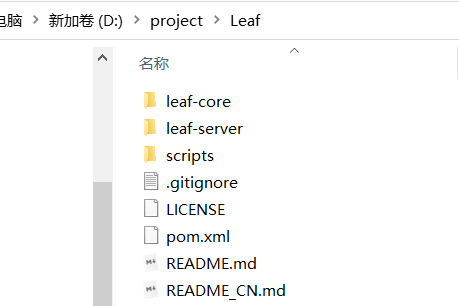
1,拉取源码
- 通过Git拉取项目
git clone git@github.com:Meituan-Dianping/Leaf.git
- 项目是一个SpringBoot架构的。
2,修改配置并创建号段表
1)这里以IDEA为例,进入到leaf-server目录下,在资源路径下找到leaf.properties文件,这里是号段模式和雪花算法模式的配置信息。
leaf.name=com.sankuai.leaf.opensource.test
# 是否启用号段模式
leaf.segment.enable=true
# 数据库连接信息
leaf.jdbc.url=jdbc:mysql://localhost:3306/demo?serverTimezone=Asia/Shanghai&characterEncoding=utf-8&autoReconnect=true&failOverReadOnly=false&zeroDateTimeBehavior=convertToNull
# 数据库用户名
leaf.jdbc.username=root
# 数据库密码
leaf.jdbc.password=12345

# 雪花算法模式暂时先不启用
leaf.snowflake.enable=false
#leaf.snowflake.zk.address=
#leaf.snowflake.port=
2)在leaf-server的scripts目录下是号段模式要用到的建表语句。
DROP TABLE IF EXISTS `leaf_alloc`;

CREATE TABLE `leaf_alloc` (
  `biz_tag` varchar(128)  NOT NULL DEFAULT '',
  `max_id` bigint(20) NOT NULL DEFAULT '1',
  `step` int(11) NOT NULL,
  `description` varchar(256)  DEFAULT NULL,
  `update_time` timestamp NOT NULL DEFAULT CURRENT_TIMESTAMP ON UPDATE CURRENT_TIMESTAMP,
  PRIMARY KEY (`biz_tag`)
) ENGINE=InnoDB;

insert into leaf_alloc(biz_tag, max_id, step, description) values('leaf-segment-test', 1, 2000, 'Test leaf Segment Mode Get Id')
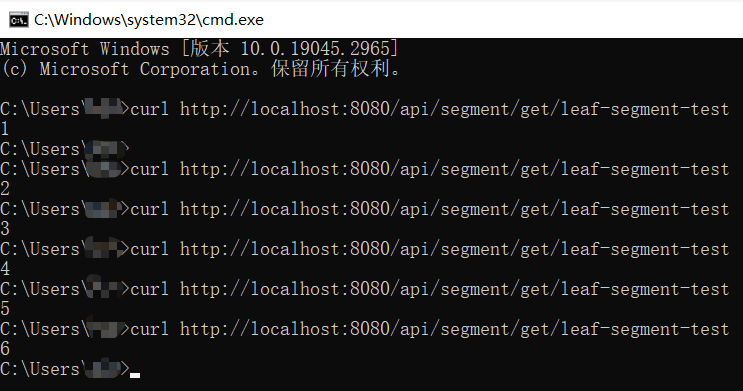
3,项目启动并测试
#segment
curl http://localhost:8080/api/segment/get/leaf-segment-test
#snowflake
curl http://localhost:8080/api/snowflake/get/test
四,Leaf Snowflake
Leaf-segment方案可以生成趋势递增的ID,同时ID号是可计算的,但是在有些情况下,我们希望id是递增但无规律的,这时就可以使用Leaf Snowflake来实现。

Leaf-snowflake方案完全沿用snowflake方案的bit位设计,即是“1+41+10+12”的方式组装ID号。对于workerID的分配,当服务集群数量较小的情况下,完全可以手动配置。Leaf服务规模较大,动手配置成本太高。所以使用Zookeeper持久顺序节点的特性自动对snowflake节点配置wokerID。Leaf-snowflake是按照下面几个步骤启动的:
- 1,启动Leaf-snowflake服务,连接Zookeeper,在leaf_forever父节点下检查自己是否已经注册过(是否有该顺序子节点)。
- 2,如果有注册过直接取回自己的workerID(zk顺序节点生成的int类型ID号),启动服务。
- 3,如果没有注册过,就在该父节点下面创建一个持久顺序节点,创建成功后取回顺序号当做自己的workerID号,启动服务。
1,安装Zookeeper
1.1,下载
Zookeeper官网
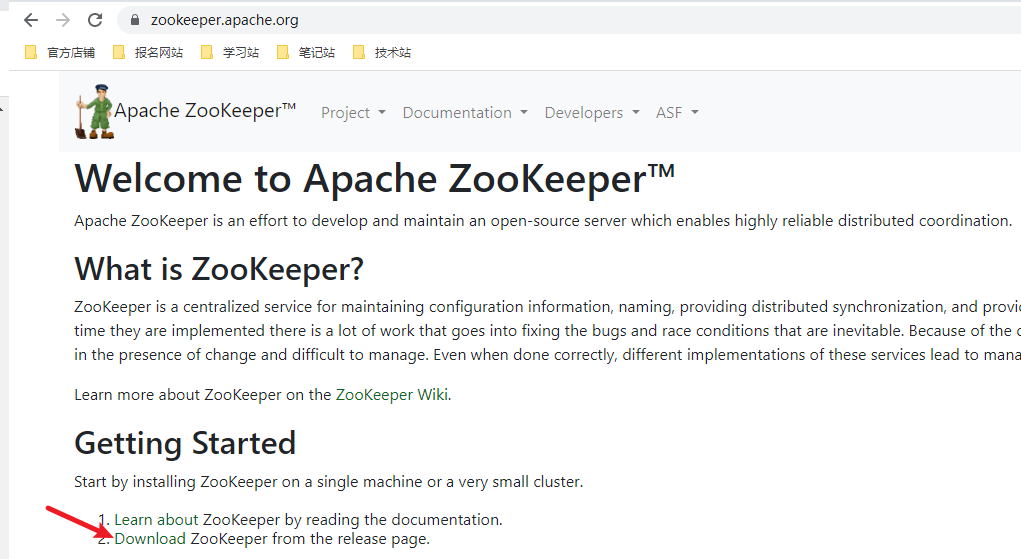
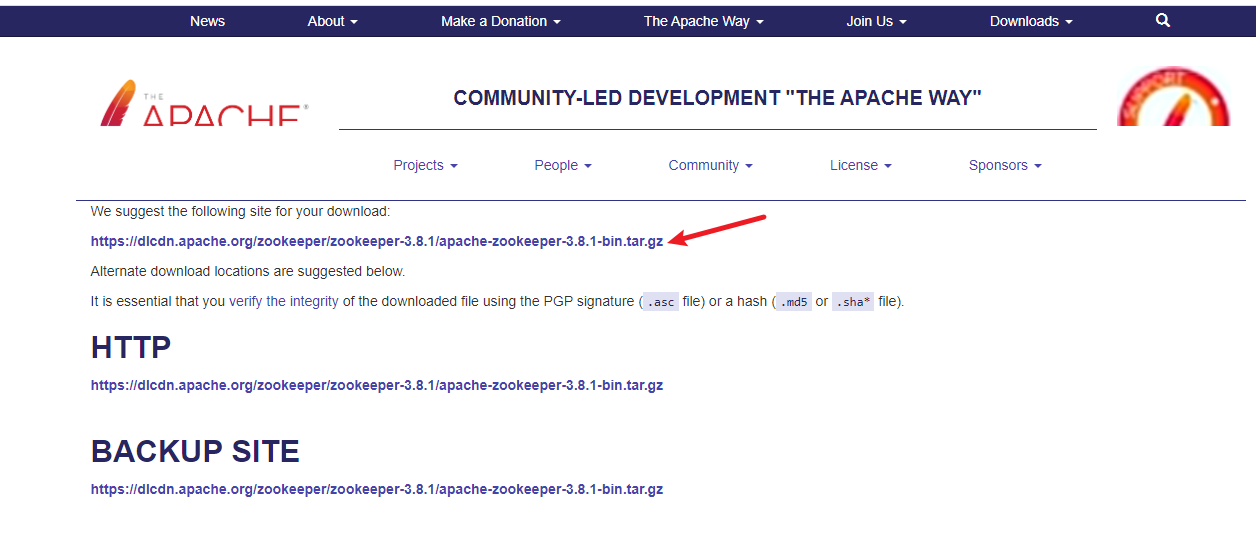
这里我们下载最新的当前版本:
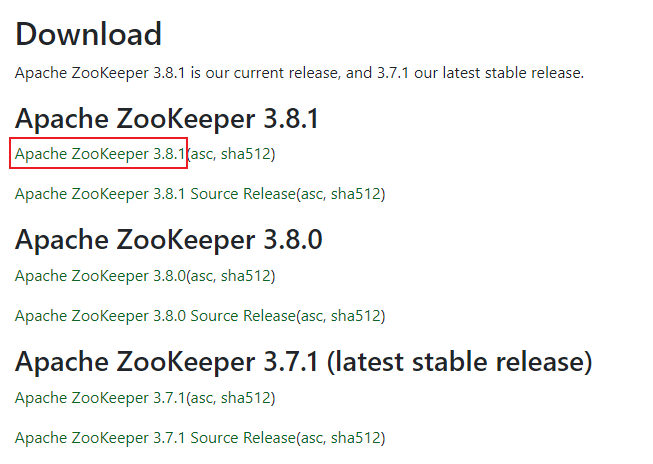
选择官方推荐的下载方式:
1.2,安装
- 将文件上传到服务器,随后解压
tar -zxvf apache-zookeeper-3.8.1-bin.tar.gz
- 进入解压后的zookeeper目录,并创建两个目录:data,log
cd apache-zookeeper-3.8.1-bin
mkdir data
mkdir log
- 进入zookeeper的conf目录,将样例的配置文件拷贝一份,修改里面的部分配置
cd conf
cp zoo_sample.cfg zoo.cfg
vim zoo.cfg
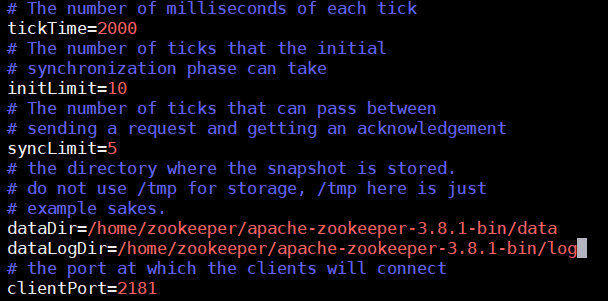
dataDir是zookeeper的数据存放位置,之前是/tmp目录下,该目录是Linux的临时目录,会被定期清理掉,我们修改成自己的位置,并添加日志的目录
dataDir=/home/zookeeper/apache-zookeeper-3.8.1-bin/data
dataLogDir=/home/zookeeper/apache-zookeeper-3.8.1-bin/log
- 进入bin目录,启动zookeeper
# 运行zookeeper
sh zkServer.sh start
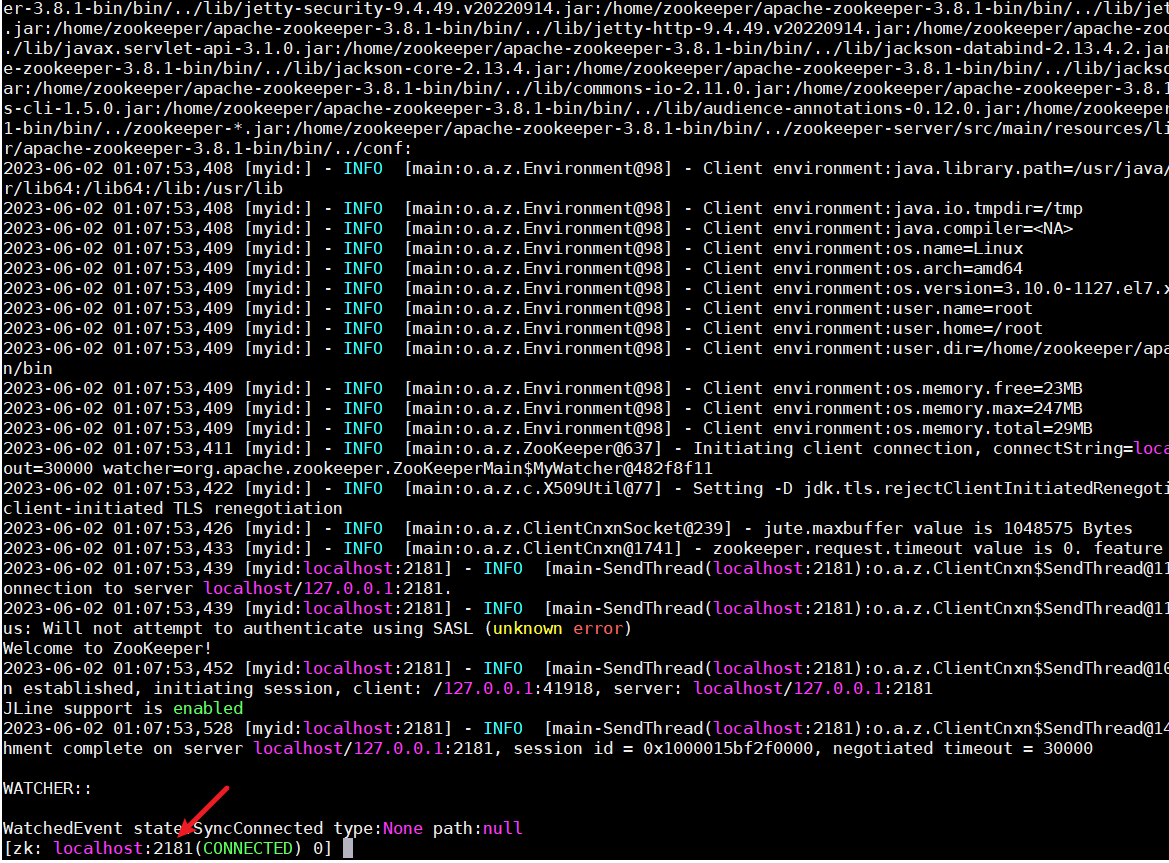
# 通过客户端工具验证zookeeper是否启动成功
./zkCli.sh

# 停止zookeeper
sh zkServer.sh stop
# 重启zookeeper
sh zkServer.sh restart
- 开发端口或关闭防火墙
# leaf-server需要连接zookeeper,端口未开放会连接失败
firewall-cmd --add-port=2181/tcp --permanent
systemctl restart firewalld
2,Leaf Snowflake项目配置
修改leaf.properties文件:
# 开启雪花算法模式
leaf.snowflake.enable=true
# zookeeper连接信息,包括ip和端口
leaf.snowflake.zk.address=192.168.1.9:2181
# 类似于workId,用来与其它服务做区分
leaf.snowflake.port=8080
配置完成后就可以启动项目进行测试了。
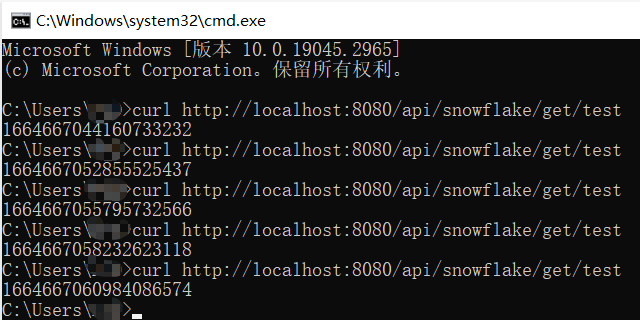
3,测试
curl http://localhost:8080/api/snowflake/get/test
五,模块集成
唯一主键服务可以单独部署,也可以模块的方式集成到自己的项目中,或者是springboot-starter的方式直接引入到项目中,下面以模块的方式为例,将leaf-core集成到自己的项目中。
1,新建模块
新建一个模块,命名unique_id,该模块属于自己父项目下的子模块,模块的代码直接拷贝leaf-core中的即可,除了pom.xml中需要修改,因为原leaf-core中的某些依赖版本是使用了它自己的leaf-parent,我们需要在自己的parent模块中定义,或者直接在本模块中使用指定的版本号,下面的pom.xml是经过实践可行的。
<?xml version="1.0" encoding="UTF-8"?>
<project xmlns="http://maven.apache.org/POM/4.0.0"
         xmlns:xsi="http://www.w3.org/2001/XMLSchema-instance"
         xsi:schemaLocation="http://maven.apache.org/POM/4.0.0 http://maven.apache.org/xsd/maven-4.0.0.xsd">
    <parent>
        <artifactId>ticktack</artifactId>
        <groupId>com.demo</groupId>
        <version>1.0-SNAPSHOT</version>
    </parent>
    <modelVersion>4.0.0</modelVersion>

    <artifactId>unique_id</artifactId>
    <version>1.0.1</version>
    <packaging>jar</packaging>

    <properties>
        <maven.compiler.source>8</maven.compiler.source>
        <maven.compiler.target>8</maven.compiler.target>
        <maven.compiler.source>8</maven.compiler.source>
        <maven.compiler.target>8</maven.compiler.target>
        <mysql-connector-java.version>5.1.38</mysql-connector-java.version>
        <commons-io.version>2.4</commons-io.version>
        <log4j.version>2.7</log4j.version>
        <mybatis-spring.version>1.2.5</mybatis-spring.version>
        <jackson-databind.version>2.9.6</jackson-databind.version>
        <spring.version>4.3.18.RELEASE</spring.version>
        <log4j.version>2.7</log4j.version>
    </properties>

    <dependencies>
        <dependency>
            <groupId>org.mybatis</groupId>
            <artifactId>mybatis</artifactId>
            <version>3.5.9</version>
        </dependency>

        <dependency>
            <groupId>org.perf4j</groupId>
            <artifactId>perf4j</artifactId>
            <version>0.9.16</version>
        </dependency>
        <dependency>
            <groupId>org.slf4j</groupId>
            <artifactId>slf4j-api</artifactId>
            <version>1.7.2</version>
        </dependency>
        <dependency>
            <groupId>commons-io</groupId>
            <artifactId>commons-io</artifactId>
            <version>2.4</version>
        </dependency>
        <!--zk-->
        <dependency>
            <groupId>org.apache.curator</groupId>
            <artifactId>curator-recipes</artifactId>
            <version>2.6.0</version>
            <!--            <scope>provided</scope>-->
        </dependency>
        <dependency>
            <groupId>com.fasterxml.jackson.core</groupId>
            <artifactId>jackson-databind</artifactId>
            <version>${jackson-databind.version}</version>
            <scope>provided</scope>
        </dependency>
        <!-- test scope -->
        <dependency>
            <groupId>org.springframework</groupId>
            <artifactId>spring-core</artifactId>
            <version>${spring.version}</version>
            <scope>test</scope>
        </dependency>
        <dependency>
            <groupId>org.springframework</groupId>
            <artifactId>spring-beans</artifactId>
            <version>${spring.version}</version>
            <scope>test</scope>
        </dependency>
        <dependency>
            <groupId>org.springframework</groupId>
            <artifactId>spring-jdbc</artifactId>
            <version>${spring.version}</version>
            <scope>test</scope>
        </dependency>
        <dependency>
            <groupId>org.springframework</groupId>
            <artifactId>spring-context</artifactId>
            <version>${spring.version}</version>
            <scope>test</scope>
        </dependency>
        <dependency>
            <groupId>org.springframework</groupId>
            <artifactId>spring-test</artifactId>
            <version>${spring.version}</version>
            <scope>test</scope>
        </dependency>

        <dependency>
            <groupId>org.apache.logging.log4j</groupId>
            <artifactId>log4j-slf4j-impl</artifactId>
            <version>${log4j.version}</version>
            <scope>test</scope>
        </dependency>
        <dependency>
            <groupId>org.apache.logging.log4j</groupId>
            <artifactId>log4j-api</artifactId>
            <version>${log4j.version}</version>
            <scope>test</scope>
        </dependency>
        <dependency>
            <groupId>org.apache.logging.log4j</groupId>
            <artifactId>log4j-core</artifactId>
            <version>${log4j.version}</version>
            <scope>test</scope>
        </dependency>

        <dependency>
            <groupId>com.alibaba</groupId>
            <artifactId>druid</artifactId>
            <version>1.0.18</version>
            <scope>test</scope>
        </dependency>
        <dependency>
            <groupId>mysql</groupId>
            <artifactId>mysql-connector-java</artifactId>
            <version>${mysql-connector-java.version}</version>
        </dependency>
        <dependency>
            <groupId>org.mybatis</groupId>
            <artifactId>mybatis-spring</artifactId>
            <version>${mybatis-spring.version}</version>
            <scope>test</scope>
        </dependency>

        <dependency>
            <groupId>junit</groupId>
            <artifactId>junit</artifactId>
            <scope>test</scope>
            <version>4.12</version>
        </dependency>

        <dependency>
            <groupId>com.google.guava</groupId>
            <artifactId>guava</artifactId>
            <version>16.0.1</version>
        </dependency>

    </dependencies>

</project>
2,模块引入与配置
- 在需要使用主键服务的模块引入
<!--引入第三方模块:unique_id-->
<dependency>
   <groupId>com.hao</groupId>
   <artifactId>unique_id</artifactId>
   <version>1.0.1</version>
</dependency>
- 配置文件 leaf.properties
leaf.name=com.sankuai.leaf.opensource.test
leaf.segment.enable=true
leaf.segment.url=jdbc:mysql://127.0.0.1:3306/thtrafficgenemgmt?useUnicode=true&characterEncoding=utf-8&useSSL=true&serverTimezone=GMT%2B8
leaf.segment.driver-class-name=com.mysql.cj.jdbc.Driver
leaf.segment.username=root
leaf.segment.password=123456

# Leaf Snow Flake配置
leaf.snowflake.enable=true
leaf.snowflake.zk.address=192.168.1.9:2181
leaf.snowflake.port=8090
3,测试
- 引入生成主键的service类
import com.alibaba.druid.pool.DruidDataSource;
import com.sankuai.inf.leaf.IDGen;
import com.sankuai.inf.leaf.common.PropertyFactory;
import com.sankuai.inf.leaf.common.Result;
import com.sankuai.inf.leaf.common.ZeroIDGen;
import com.sankuai.inf.leaf.segment.SegmentIDGenImpl;
import com.sankuai.inf.leaf.segment.dao.IDAllocDao;
import com.sankuai.inf.leaf.segment.dao.impl.IDAllocDaoImpl;
import com.tick.tack.exception.ServiceException;
import org.slf4j.Logger;
import org.slf4j.LoggerFactory;
import org.springframework.stereotype.Service;

import java.sql.SQLException;
import java.util.Properties;

@Service("SegmentService")
public class SegmentService {
    // 号段模式下数据库信息配置
    private static final String LEAF_SEGMENT_ENABLE = "leaf.segment.enable";
    private static final String LEAF_JDBC_URL = "leaf.segment.url";
    private static final String LEAF_JDBC_USERNAME = "leaf.segment.username";
    private static final String LEAF_JDBC_PASSWORD = "leaf.segment.password";

    private Logger logger = LoggerFactory.getLogger(SegmentService.class);

    private IDGen idGen;
    private DruidDataSource dataSource;

    public SegmentService() throws SQLException, ServiceException {
        Properties properties = PropertyFactory.getProperties();
        boolean flag = Boolean.parseBoolean(properties.getProperty(LEAF_SEGMENT_ENABLE, "true"));
        if (flag) {
            // Config dataSource
            dataSource = new DruidDataSource();
            dataSource.setUrl(properties.getProperty(LEAF_JDBC_URL));
            dataSource.setUsername(properties.getProperty(LEAF_JDBC_USERNAME));
            dataSource.setPassword(properties.getProperty(LEAF_JDBC_PASSWORD));
            dataSource.init();

            // Config Dao
            IDAllocDao dao = new IDAllocDaoImpl(dataSource);

            // Config ID Gen
            idGen = new SegmentIDGenImpl();
            ((SegmentIDGenImpl) idGen).setDao(dao);
            if (idGen.init()) {
                logger.info("Segment Service Init Successfully");
            } else {
                throw new ServiceException("Segment Service Init Fail");
            }
        } else {
            idGen = new ZeroIDGen();
            logger.info("Zero ID Gen Service Init Successfully");
        }
    }

    public Result getId(String key) {
        return idGen.get(key);
    }

    public SegmentIDGenImpl getIdGen() {
        if (idGen instanceof SegmentIDGenImpl) {
            return (SegmentIDGenImpl) idGen;
        }
        return null;
    }
}
import com.sankuai.inf.leaf.IDGen;
import com.sankuai.inf.leaf.common.PropertyFactory;
import com.sankuai.inf.leaf.common.Result;
import com.sankuai.inf.leaf.common.ZeroIDGen;
import com.sankuai.inf.leaf.snowflake.SnowflakeIDGenImpl;
import com.tick.tack.exception.ServiceException;
import org.slf4j.Logger;
import org.slf4j.LoggerFactory;
import org.springframework.stereotype.Service;

import java.util.Properties;

@Service("SnowflakeService")
public class SnowflakeService {
    // 雪花算法-zookeeper相关配置
    private static final String LEAF_SNOWFLAKE_ENABLE = "leaf.snowflake.enable";
    private static final String LEAF_SNOWFLAKE_PORT = "leaf.snowflake.port";
    private static final String LEAF_SNOWFLAKE_ZK_ADDRESS = "leaf.snowflake.zk.address";

    private Logger logger = LoggerFactory.getLogger(SnowflakeService.class);

    private IDGen idGen;

    public SnowflakeService() throws ServiceException {
        Properties properties = PropertyFactory.getProperties();
        boolean flag = Boolean.parseBoolean(properties.getProperty(LEAF_SNOWFLAKE_ENABLE, "true"));
        if (flag) {
            String zkAddress = properties.getProperty(LEAF_SNOWFLAKE_ZK_ADDRESS);
            int port = Integer.parseInt(properties.getProperty(LEAF_SNOWFLAKE_PORT));
            idGen = new SnowflakeIDGenImpl(zkAddress, port);
            if (idGen.init()) {
                logger.info("Snowflake Service Init Successfully");
            } else {
                throw new ServiceException("Snowflake Service Init Fail");
            }
        } else {
            idGen = new ZeroIDGen();
            logger.info("Zero ID Gen Service Init Successfully");
        }
    }

    public Result getId(String key) {
        return idGen.get(key);
    }
}
- 属性注入,与方法测试
import com.sankuai.inf.leaf.common.Result;
import com.sankuai.inf.leaf.common.Status;
import com.tick.tack.config.AuthAccess;
import com.tick.tack.utils.SegmentService;
import com.tick.tack.utils.SnowflakeService;
import io.swagger.annotations.Api;
import io.swagger.annotations.ApiOperation;
import org.springframework.beans.factory.annotation.Autowired;
import org.springframework.web.bind.annotation.GetMapping;
import org.springframework.web.bind.annotation.RestController;

@RestController
@Api(tags = "唯一ID测试类")
public class UniqueIdGenerateController {
    @Autowired
    private SegmentService segmentService;

    @Autowired
    private SnowflakeService snowflakeService;

    @GetMapping("/generateRidBySegment")
    @ApiOperation(value = "号段模式生成唯一ID")
    @AuthAccess
    public void generateRidBySegment() {
        Result result = segmentService.getId("leaf-segment-test");
        if (result.getStatus().equals(Status.SUCCESS)) {
            System.out.println(result.getId());
        } else {
            System.out.println("号段模式获取分布式ID失败");
        }

    }

    @GetMapping("/generateRidBySnowflake")
    @ApiOperation(value = "雪花算法生成唯一ID")
    @AuthAccess
    public void generateRidBySnowflake() {
        Result snowflakeServiceId = snowflakeService.getId("test");
        if (snowflakeServiceId.getStatus().equals(Status.SUCCESS)) {
            System.out.println(snowflakeServiceId.getId());
        } else {
            System.out.println("雪花算法获取分布式ID失败");
        }
    }
}
4,依赖冲突
模块集成后可能会出现依赖版本冲突,导致项目启动失败,这个时候就需要调整版本,其实最好是将所有的版本都定义到我们的父工程,然后唯一id模块和我们自己的模块都使用同一套版本,这样就可以降低版本冲突的问题,另外leaf-core中有些依赖作用范围是provided,会导致运行时找不到依赖,报ClassNoDefException,这时将依赖的作用范围设置成Runtime,或者直接删除<scope>provided</scope>。


 QT多线程的5种用法,通过使用线程解决UI主界面的耗时操作代码,防止界面卡死。...
 U8W/U8W-Mini使用与常见问题解决
 stm32使用HAL库配置串口中断收发数据(保姆级教程)
 分享几个国内免费的ChatGPT镜像网址(亲测有效)
 Allegro16.6差分等长设置及走线总结