您现在的位置是:首页 >其他 >c# vs2013 制作水晶报表并导出为 pdf网站首页其他
c# vs2013 制作水晶报表并导出为 pdf
简介c# vs2013 制作水晶报表并导出为 pdf
一两年前接触的,当时没有记录,现在把他写下来。
vs2013制作水晶报表,应该要用到插件安装,可以自行搜索安装插件。
在Views/RPT文件夹下创建.rpt后缀的水晶报表文件(这里的文件夹位置根据自身随意更改)。
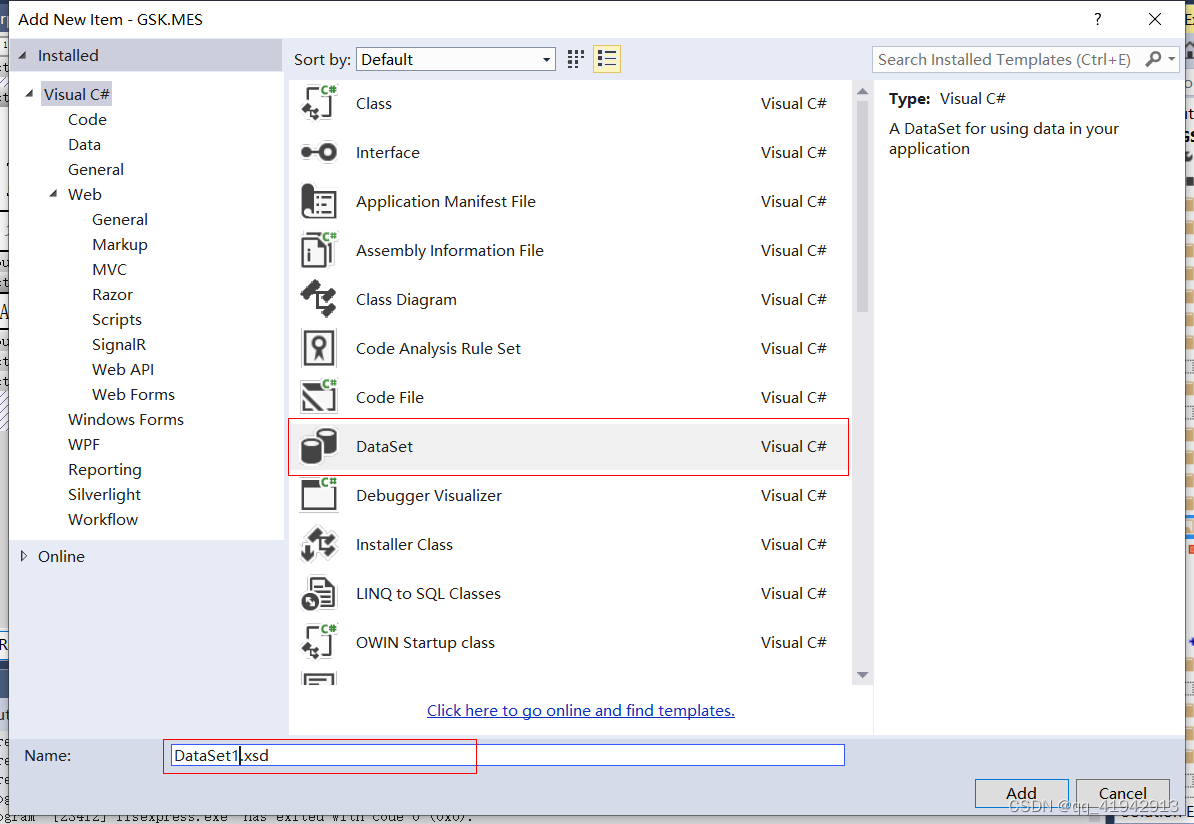
在Data文件夹下(文件夹位置根据自身随意更改),创建DataSet数据集
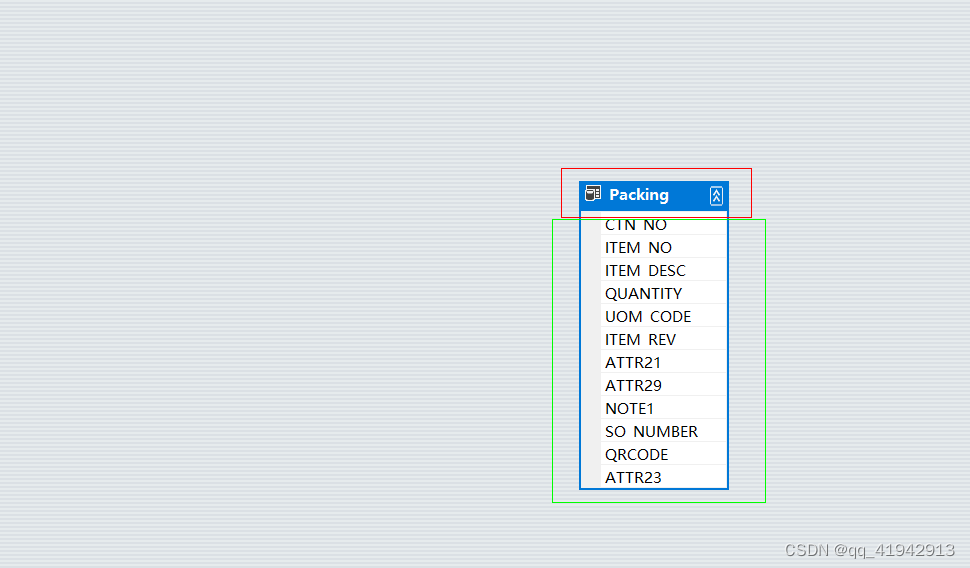
创建好后,在页面右击Add-DataTable添加表,更改datatable的名称,同样在表内右击Add-Column添加列,输入列明(自定义)
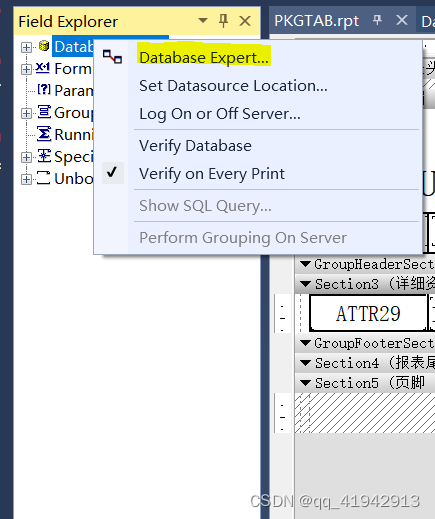
在.rpt报表文件页面,先将刚刚创建的DataSet的表导进来。在左边的导航,右击 Database Fields,选择Database Expert
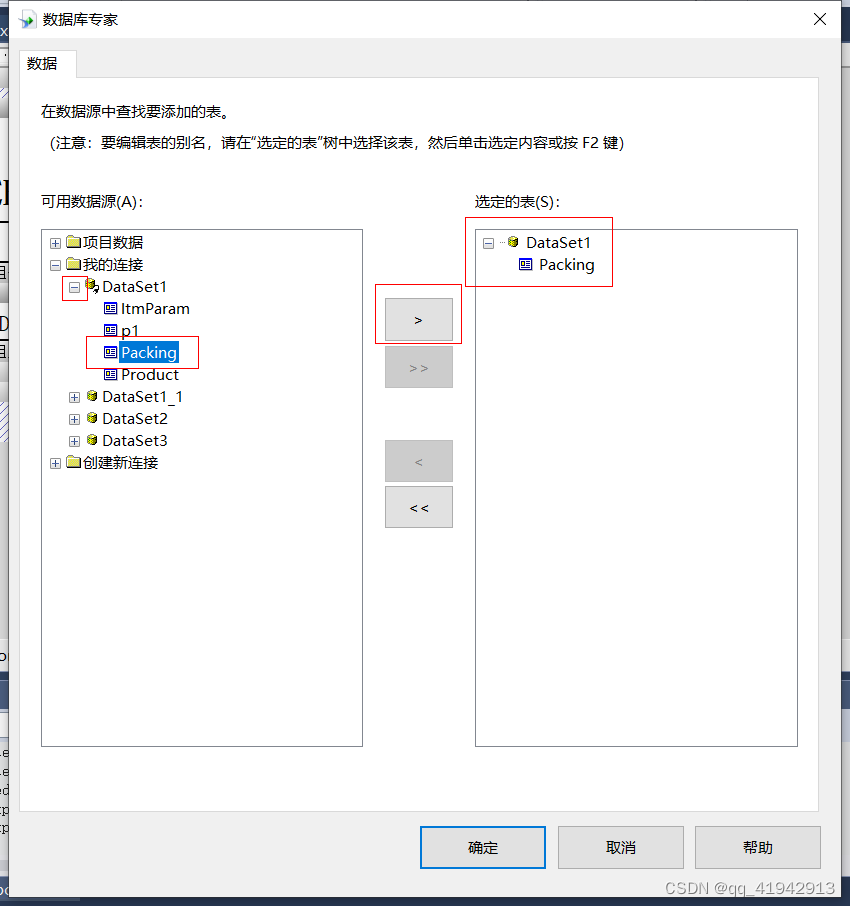
我的连接-DataSet1-Packing,点击>按钮,将该datatable表导进来,确定。待会就可以拖拉这个表里的列。
在里面画表格。改字体、字号大小、画线、不用到的报表头之类的就隐藏掉等。我这里是一个已经画好的表格,在页眉部分用到了分组功能,(为了让表格头不循环,表格体 列要循环显示,就将表的id作为分组名 来达到这样的目的)。
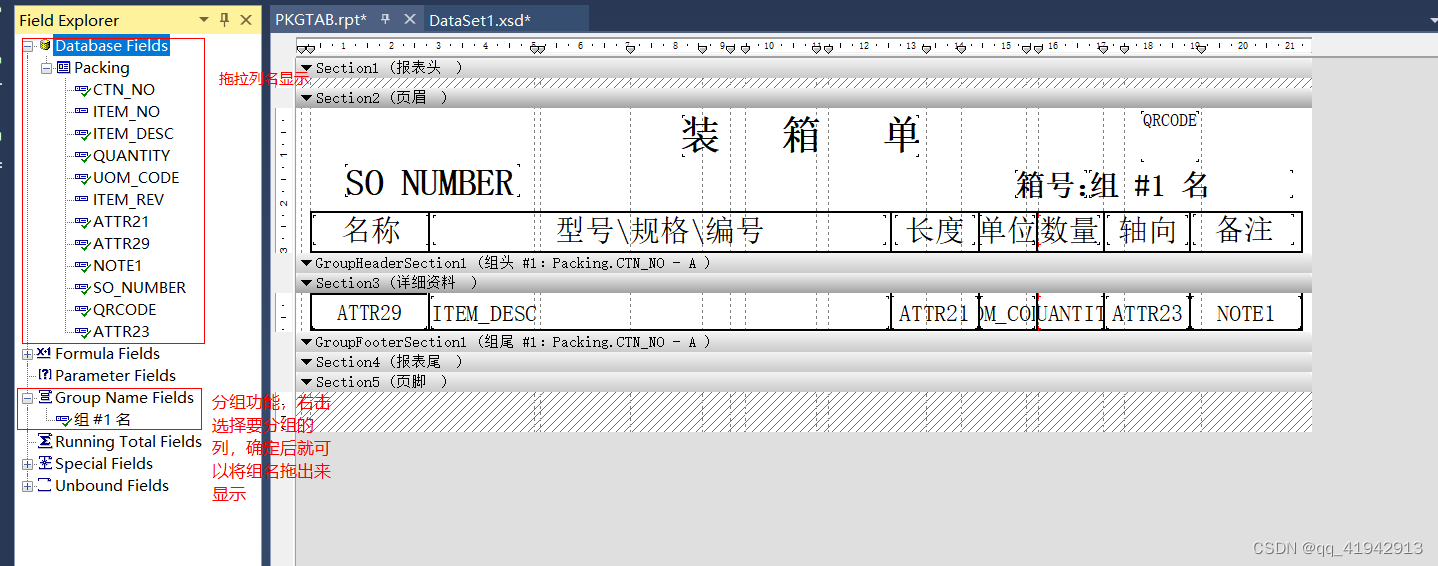
填充数据至表格,并导出为pdf。(我用的是一般处理程序,有什么不同根据自身修改)
后端代码,前端调用PrintPacking方法
using CrystalDecisions.CrystalReports.Engine;
using CrystalDecisions.Shared;
using Newtonsoft.Json;

public void PrintPacking(HttpContext context)
{
    try
    {
        string rptName = "PKGTAB";//.rpt报表文件名称
        List<数据库表名> list = new List<数据库表名>();//源数据表

        DataSet1 ds1 = new DataSet1();//实例化数据集

        //分箱数
        List<int> _countr = list1.Select(t => t.COUNTR).Distinct().ToList();

        if (list1.Count > 0 && head.Count > 0)
        {
            foreach (var item in list)
            {
            	//循环将数据添加进去
                ds1.Packing.AddPackingRow(item.CTN_NO, item.ITEM_NO, item.ITEM_DESC, item.QUANTITY, item.UOM_CODE, item.ITEM_REV, item.ATTR21, item.ATTR29, item.NOTE1, item.SO_NUMBER,item.qrcode, item.ATTR23);
            }

            m_responseData = new PrintHandler().ExportPDF(ds1, rptName);

        }
    }
    catch (Exception ex)
    {

    }
    string jsonString = JsonConvert.SerializeObject(m_responseData);//Json序列化,JSON对象转成JSON字符串
    context.Response.Write(jsonString);
}
//导出PDF格式
private ReportDocument docReport = new ReportDocument();//全局变量 私有
//DataSet1 ds1
//rptName:.rpt水晶报表文件的名称
public bool ExportPDF(DataSet1 ds1, string rptName)
{
	bool flg=false;
    if (ds1 != null && !string.IsNullOrEmpty(rptName))
    {
        try
        {
            string _rptName = HttpContext.Current.Server.MapPath("/Views/RPT/" + rptName + ".rpt");
            docReport.Load(_rptName);
            docReport.Database.Tables[0].ApplyLogOnInfo(CryReport.GetLogonInfo());
            docReport.SetDataSource(ds1);

            DiskFileDestinationOptions diskOpts = new DiskFileDestinationOptions();
            docReport.ExportOptions.ExportDestinationType = ExportDestinationType.DiskFile;
            docReport.ExportOptions.ExportFormatType = ExportFormatType.PortableDocFormat;

            string filePath = HttpContext.Current.Server.MapPath(@"/" + rptName + ".pdf");
            diskOpts.DiskFileName = filePath;
            docReport.ExportOptions.DestinationOptions = diskOpts;
            docReport.Export();
            docReport.Dispose();

			flg=true;
            //m_responseData = new ResponseData(true, rptName, string.Format("成功输出文件{0}.pdf.", rptName));
        }
        catch (Exception ex)
        {

        }
    }
    else
    {
        m_responseData = new ResponseData(false, "报表数据源或报表名为空");
    }
    return flg;
}
前端:
$.ajax({
    type: 'post',
    async: false,
    url: '',
    success: function (data) {
        var obj = eval('(' + data + ')');
        if (obj.Success) {
        	var filename = "PKGTAB";
            var target = "/Views/POP/File?filename=" + filename + ".pdf";//新建一个页面File.aspx 我这边放在/Views/POP/目录下
            window.open(target);//打开一个新页面将pfd显示出来
            error.hide();
        } else {
            error.show().html(obj.Message);
        }
    }
});
新建的File.aspx页面,打开File.aspx.cs页面,protected void Page_Load(object sender, EventArgs e)函数改成如下:
protected void Page_Load(object sender, EventArgs e)
 {
     string _fileName = Request.QueryString["filename"];
     string filePath = Server.MapPath(@"/" + _fileName);
     if (!IsPostBack)
     {
         //PDFPreview.Priview(this, filePath);
         //判断文件的存在
         System.Web.UI.Page p = this;
         if (System.IO.File.Exists(filePath))
         {
             p.Response.ContentType = "Application/pdf";

             string fileName = filePath.Substring(filePath.LastIndexOf('\') + 1);
             p.Response.AddHeader("content-disposition", "filename=" + fileName);
             p.Response.WriteFile(filePath);
             p.Response.End();
         }
     }
 }
打开File.aspx.designer.cs,public partial class File方法改成如下:
public partial class File
{

    /// <summary>
    /// form1 control.
    /// </summary>
    /// <remarks>
    /// Auto-generated field.
    /// To modify move field declaration from designer file to code-behind file.
    /// </remarks>
    protected global::System.Web.UI.HtmlControls.HtmlForm form1;
}
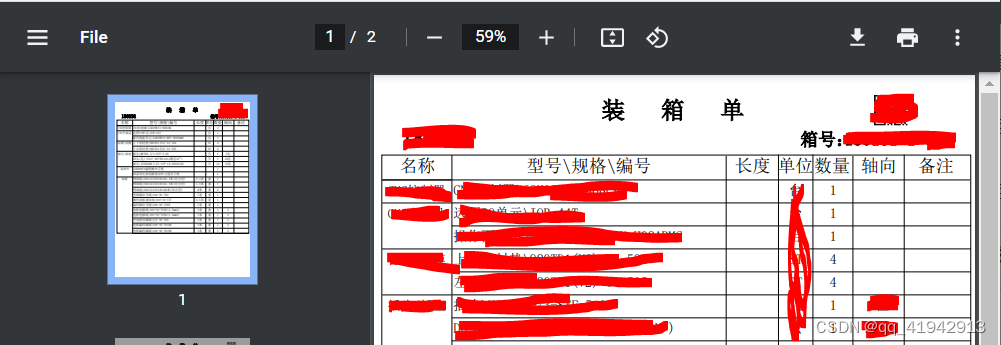
效果
风语者!平时喜欢研究各种技术,目前在从事后端开发工作,热爱生活、热爱工作。


 QT多线程的5种用法,通过使用线程解决UI主界面的耗时操作代码,防止界面卡死。...
 U8W/U8W-Mini使用与常见问题解决
 stm32使用HAL库配置串口中断收发数据(保姆级教程)
 分享几个国内免费的ChatGPT镜像网址(亲测有效)
 Allegro16.6差分等长设置及走线总结