您现在的位置是:首页 >技术交流 >Vue3 项目相关网站首页技术交流
Vue3 项目相关
vite 项目起步式
npm create vite
  - 1.命名项目名称
  - 2. 选择技术框架
  - 3. 进入项目文件夹 npm i 安装依赖,
  - 4. npm run dev 运行项目

配置 package.json 文件 ,使项目运行后自动再浏览器中打开。
在 dev 运行命令后添加一个
--open即可。
  "scripts": {
    "dev": "vite --open",
    "build": "vue-tsc && vite build",
    "preview": "vite preview"
  },
eslint 相关配置
安装依赖
pnpm i eslint -D
生成配置文件:.eslint.cjs
npx eslint --init
安装 eslint 相关依赖指令
pnpm install -D eslint-plugin-import eslint-plugin-vue eslint-plugin-node eslint-plugin-prettier eslint-config-prettier eslint-plugin-node @babel/eslint-parser
1.2 修改.eslintrc.cjs 配置文件
// @see https://eslint.bootcss.com/docs/rules/

module.exports = {
  env: {
    browser: true,
    es2021: true,
    node: true,
    jest: true,
  },
  /* 指定如何解析语法 */
  parser: 'vue-eslint-parser',
  /** 优先级低于 parse 的语法解析配置 */
  parserOptions: {
    ecmaVersion: 'latest',
    sourceType: 'module',
    parser: '@typescript-eslint/parser',
    jsxPragma: 'React',
    ecmaFeatures: {
      jsx: true,
    },
  },
  /* 继承已有的规则 */
  extends: [
    'eslint:recommended',
    'plugin:vue/vue3-essential',
    'plugin:@typescript-eslint/recommended',
    'plugin:prettier/recommended',
  ],
  plugins: ['vue', '@typescript-eslint'],
  /*
   * "off" 或 0    ==>  关闭规则
   * "warn" 或 1   ==>  打开的规则作为警告(不影响代码执行)
   * "error" 或 2  ==>  规则作为一个错误(代码不能执行,界面报错)
   */
  rules: {
    // eslint(https://eslint.bootcss.com/docs/rules/)
    'no-var': 'error', // 要求使用 let 或 const 而不是 var
    'no-multiple-empty-lines': ['warn', { max: 1 }], // 不允许多个空行
    'no-console': process.env.NODE_ENV === 'production' ? 'error' : 'off',
    'no-debugger': process.env.NODE_ENV === 'production' ? 'error' : 'off',
    'no-unexpected-multiline': 'error', // 禁止空余的多行
    'no-useless-escape': 'off', // 禁止不必要的转义字符

    // typeScript (https://typescript-eslint.io/rules)
    '@typescript-eslint/no-unused-vars': 'error', // 禁止定义未使用的变量
    '@typescript-eslint/prefer-ts-expect-error': 'error', // 禁止使用 @ts-ignore
    '@typescript-eslint/no-explicit-any': 'off', // 禁止使用 any 类型
    '@typescript-eslint/no-non-null-assertion': 'off',
    '@typescript-eslint/no-namespace': 'off', // 禁止使用自定义 TypeScript 模块和命名空间。
    '@typescript-eslint/semi': 'off',

    // eslint-plugin-vue (https://eslint.vuejs.org/rules/)
    'vue/multi-word-component-names': 'off', // 要求组件名称始终为 “-” 链接的单词
    'vue/script-setup-uses-vars': 'error', // 防止<script setup>使用的变量<template>被标记为未使用
    'vue/no-mutating-props': 'off', // 不允许组件 prop的改变
    'vue/attribute-hyphenation': 'off', // 对模板中的自定义组件强制执行属性命名样式
  },
}
1.3.eslintignore 忽略文件
dist
node_modules
1.4 运行脚本
package.json 新增两个运行脚本
"scripts": {
    "lint": "eslint src",
    "fix": "eslint src --fix",
}
二、配置prettier
有了 eslint,为什么还要有 prettier?eslint 针对的是 javascript,他是一个检测工具,包含 js 语法以及少部分格式问题,在 eslint 看来,语法对了就能保证代码正常运行,格式问题属于其次;
而 prettier 属于格式化工具,它看不惯格式不统一,所以它就把 eslint 没干好的事接着干,另外,prettier 支持
包含 js 在内的多种语言。
总结起来,eslint 和 prettier 这俩兄弟一个保证 js 代码质量,一个保证代码美观。
2.1 安装依赖包
pnpm install -D eslint-plugin-prettier prettier eslint-config-prettier
2.2.prettierrc.json 添加规则
{
  "singleQuote": true,
  "semi": false,
  "bracketSpacing": true,
  "htmlWhitespaceSensitivity": "ignore",
  "endOfLine": "auto",
  "trailingComma": "all",
  "tabWidth": 2
}
2.3.prettierignore 忽略文件
/dist/*
/html/*
.local
/node_modules/**
**/*.svg
**/*.sh
/public/*
通过 pnpm run lint 去检测语法,如果出现不规范格式,通过 pnpm run fix 修改
三、强制使用 pnpm 包管理器工具
团队开发项目的时候,需要统一包管理器工具,因为不同包管理器工具下载同一个依赖,可能版本不一样,
导致项目出现 bug 问题,因此包管理器工具需要统一管理!!!
在根目录创建scritps/preinstall.js文件,添加下面的内容
if (!/pnpm/.test(process.env.npm_execpath || '')) {
  console.warn(
    `u001b[33mThis repository must using pnpm as the package manager ` +
    ` for scripts to work properly.u001b[39m
`,
  )
  process.exit(1)
}
配置命令
"scripts": {
	"preinstall": "node ./scripts/preinstall.js"
}
当我们使用 npm 或者 yarn 来安装包的时候,就会报错了。原理就是在 install 的时候会触发 preinstall(npm 提供的生命周期钩子)这个文件里面的代码。
vue3 项目中配置环境变量
项目根目录分别添加 开发、生产和测试环境的文件!
.env.development
.env.production
.env.test
文件内容
# 变量必须以 VITE_ 为前缀才能暴露给外部读取
NODE_ENV = 'development'
VITE_APP_TITLE = '硅谷甄选运营平台'
VITE_APP_BASE_API = '/dev-api'
NODE_ENV = 'production'
VITE_APP_TITLE = '硅谷甄选运营平台'
VITE_APP_BASE_API = '/prod-api'
# 变量必须以 VITE_ 为前缀才能暴露给外部读取
NODE_ENV = 'test'
VITE_APP_TITLE = '硅谷甄选运营平台'
VITE_APP_BASE_API = '/test-api'
配置运行命令:package.json
 "scripts": {
    "dev": "vite --open",
    "dev:test": "vue-tsc && vite dev --mode test",
    "dev:pro": "vue-tsc && vite dev --mode production",
    "build:test": "vue-tsc && vite build --mode test",
    "build:pro": "vue-tsc && vite build --mode production",
    "preview": "vite preview"
  },
通过import.meta.env获取环境变量
svg 图标 组件注册并封装
在开发项目的时候经常会用到svg矢量图,而且我们使用SVG以后,页面上加载的不再是图片资源,
这对页面性能来说是个很大的提升,而且我们SVG文件比img要小的很多,放在项目中几乎不占用资源。
安装SVG依赖插件
pnpm install vite-plugin-svg-icons -D
在vite.config.ts中配置插件
import { createSvgIconsPlugin } from 'vite-plugin-svg-icons'
import path from 'path'
export default () => {
  return {
    plugins: [
      createSvgIconsPlugin({
        // Specify the icon folder to be cached
        iconDirs: [path.resolve(process.cwd(), 'src/assets/icons')],//表示将所有的 svg 图标都放在 assets/icons 文件夹下面。
        // Specify symbolId format
        symbolId: 'icon-[dir]-[name]',
      }),
    ],
  }
}
统一管理 svg 图标
在 src/assets 文件夹下 新建一个 icons文件夹。(必须创建同名文件夹,因为上面的配置入口是src/assets/icons)
在文件夹下面新建 svg 文件,svg 文件名 就是 xlink-href 的属性值。( xlink-href=’ #icon - svg文件名 ')
将 icon-font 网站上 复制的 svg 代码 复制到上面新建的 svg 文件中。
入口文件导入
import 'virtual:svg-icons-register'
svg 图标使用
注意: xlink-href 的属性值一定要用 #icon-图标名字 的格式
fill 的属性值可以设置为 #d4237a
 <!-- svg 图标外层容器节点,内部需要与 use标签结合使用 -->
    <svg style="width: 200px; height: 200px">
      <!-- use标签的 xlink:href 属性表示 svg 用哪一个样式的图标,属性值格式  #icon-图标名字 (必须用这种格式) -->
      <!-- use 标签的 fill 属性可是设置 svg 图标的颜色。 fill 的属性值可以设置为 #d4237a -->
      <use xlink:href="#icon-phone" fill="pink"></use>
    </svg>
icon-font svg图标下载注意事项
问题:从 icon-font 网站上下载的 svg 图标没办法使用 fill 属性设置 颜色
解决办法:将 icon-font 网站上复制的 svg 代码中 所有的 fill 属性全部删除
将下面代码中所有的 fill属性和属性值 全部删除,然后再给 use 标签设置fill 属性 ,就可以生效了

<svg t="1685364513363" class="icon" viewBox="0 0 1024 1024" version="1.1" xmlns="http://www.w3.org/2000/svg" p-id="1894" width="200" height="200"><path d="M931.2 35.04H97.76a80 80 0 0 0-80 80v557.76a80 80 0 0 0 80 80h315.52l-56.96 225.76h-72a16 16 0 1 0 0 32h460.16a16 16 0 0 0 0-32H672l-56.32-225.76H931.2a80 80 0 0 0 80-80V115.04a80 80 0 0 0-80-80z m-293.28 944H391.04L448 753.6h133.44zM931.2 720.8H97.76a48 48 0 0 1-48-45.6h929.12a48 48 0 0 1-47.68 45.6z m48-77.6H49.76v-528a48 48 0 0 1 48-48H931.2a48 48 0 0 1 48 48z" fill="#3FA9F5" p-id="1895"></path><path d="M813.76 272v-0.8a21.12 21.12 0 0 0-2.56-4 4.32 4.32 0 0 1-1.28-1.12 24.48 24.48 0 0 0-3.36-2.24h-1.6a16 16 0 0 0-5.44-1.12h-121.6a16 16 0 0 0 0 32h81.76L532.64 515.36l-198.56-97.12a16 16 0 0 0-18.88 3.84l-134.4 150.88a16 16 0 0 0 12 26.56 16 16 0 0 0 11.84-5.28l126.4-141.92 197.76 96.8a16 16 0 0 0 18.08-2.88l236.16-230.56V400a16 16 0 0 0 32 0v-122.24a16 16 0 0 0-1.28-5.76zM436.48 276.8a12.48 12.48 0 1 0 0 24.96h32v15.04a12.48 12.48 0 0 0 12.48 12.48 12.32 12.32 0 0 0 12.32-12.48v-15.04h32a12.48 12.48 0 0 0 0-24.96h-32v-14.4h32a12.48 12.48 0 0 0 12.48-12.48 12.32 12.32 0 0 0-12.48-12.32h-25.6l19.84-20a12.48 12.48 0 1 0-17.6-17.6l-20.32 21.76-21.76-21.76a12.48 12.48 0 1 0-17.6 17.6l20 20h-25.76a12.32 12.32 0 0 0-12.48 12.32 12.48 12.48 0 0 0 12.48 12.48h32v14.4z" fill="#3FA9F5" p-id="1896"></path><path d="M482.56 384.96a126.4 126.4 0 1 0-126.4-126.4 126.4 126.4 0 0 0 126.4 126.4z m0-220.8a94.4 94.4 0 1 1-94.4 94.4 94.56 94.56 0 0 1 94.4-94.4z" fill="#3FA9F5" p-id="1897"></path></svg>
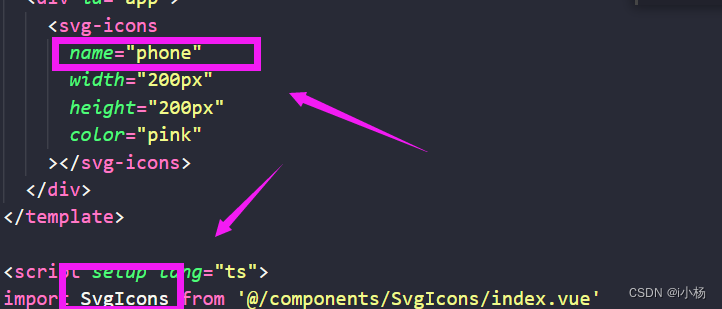
svg 封装为全局组件
因为项目很多模块需要使用图标,因此把它封装为全局组件!!!
在src/components目录下创建一个SvgIcon组件:代表如下
<template>
  <div>
    <svg :style="{ width: width, height: height }">
      <use :xlink:href="prefix + name" :fill="color"></use>
    </svg>
  </div>
</template>

<script setup lang="ts">
defineProps({
  //xlink:href属性值的前缀
  prefix: {
    type: String,
    default: '#icon-'
  },
  //svg矢量图的名字
  name: String,
  //svg图标的颜色
  color: {
    type: String,
    default: ""
  },
  //svg宽度
  width: {
    type: String,
    default: '16px'
  },
  //svg高度
  height: {
    type: String,
    default: '16px'
  }

})
</script>
<style scoped></style>
在src文件夹目录下创建一个index.ts文件:用于注册components文件夹内部全部全局组件!!!
import SvgIcon from './SvgIcon/index.vue';
import type { App, Component } from 'vue';
const components: { [name: string]: Component } = { SvgIcon };
export default {
    install(app: App) {
        Object.keys(components).forEach((key: string) => {
            app.component(key, components[key]);
        })
    }
}
在入口文件引入src/index.ts文件,通过app.use方法安装自定义插件
import gloablComponent from './components/index';
app.use(gloablComponent);


 U8W/U8W-Mini使用与常见问题解决
 QT多线程的5种用法,通过使用线程解决UI主界面的耗时操作代码,防止界面卡死。...
 stm32使用HAL库配置串口中断收发数据(保姆级教程)
 分享几个国内免费的ChatGPT镜像网址(亲测有效)
 Allegro16.6差分等长设置及走线总结