您现在的位置是:首页 >其他 >SpringBoot整合Swagger3.0网站首页其他
SpringBoot整合Swagger3.0
简介SpringBoot整合Swagger3.0
SpringBoot整合Swagger3.0
SpringBoot整合Swagger3.0
引入pom.xml
<?xml version="1.0" encoding="UTF-8"?>
<project xmlns="http://maven.apache.org/POM/4.0.0"
         xmlns:xsi="http://www.w3.org/2001/XMLSchema-instance"
         xsi:schemaLocation="http://maven.apache.org/POM/4.0.0 http://maven.apache.org/xsd/maven-4.0.0.xsd">
    <modelVersion>4.0.0</modelVersion>

    <groupId>com.young</groupId>
    <artifactId>swagger03</artifactId>
    <version>1.0-SNAPSHOT</version>
    <parent>
        <artifactId>spring-boot-starter-parent</artifactId>
        <groupId>org.springframework.boot</groupId>
        <version>2.7.0</version>
    </parent>
    <dependencies>
        <dependency>
            <groupId>org.springframework.boot</groupId>
            <artifactId>spring-boot-starter-web</artifactId>
        </dependency>
        <dependency>
            <groupId>io.springfox</groupId>
            <artifactId>springfox-boot-starter</artifactId>
            <version>3.0.0</version>
        </dependency>
        <dependency>
            <groupId>org.projectlombok</groupId>
            <artifactId>lombok</artifactId>
        </dependency>
        <dependency>
            <groupId>com.alibaba</groupId>
            <artifactId>fastjson</artifactId>
            <version>1.2.83</version>
        </dependency>
    </dependencies>
    <properties>
        <maven.compiler.source>11</maven.compiler.source>
        <maven.compiler.target>11</maven.compiler.target>
    </properties>

</project>
在启动类加上@EnableOpi注解
package com.young;

import org.springframework.boot.SpringApplication;
import org.springframework.boot.autoconfigure.SpringBootApplication;
import springfox.documentation.oas.annotations.EnableOpenApi;

@SpringBootApplication
@EnableOpenApi
public class Swagger03Application {
    public static void main(String[] args) {
        SpringApplication.run(Swagger03Application.class,args);
    }
}
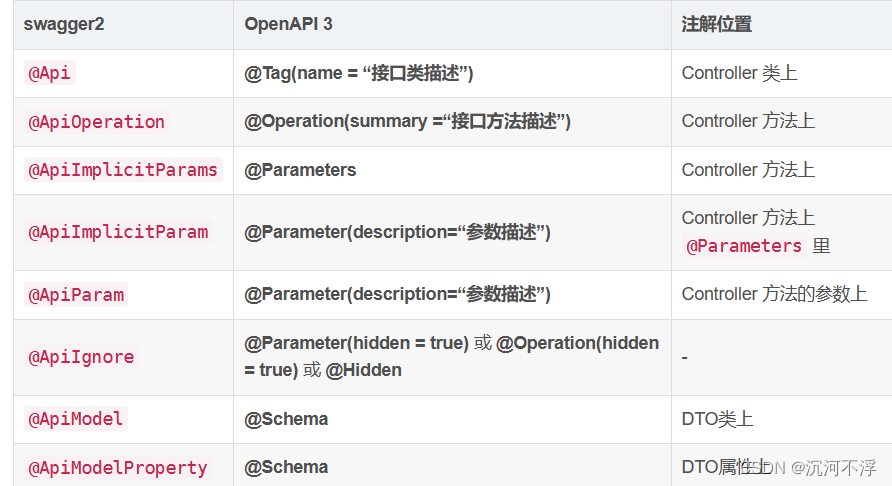
Swagger3和Swagger2的注解对比

在dto类里面,使用schema来描述类的信息和类的属性
package com.young.entity;

import io.swagger.v3.oas.annotations.media.Schema;
import lombok.Data;

@Data
@Schema(description = "用户类")
public class User {
    @Schema(description = "用户id")
    private String id;
    @Schema(description = "用户姓名")
    private String name;
    @Schema(description = "用户年龄")
    private String age;
}
controller层,用@Tag注解描述这个controller类的具体功能,然后@Operation注解描述某个方法的具体功能,@Parameters用来记录方法中需要的参数,每个参数的含义。
package com.young.controller;

import com.young.entity.User;
import io.swagger.v3.oas.annotations.Operation;
import io.swagger.v3.oas.annotations.Parameter;
import io.swagger.v3.oas.annotations.Parameters;
import io.swagger.v3.oas.annotations.tags.Tag;
import org.springframework.web.bind.annotation.*;

@RestController
@RequestMapping("/user")
@Tag(name = "用户管理")
public class UserController {
    @Operation(summary = "根据用户id获取用户",tags = "用户管理")
    @Parameters({
            @Parameter(name = "id",description = "用户id")
    })
    @GetMapping("/{id}")
    public User getUserById(@PathVariable("id")String id){
        User user=new User();
        user.setId(id);
        user.setName("hello");
        user.setAge("0");
        return user;
    }
}
Swagger3的配置类
package com.young.config;

import org.springframework.context.annotation.Bean;
import org.springframework.context.annotation.Configuration;
import springfox.documentation.builders.ApiInfoBuilder;
import springfox.documentation.builders.PathSelectors;
import springfox.documentation.builders.RequestHandlerSelectors;
import springfox.documentation.service.ApiInfo;
import springfox.documentation.service.Contact;
import springfox.documentation.spi.DocumentationType;
import springfox.documentation.spring.web.plugins.Docket;

@Configuration
public class Swagger03Config {
    @Bean
    public Docket createDocket(){
        return new Docket(DocumentationType.OAS_30)
                .enable(true) //是否开启OpenApi
                .apiInfo(apiInfo())
                .select()
                .apis(RequestHandlerSelectors.basePackage("com.young.controller")) //指定要扫描的包
                .paths(PathSelectors.any())
                .build();
    }

    private ApiInfo apiInfo(){
        return new ApiInfoBuilder()
                .title("未来先遣者")
                .contact(new Contact("沉河不浮",
                        "https://blog.csdn.net/weixin_55850954",
                        "2827523200@qq.com"))
                .description("记录SpringBoot整合Swagger3")
                .license("Apache2.0")
                .licenseUrl("https://localhost:apache")
                .build();
    }
}
application.yml
spring:
  mvc:
    pathmatch:
      matching-strategy: ant_path_matcher #这里一定要设置,因为swagger-ui默认使用的是ant_path_matcher
springfox:
  documentation:
    swagger-ui:
      enabled: true
      base-url: /documentation #这里可以设置访问的路径
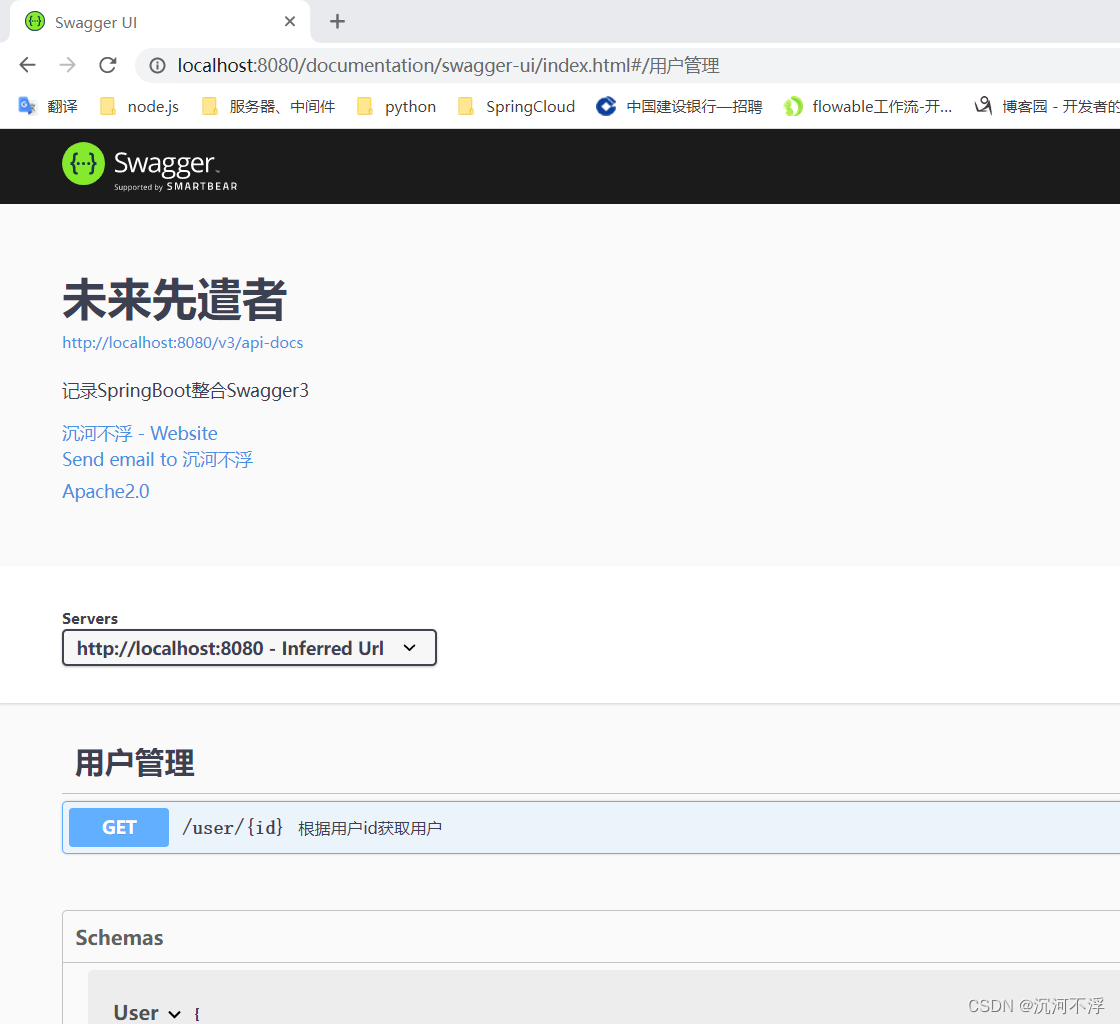
启动项目,访问http://localhost:8080/documentation/swagger-ui/index.html

SpringBoot整合Swagger和SpringSecurity
在pom.xml里添加springSecurity的依赖
<dependency>
            <groupId>org.springframework.boot</groupId>
            <artifactId>spring-boot-starter-security</artifactId>
        </dependency>
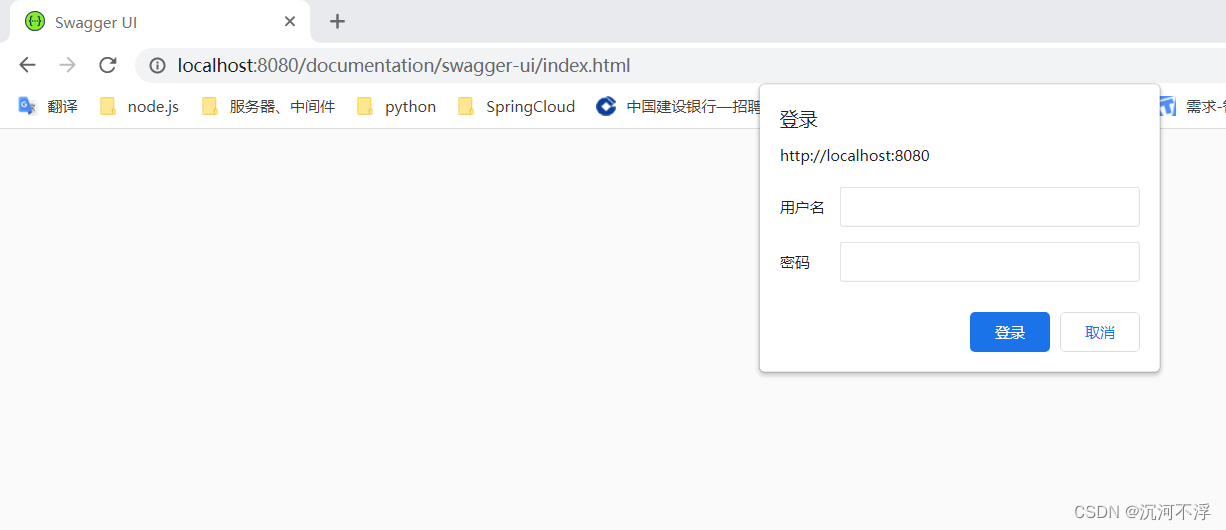
重启项目,然后重新访问接口文档,发现被拦截了

我们配置Security的配置类,来解除对接口文档访问的拦截
package com.young.config;

import org.springframework.context.annotation.Bean;
import org.springframework.context.annotation.Configuration;
import org.springframework.security.config.annotation.web.builders.HttpSecurity;
import org.springframework.security.config.annotation.web.configuration.WebSecurityConfigurerAdapter;

@Configuration
public class SecurityConfig extends WebSecurityConfigurerAdapter {
    @Override
    protected void configure(HttpSecurity http)throws Exception{
        http.authorizeRequests().antMatchers("/static/**",
                "/swagger-resources/**",
                "/documentation/**", //因为刚才在application.yml里面设置baseUrl为documentation,所以要加上这个
                "/v2/**",
                "/v3/**",
                "/swagger-ui/**",
                "**/upload/**",
                "/index.jsp").permitAll()
                .anyRequest().authenticated();
    }
}
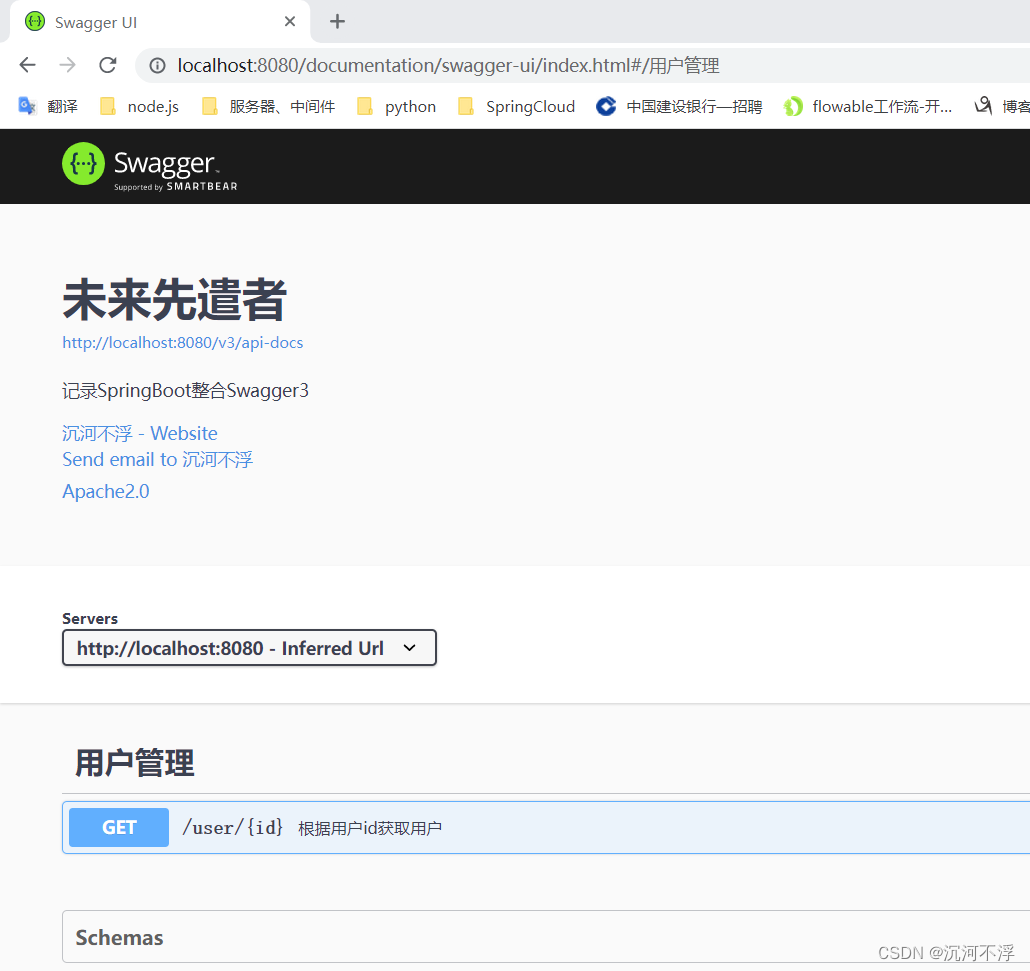
再次访问接口文档:

注意
在开发环境中,可以使用Swagger方便前后端对接,但在线上环境,不应该让用户访问到我们的接口文档,因此上线时,要把swagger接口文档关闭
参考文章:
风语者!平时喜欢研究各种技术,目前在从事后端开发工作,热爱生活、热爱工作。


 U8W/U8W-Mini使用与常见问题解决
 QT多线程的5种用法,通过使用线程解决UI主界面的耗时操作代码,防止界面卡死。...
 stm32使用HAL库配置串口中断收发数据(保姆级教程)
 分享几个国内免费的ChatGPT镜像网址(亲测有效)
 Allegro16.6差分等长设置及走线总结