您现在的位置是:首页 >技术交流 >springCloud使用maven网站首页技术交流
springCloud使用maven
springCloud项目使用maven集成nexus
一:故事背景
我们的ar项目要开发第三版。现在要进行框架的搭建。搭建的是一个springCloud的项目。项目结构是参照第二版进行搭建的。不过这次搭建的过程中,集成了nexus,使用nexus做仓库,管理我们的项目。今天就总结一下,如何在springCloud项目集成nexus
二:基础概念
2.1 什么是Maven
Maven是一个Java项目管理和自动构建工具。它使用基于XML的配置文件来定义项目的结构和依赖关系,并使用这些信息来自动生成项目的构建脚本。Maven可以自动下载所需的依赖项并将它们添加到项目的classpath中,还可以自动生成项目文档和报告,并且可以与许多其他工具集成。通过使用Maven,开发人员可以更加专注于编写代码,而不必担心配置文件和依赖项管理等问题。
2.2 什么是nexus
Nexus是一个开源的仓库管理器,它用于管理软件构件和依赖项。它提供了一个集中式的存储库来存储各种类型的构件,例如Jar文件、WAR文件、ZIP文件、RPM包等。Nexus还提供了一组工具和API,使得开发人员可以方便地发布、管理和下载构件。Nexus的一个主要优势是它可以与Maven集成,这使得在使用Maven进行构建时更加容易地管理依赖项和存储构件。此外,Nexus还提供了对安全性和访问控制的支持,以确保仓库中的构件仅被授权的用户访问。
了解
三:实操
实操前,默认大家已经安装好了maven和nexus,这里不多做介绍,如果大家需要可以网上查询,相关博客很多。
3.1 setting文件配置
<settings>
  <!-- 配置Maven服务器的认证信息,用于访问私有仓库 -->
  <servers>
    <server>
      <id>my-server</id> <!-- 服务器的id,必须唯一 -->
      <username>user</username> <!-- 服务器的用户名 -->
      <password>password</password> <!-- 服务器的密码 -->
    </server>
  </servers>

  <!-- 配置远程仓库镜像,加速依赖的下载 -->
  <mirrors>
    <mirror>
      <id>aliyun</id> <!-- 镜像的id,必须唯一 -->
      <name>aliyun maven mirror</name> <!-- 镜像的名称 -->
      <url>http://maven.aliyun.com/nexus/content/groups/public/</url> <!-- 镜像的URL地址 -->
      <mirrorOf>central</mirrorOf> <!-- 镜像所代理的仓库,这里代理中央仓库 -->
    </mirror>
  </mirrors>

  <!-- 配置Maven在网络环境下访问远程仓库的代理服务器信息 -->
  <proxies>
    <proxy>
      <id>my-proxy</id> <!-- 代理的id,必须唯一 -->
      <active>true</active> <!-- 是否启用代理 -->
      <protocol>http</protocol> <!-- 代理服务器的协议 -->
      <host>proxy.mycompany.com</host> <!-- 代理服务器的主机名或IP地址 -->
      <port>8080</port> <!-- 代理服务器的端口号 -->
      <username>user</username> <!-- 代理服务器的用户名 -->
      <password>password</password> <!-- 代理服务器的密码 -->
      <nonProxyHosts>localhost|127.0.0.1</nonProxyHosts> <!-- 不需要使用代理的主机列表 -->
    </proxy>
  </proxies>

  <!-- 配置Maven本地仓库的位置 -->
  <localRepository>${user.home}/.m2/repository</localRepository>

  <!-- 配置是否离线模式 -->
  <offline>false</offline>

  <!-- 配置Maven插件组 -->
  <pluginGroups>
    <pluginGroup>org.apache.tomcat.maven</pluginGroup> <!-- 配置Tomcat Maven插件组 -->
  </pluginGroups>

  <!-- 配置全局属性 -->
  <properties>
    <project.build.sourceEncoding>UTF-8</project.build.sourceEncoding> <!-- 项目的源代码编码 -->
  </properties>
</settings>
3.2 项目内pom.xml配置
你需要在你的父项目里添加如下配置。如果你的项目之间有父子依赖关系,只在子项目内进行jar包上传,在下拉的时候,有子项目会去找父项目的依赖而导致报错
    <distributionManagement>
        <!--Release类型的托管资源库-->
        <repository>
            <!--id对应nexus仓库的id-->
            <id>test_hosted</id>
            <!--自定义名称-->
            <name>Releases</name>
            <!--仓库对应的URL地址-->
            <url>http://xxx.xxx.xx.xxx:port/repository/test_hosted/</url>
        </repository>
        <!--Snapshot类型的托管资源库-->
        <snapshotRepository>
            <!--id对应nexus仓库的id-->
            <id>test_snapshot_hosted</id>
            <!--自定义名称-->
            <name>Snapshot</name>
            <!--仓库对应的URL地址-->
            <url>http://xxx.xxx.xx.xxx:port/repository/test_snapshot_hosted/</url>
        </snapshotRepository>
    </distributionManagement>
3.3 jar上传
配置好之后,我们就可以尝试进行上传了。上传一共有四种方式
3.3.1 maven插件上传
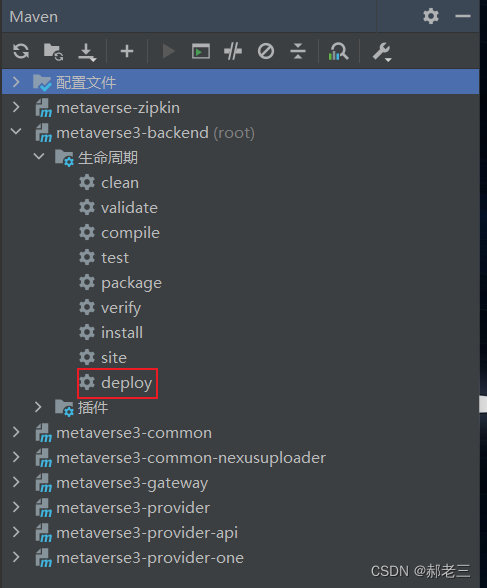
我们可以直接通过idea带的插件,进行上传,他会去setting读取我们配置的账号,密码,去pom文件读取上传的地址和仓库,上传之后,nexus内会有我们项目对应的jar包

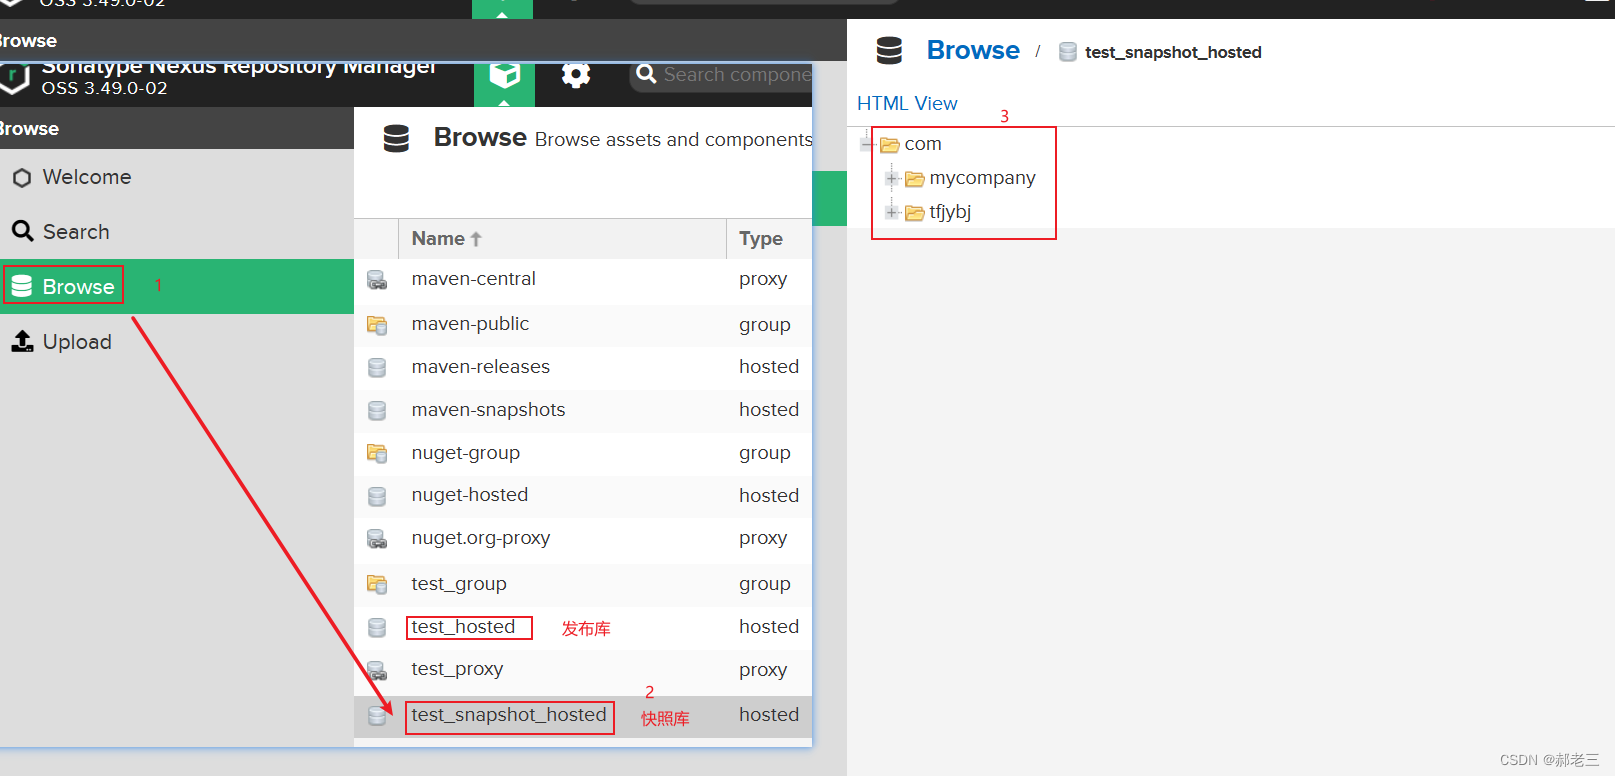
上传成功后在我们的nexus上可以看到对应的文件

3.3.2 mvn命令上传
我们也可以直接通过命令将jar包进行上传,上传到nexus,这里只会读取setting里配置的账号密码,上传的路径,版本等信息,需要我们自己配置
mvn deploy:deploy-file -DgroupId=<group-id> -DartifactId=<artifact-id>
-Dversion=<version> -Dpackaging=<packaging> -Dfile=<path-to-file>
-DrepositoryId=nexus -Durl=<nexus-url>
上面的参数对应
-DgroupId:Maven项目的groupId。
-DartifactId:Maven项目的artifactId。
-Dversion:Maven项目的版本号。
-Dpackaging:文件的类型,例如jar、war等。
-Dfile:要上传的文件的路径。
-DrepositoryId:在Maven的settings.xml中定义的服务器的id。在这个例子中,我们使用nexus作为id。
-Durl:Nexus服务器的URL地址。
大家使用的时候,请将<group-id>、<artifact-id>、<version>和<packaging>替换为您的Maven项目的实际值,
将<path-to-file>替换为要上传的文件的路径。将<nexus-url>替换为您Nexus服务器的URL地址。
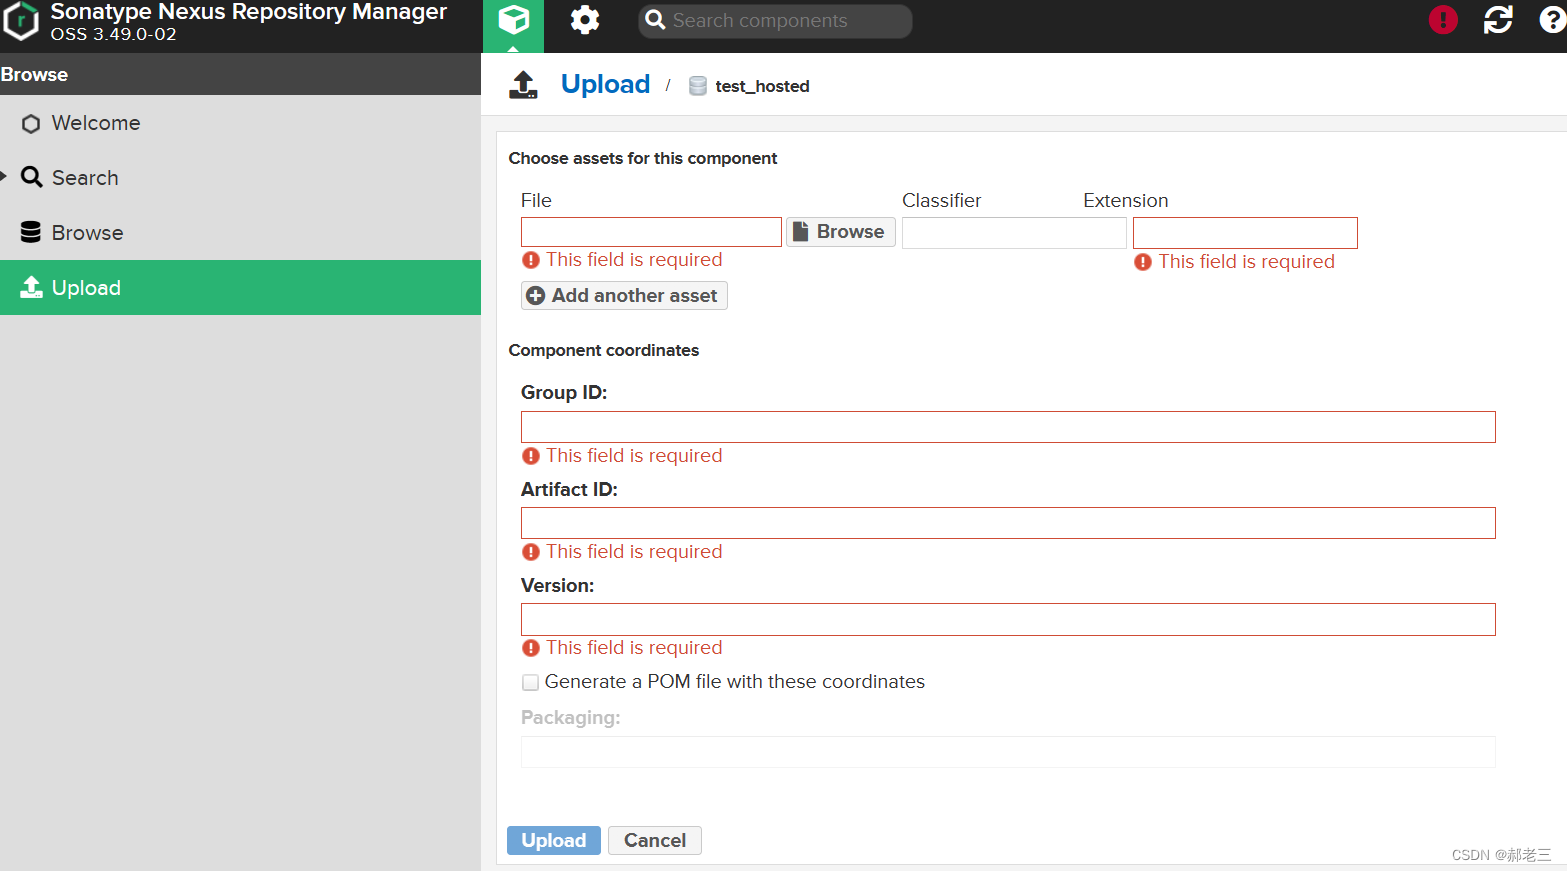
3.3.3 页面上传
这个没有什么技术含量,将对应信息填对就可以了
- 选择要上传到那个仓库

- 填写信息,选择文件,完成之后进行上传就可以了。

3.3.4 通过Rest的方式进行上传
可以通过接口的方式进行上传,官方文档里也有具体的api文档,但是做起来比较复杂,我们这里只做了研究,并没有在项目里实际进行应用。
3.4.1 pom依赖
    <dependencies>
        <dependency>
            <groupId>org.apache.httpcomponents</groupId>
            <artifactId>httpcore</artifactId>
        </dependency>
        <dependency>
            <groupId>org.springframework</groupId>
            <artifactId>spring-web</artifactId>
        </dependency>
    </dependencies>
3.4.2上传代码
public static void main(String[] args)  {
    RestTemplate restTemplate = new RestTemplate(); // 创建RestTemplate实例
    String username = "admin"; // 用户名
    String password = "admin"; // 密码
    restTemplate.getInterceptors().add(
            new BasicAuthenticationInterceptor(username, password)); // 添加Basic Authentication拦截器,用于进行Http Basic认证

    String filename = "D:\项目开发\metaverse3-backend\metaverse3-gateway\target\metaverse3-gateway-1.0-SNAPSHOT.jar"; // 文件路径
    File file = new File(filename); // 创建文件对象
    FileSystemResource resource = new FileSystemResource(file); // 创建文件系统资源对象
    MultiValueMap<String, Object> requestMap = new LinkedMultiValueMap<>(); // 创建请求参数Map
    requestMap.add("file", resource); // 添加文件系统资源对象到请求参数Map中
    HttpHeaders headers = new HttpHeaders(); // 创建HttpHeaders对象
    headers.setContentType(MediaType.MULTIPART_FORM_DATA); // 设置Content-Type为multipart/form-data
    HttpEntity<MultiValueMap<String, Object>> requestEntity = new HttpEntity<>(requestMap, headers); // 创建HttpEntity对象,用于发送POST请求

    test(restTemplate, requestEntity); // 调用test方法发送请求
}

public static void test(RestTemplate restTemplate, HttpEntity<MultiValueMap<String, Object>> requestEntity){
    String url = "http://xxx.xxx.xx.xxx:port/repository/test_snapshot_hosted/"; // Nexus仓库URL
    String groupId = "com.mycompany"; // Maven groupId
    String artifactId = "my-artifact"; // Maven artifactId
    String version = "1.0-SNAPSHOT"; // Maven版本号
    String packaging = "jar"; // 打包类型
    String classifier = "my-classifier"; // 分类器
    String repositoryPath = groupId.replace('.', '/') + '/' + artifactId + '/' + version + '/' + artifactId + '-' + version + (classifier == null ? "" : '-' + classifier) + '.' + packaging; // Nexus仓库中存储的路径
    String nexusUrl = url + repositoryPath; // 完整的Nexus仓库URL
    ResponseEntity<String> responseEntity = restTemplate.exchange(nexusUrl, HttpMethod.PUT, requestEntity, String.class); // 发送PUT请求,将文件上传到Nexus仓库
}
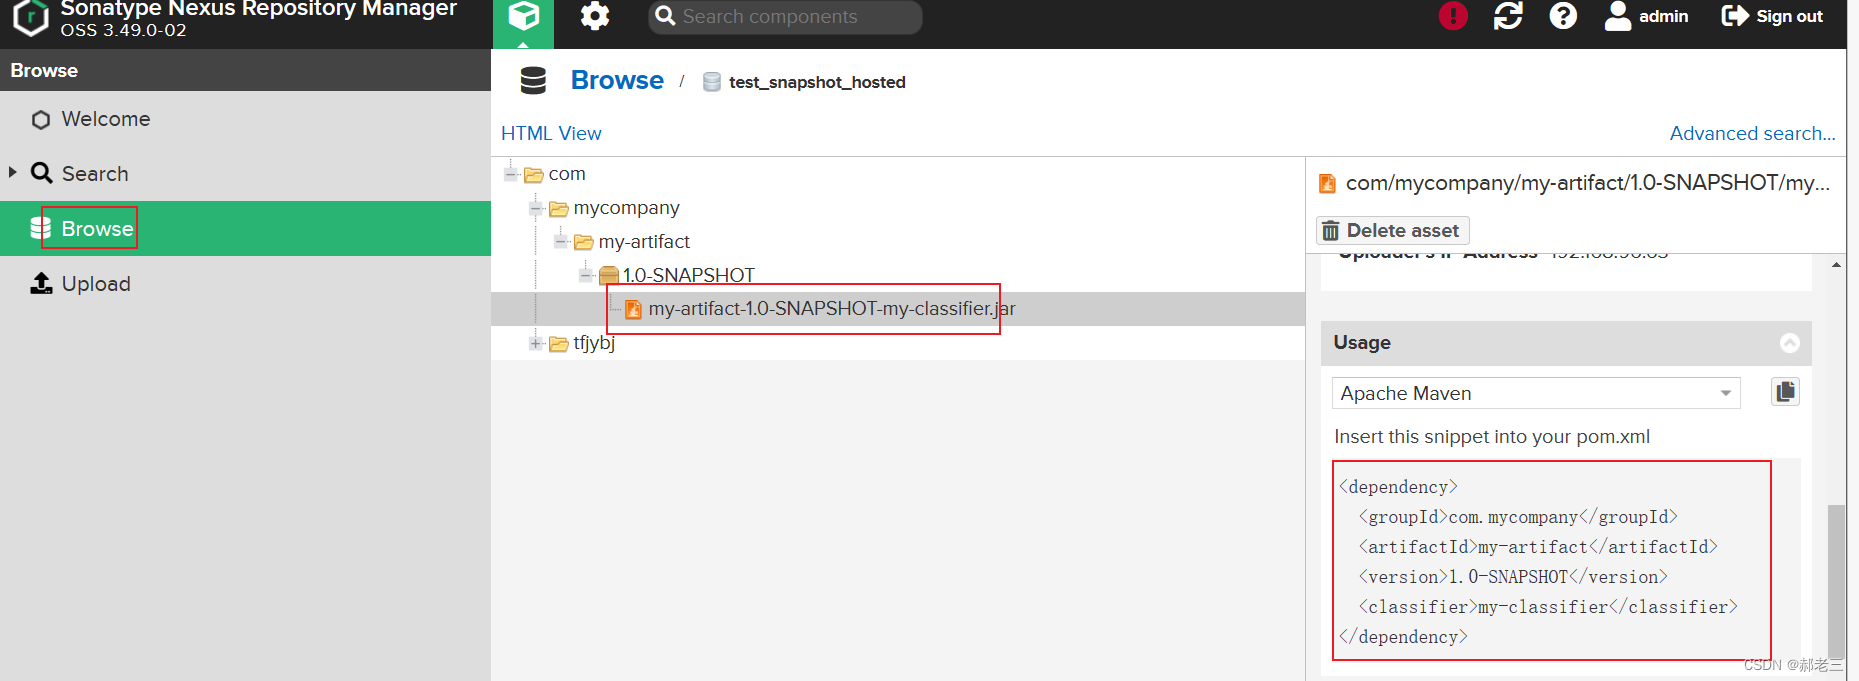
通过以上代码可以将对应jar包上传到对应nexus。大家可以基于次部分代码进行相应改造
四:jar包下拉
jar包下拉的方式很简单,只要找到我们上传的jar包,然后再需要使用的项目的pom文件下使用 dependency标签引入就可以了,大家都应该有过引入的经验,这里就不多解释了

五:总结提升
本文介绍了如何集成nexus,并且给出上传jar包的各种方式,大家可以根据自己的需求进行实操。


 U8W/U8W-Mini使用与常见问题解决
 分享几个国内免费的ChatGPT镜像网址(亲测有效)
 stm32使用HAL库配置串口中断收发数据(保姆级教程)
 QT多线程的5种用法,通过使用线程解决UI主界面的耗时操作代码,防止界面卡死。...
 SpringSecurity实现前后端分离认证授权