您现在的位置是:首页 >技术教程 >ESP32C3之PlatformIO IDE开发环境网站首页技术教程
ESP32C3之PlatformIO IDE开发环境
简介ESP32C3之PlatformIO IDE开发环境
一、下载platformio ide扩展
在vscode里面直接搜索platformio ide,点击安装即可
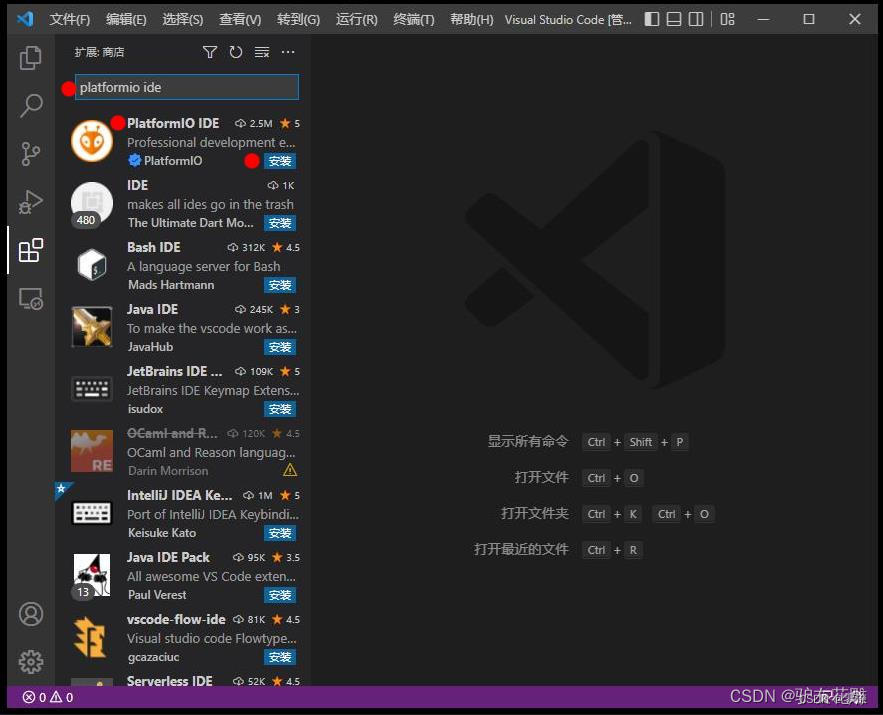
二、新建esp32c3工程
2.1 首先点击小蚂蚁的图标,然后点击pio home
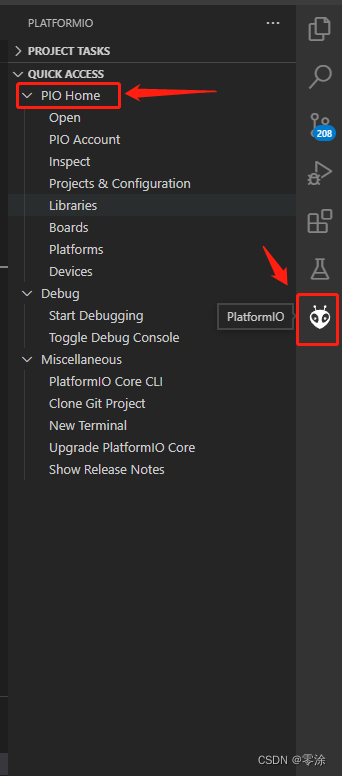
2.2 点击projects->create New Project
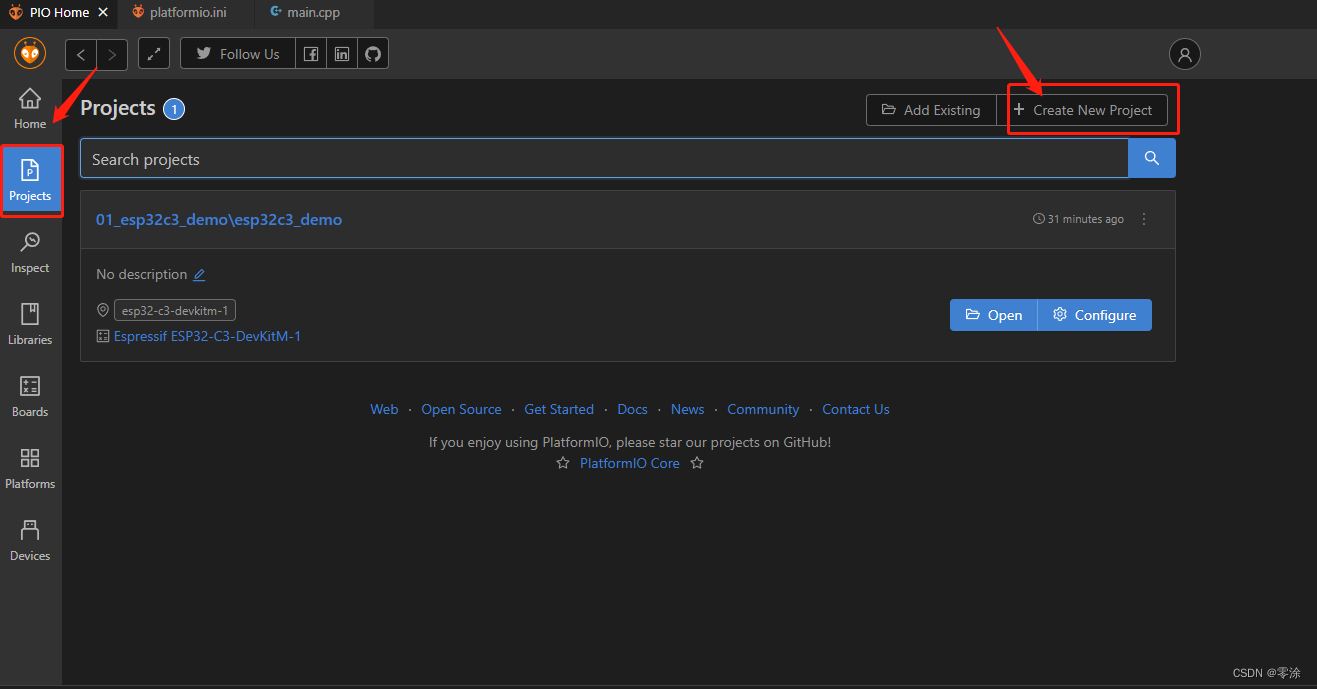
2.3 填写工程名和工程路径:勾选钩表示默认路径,板子型号根据自己的来,如果没有合适的选择一个差不多硬件配置的,这里我的是合宙的esp32-c3核心板,最后点击Finsh
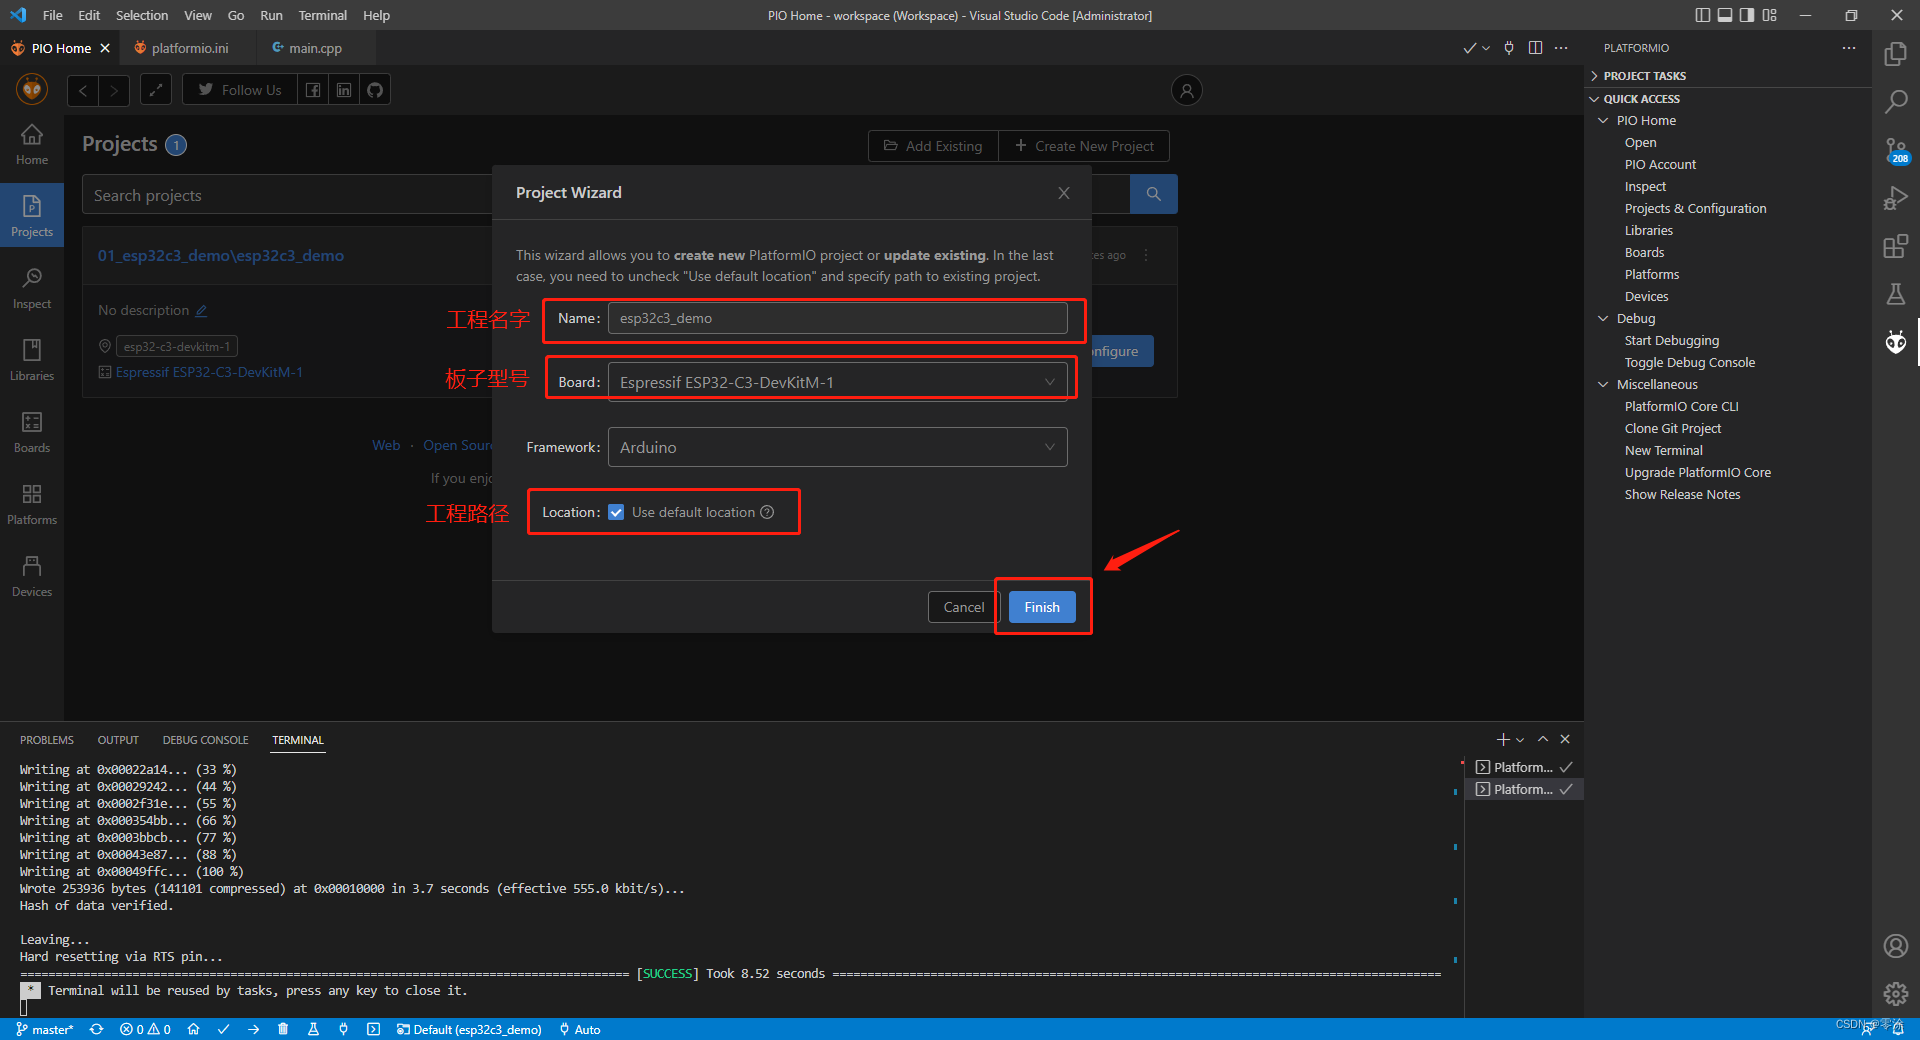
2.4 配置platformio.ini文件
注意board_build.flash_mode = dio 一定需要添加,否则板子无法启动,
upload_port = COM9为你的电脑所在的端口号
; PlatformIO Project Configuration File
;
;   Build options: build flags, source filter
;   Upload options: custom upload port, speed and extra flags
;   Library options: dependencies, extra library storages
;   Advanced options: extra scripting
;
; Please visit documentation for the other options and examples
; https://docs.platformio.org/page/projectconf.html

[env:esp32-c3-devkitm-1]
platform = espressif32
board = esp32-c3-devkitm-1
framework = arduino
board_build.flash_mode = dio
upload_port = COM9
2.5 测试代码
main.cpp
#include <Arduino.h>

void setup()
{
  Serial.begin(115200);
}

void loop()
{
  Serial.println("Hello World");
  delay(1000);
}
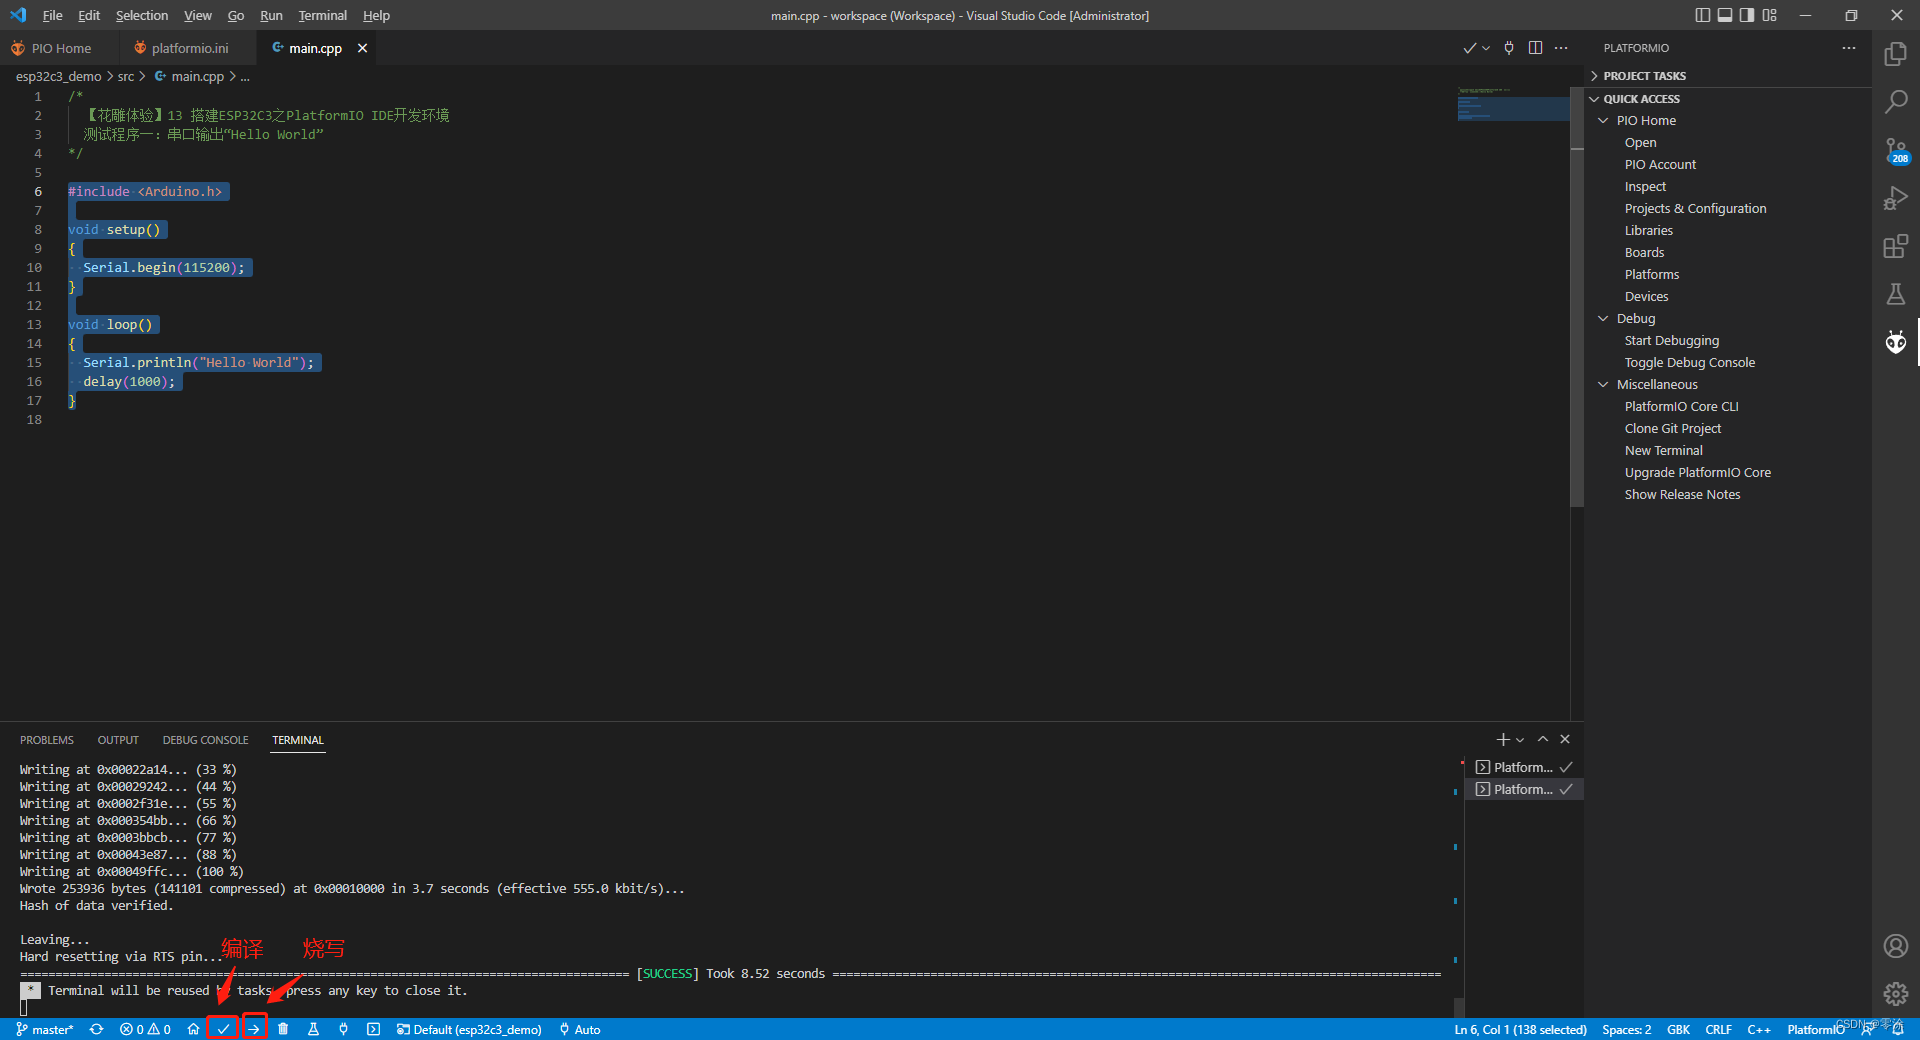
2.6 编译和烧写
点击左下角的编译和烧写图标进行烧写(如果你的新建完工程后没有这两个图标,可以尝试将vscode重启后,大概率就有了, 我的就是这样子)
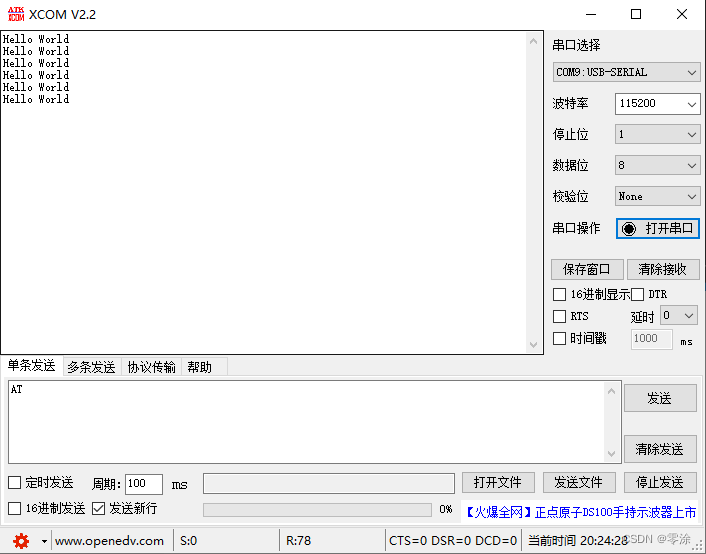
2.7 实验
风语者!平时喜欢研究各种技术,目前在从事后端开发工作,热爱生活、热爱工作。


 U8W/U8W-Mini使用与常见问题解决
 QT多线程的5种用法,通过使用线程解决UI主界面的耗时操作代码,防止界面卡死。...
 stm32使用HAL库配置串口中断收发数据(保姆级教程)
 分享几个国内免费的ChatGPT镜像网址(亲测有效)
 Allegro16.6差分等长设置及走线总结