您现在的位置是:首页 >技术教程 >vue-quill-editor富文本编辑框使用网站首页技术教程
vue-quill-editor富文本编辑框使用
简介vue-quill-editor富文本编辑框使用
vue富文本中实现上传图片及修改图片大小等功能。
1,配置使用
配置使用网上很多,记录下自己的使用过程
第一步:components/Editor文件夹下创建QuillEditor.vue文件
<template>
  <div :class="prefixCls">
    <quill-editor
      v-model="value"
      ref="myQuillEditor"
      :options="editorOption"
      @blur="onEditorBlur($event)"
      @focus="onEditorFocus($event)"
      @ready="onEditorReady($event)"
      @change="onEditorChange($event)">
    </quill-editor>
    <!-- antvue上传 -->
   <!-- <el-upload
      name="file"
      :multiple="true"
      accept=".pdf,.doc,.docx,.xml,xls,xlsx,application/msword"
      action= "http://localhost:8080/common/uploadBack"
      :showUploadList="false"
      :headers="headers"
      @change="handleChange"
      class="uploadFile"
    >
    </el-upload>-->
  </div>
</template>

<script>

// 组件载入Vue-Quill-Editor
import 'quill/dist/quill.core.css'
import 'quill/dist/quill.snow.css'
import 'quill/dist/quill.bubble.css'
import { quillEditor } from 'vue-quill-editor'
// register quill module
import Quill from 'quill' // 引入编辑器
// 图片可以放大和缩小
import { ImageDrop } from 'quill-image-drop-module'
import ImageResize from 'quill-image-resize-module'
// 提供图片上传到服务器的功能
import { ImageExtend, QuillWatch } from 'quill-image-extend-module'
// 注册组件
Quill.register('modules/imageDrop', ImageDrop)
Quill.register('modules/imageResize', ImageResize)
Quill.register('modules/ImageExtend', ImageExtend)

// 自定义插入a链接
const Link = Quill.import('formats/link')
class FileBlot extends Link { // 继承Link Blot
  static create (value) {
    let node
    if (value && !value.href) { // 适应原本的Link Blot
      node = super.create(value)
    } else { // 自定义Link Blot
      node = super.create(value.href)
      // node.setAttribute('download', value.innerText) // 左键点击即下载
      node.innerText = value.innerText
      node.download = value.innerText
    }
    return node
  }
}
FileBlot.blotName = 'link'
FileBlot.tagName = 'A'
Quill.register(FileBlot)

import { getToken } from "@/utils/auth";

export default {
  name: 'QuillEditor',
  components: {
    quillEditor
  },
  props: {
    prefixCls: {
      type: String,
      default: 'ant-editor-quill'
    },
    // 表单校验用字段
    // eslint-disable-next-line
    value: {
      type: String
    }
  },
  data () {
    return {
      // upload 上传header
      headers: {
        requestType: '0'
      },
      content: null,
      // 富文本插件配置
      editorOption: {
        modules: {
          imageDrop: true,
          imageResize: {
            displaySize: true
          },
          ImageExtend: { // 使用的图片上传扩展插件
            name: 'file', // 传的参数名
            size: 10, // 单位为M, 1M = 1024KB
            action: process.env.VUE_APP_BASE_API +'/common/imortImg', // 后台上传图片的接口地址
            headers: (xhr) => { // 请求头
              xhr.setRequestHeader("Authorization", "Bearer " + getToken());
              return xhr
            },
            response: (res) => {
              console.log(res);
              return res.data.imgUrl // 返回的图片信息
            },
            // 图片超过大小的回调
            sizeError: () => {
              this.$message.error('上传图片大小不超2M')
            },
            start: () => {}, // 可选参数 自定义开始上传触发事件
            end: () => {}, // 可选参数 自定义上传结束触发的事件,无论成功或者失败
            error: () => {}, // 可选参数 上传失败触发的事件
            success: () => {}, // 可选参数  上传成功触发的事件
            // 可选参数 每次选择图片触发,也可用来设置头部,但比headers多了一个参数,可设置formData
            change: (xhr, formData) => {
            // xhr.setRequestHeader('myHeader','myValue')
            // formData.append('token', 'myToken')
            }
          },
          toolbar: {
            container: [
                        ['bold', 'italic', 'underline', 'strike'], // 加粗 斜体 下划线 删除线
                        ['blockquote', 'code-block'], // 引用  代码块
                        [{ header: 1 }, { header: 2 }], // 1、2 级标题
                        [{ list: 'ordered' }, { list: 'bullet' }], // 有序、无序列表
                        [{ script: 'sub' }, { script: 'super' }], // 上标/下标
                        [{ indent: '-1' }, { indent: '+1' }], // 缩进
                        // [{'direction': 'rtl'}],                         // 文本方向
                        [{ size: ['small', false, 'large', 'huge'] }], // 字体大小
                        [{ header: [1, 2, 3, 4, 5, 6, false] }], // 标题
                        [{ color: [] }, { background: [] }], // 字体颜色、字体背景颜色
                        [{ font: [] }], // 字体种类
                        [{ align: [] }], // 对齐方式
                        ['link', 'image'], // 链接、图片、视频、上传
                        ['clean'] // 清除文本格式
                      ],
            handlers: {
                  'image': function () { // 劫持原来的图片点击按钮事件
                    QuillWatch.emit(this.quill.id)
                  }
            }
          }
        },
        placeholder: '请输入内容', // 提示
        readyOnly: false, // 是否只读
        theme: 'snow', // 主题 snow/bubble
        syntax: true // 语法检测
      }
    }
  },
  methods: {
    onEditorBlur (quill) {
      // console.log('editor blur!', quill)
    },
    onEditorFocus (quill) {
      // console.log('editor focus!', quill)
    },
    onEditorReady (quill) {
      // console.log('editor ready!', quill)
    },
    onEditorChange ({ quill, html, text }) {
      // console.log('editor change!', quill, html, text)
      this.$emit('input', html)
    },
    handleChange (info) {
      // console.log(info, '==============info============')
      // if (info.file.status !== 'uploading') {
      //   console.log(info.file, info.fileList)
      // }
      // if (info.file.status === 'done') {
      //   this.$message.success(`${info.file.name} file uploaded successfully`)
      // } else if (info.file.status === 'error') {
      //   this.$message.error(`${info.file.name} file upload failed.`)
      // }
      console.log("上传回调"+info);
      if (info.file.status === 'done') {
        const fileNameLength = info.file.name.length
        // 插入链接
        const quill = this.$refs.myQuillEditor.quill
        const length = quill.getSelection().index
        const reshref = info.fileList[0].response.data.ImgUrl // 文件链接地址
        quill.insertEmbed(length, 'link', { href: reshref, innerText: info.file.name }, 'api')
        quill.setSelection(length + fileNameLength)
      }
    }
  },
  watch: {}
}
</script>
<style>
.ql-snow.ql-toolbar .ql-upload{
  /*background:url('../../assets/cloudUpload.svg');*/
  background-size:24px 24px;
  background-position:center center;
  background-repeat:no-repeat;
  /*background-color:red;*/
}
.ql-snow .ql-tooltip::before {
    /*// content: "Visit URL:";*/
    /*// line-height: 26px;*/
    /*// margin-right: 8px;*/
    vertical-align: middle;
}
.ql-snow .ql-tooltip a.ql-preview {
    /*// display: inline-block;*/
    /*// max-width: 200px;*/
    /*// overflow-x: hidden;*/
    /*// text-overflow: ellipsis;*/
    vertical-align: middle;
}
</style>
<style scoped>
</style>
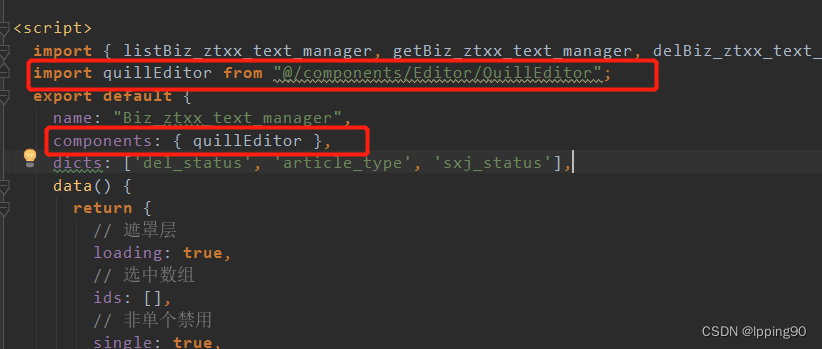
第二步:代码中加入QuillEditor的引入
import quillEditor from "@/components/Editor/QuillEditor";
export default {
    name: "Biz_ztxx_text_manager",
    components: { quillEditor },
...... 
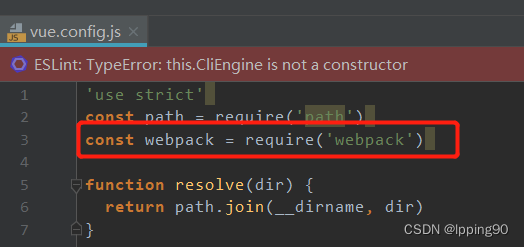
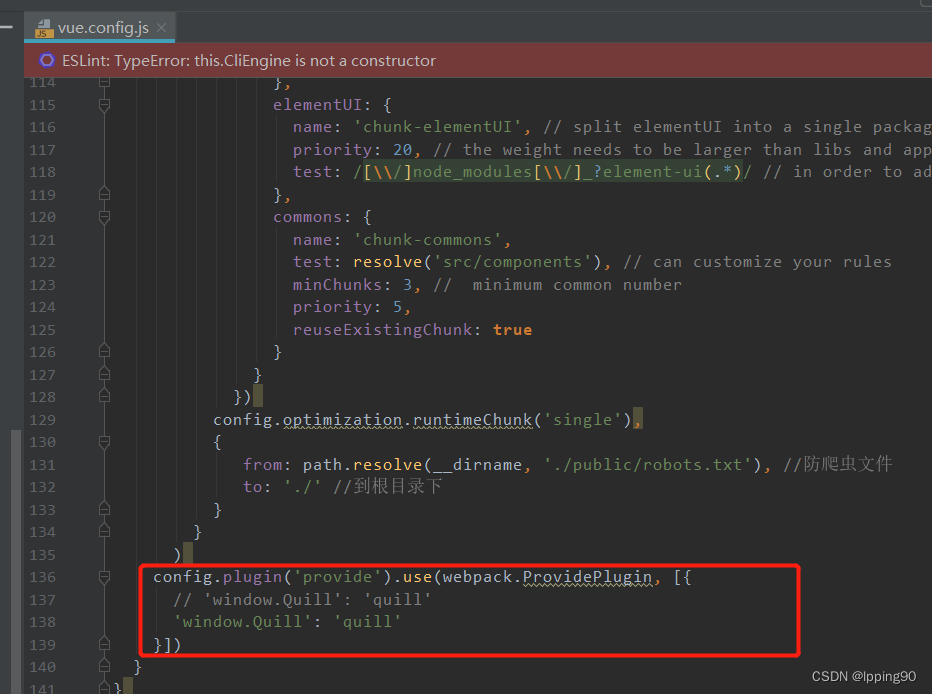
第三步:vue.config.js中加入webpack
在文件顶部加入:
const webpack = require('webpack')在文件底部加入:
config.plugin('provide').use(webpack.ProvidePlugin, [{
      // 'window.Quill': 'quill'
      'window.Quill': 'quill'
    }])

第四步:代码中引用
<quill-editor v-model="form.textDetail" />第五步:命令行中执行安装
npm install vue-quill-editor
npm install quill-image-resize-module --save
npm install quill-image-drop-module --save
npm install quill-image-extend-module --save
若安装失败,执行npm install 或者npm install --registry=https://registry.npmmirror.com
大部分情况都能成功。之后执行启动即可,可以在富文本中进行上传图片及修改图片大小等功能。
2,富文本框无法调整默认高度
参考:vue 的Quill Editor如何设置默认高度?_quill-editor 高度_Rocket MAN的博客-CSDN博客
添加此样式
<style>
    .edit_container {
        font-family: 'Avenir', Helvetica, Arial, sans-serif;
        -webkit-font-smoothing: antialiased;
        -moz-osx-font-smoothing: grayscale;
        text-align: center;
        color: #2c3e50;
        margin-top: 60px;
    }
    .ql-editor{
         height:400px;
     }
</style>
3,设置富文本框只读
vue-quill-editor设置readonly等不起作用
使用此命令设置只读,其他的设置disabled等的均不好使
<editor v-model="form.textDetail" :min-height="222" ref="quillEditor"/>let that = this
this.$nextTick(()=>{
that.$refs.quillEditor.Quill.enable(false);
})5,设置复制黏贴自动上传
进行部分调整
QuillEditor.vue中添加监听
@paste.native="handlePaste($event)"安装及引入jquery
npm install jquery --save

import $ from 'jquery';
增加handlePaste方法
handlePaste(evt) {
      let that = this
      if (evt.clipboardData &&
        evt.clipboardData.files &&
        evt.clipboardData.files.length) {
        evt.preventDefault();
        [].forEach.call(evt.clipboardData.files, (file) => {
          if (!file.type.match(/^image/(gif|jpe?g|a?png|bmp)/i)) {
            return;
          }
          const formData = new FormData();
          formData.append("file", file);//后台上传接口的参数名
          // 实现上传
          $.ajax({
            type: "post",
            url: process.env.VUE_APP_BASE_API +'/common/imortImg', // 上传的图片服务器地址
            data: formData,
            headers:{'Authorization': "Bearer " + getToken()},//必须
            dataType: "json",
            processData: false,
            contentType: false,//设置文件上传的type值,必须
            success: (response) => {
              if (response.code == 200) {
                //当编辑器中没有输入文本时,这里获取到的 range 为 null
                debugger
                var range = that.$refs.myQuillEditor.quill.selection.savedRange;
                //图片插入在富文本中的位置
                var index = 0;
                if (range == null) {
                  index = 0;
                } else {
                  index = range.index;
                }
                //将图片链接插入到当前的富文本当中
                that.$refs.myQuillEditor.quill.insertEmbed(index, "image", response.data.imgUrl);
                // 调整光标到最后
                that.$refs.myQuillEditor.quillsetSelection(index + 1); //光标后移一位
              }
            },
            error: function () {
              this.$message.error('上传失败!')
            },
          });
        });
      }
    },
风语者!平时喜欢研究各种技术,目前在从事后端开发工作,热爱生活、热爱工作。


 U8W/U8W-Mini使用与常见问题解决
 QT多线程的5种用法,通过使用线程解决UI主界面的耗时操作代码,防止界面卡死。...
 stm32使用HAL库配置串口中断收发数据(保姆级教程)
 分享几个国内免费的ChatGPT镜像网址(亲测有效)
 Allegro16.6差分等长设置及走线总结